- 01-02-2011, 07:08 PM by Hexameron #251
![]()
Hexameron
- View Profile
- View Forum Posts
![]() Gamer
Gamer
Join Date
Oct 2007
Posts
330
![]()
FM: Heretics and Pagans
File: heretic.zip
Ghost - Success (Chemical)
Perfect Thief - Failed
Time - 00:48:49
Loot - 340/880
Pockets Picked - 2/9
Backstabs - 0 Knockouts - 0
Damage dealt - 0 Damage taken - 1 (from fall)
Healing taken - 0 Kills - 0
Comments - This is a very large mission, although you wouldn't think so
from my playing time or the loot count. The mission is incredibly dark, almost
impossible to see in a lot of places, contains very wide areas to explore, high
volumes of AI, and barely any loot.
It's too bad there's an invisible barrier preventing the player from entering
the pagan village at the beginning. Basically, there are two villages blocked
off by a huge wall. The haunt village is where the player starts. The pagan
village next to it is where the mission ends, but it's blocked off by a wall.
The FM author therefore enforces a long subterranean route to get there. I
certainly did a lot of experimental climbing and mantling to see if I could get
over the wall but to no avail.
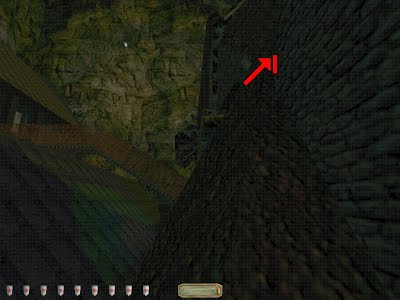
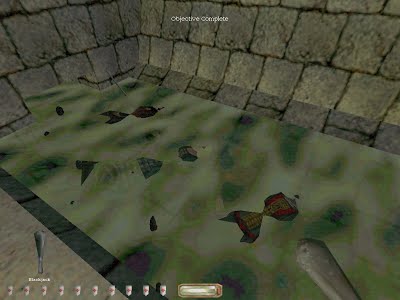
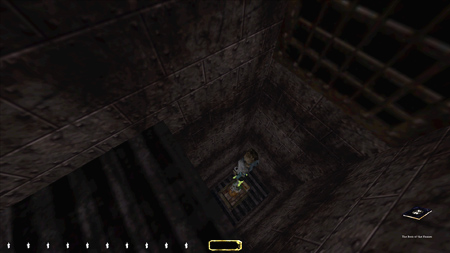
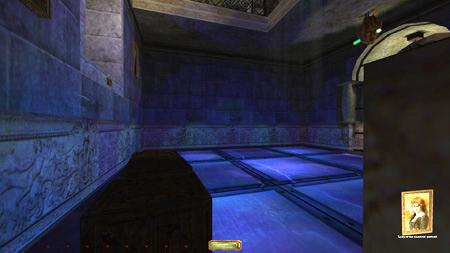
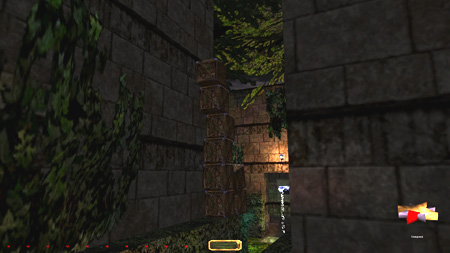
There is one area that would have busted me if I didn't have moss arrows.
Descending the shaft into the caverns below the haunt village, I noticed a
haunt standing at the bottom next to a shallow basin of water. It's not deep
enough to make a splash, but the momentum of falling into the incline of the
basin makes enough water noise (like running through a sewer) to alert the
haunt. And dropping off the rope arrow onto the rocky ground makes foot noise:
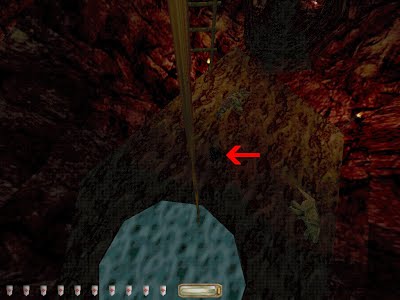

So I fired a moss arrow onto the ground next to the basin and jumped onto the
patch; voila - no bust:
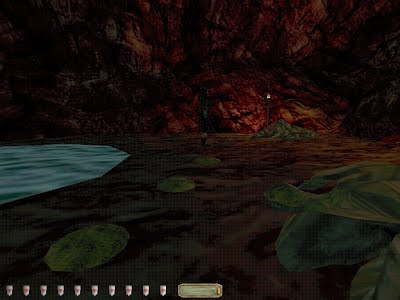
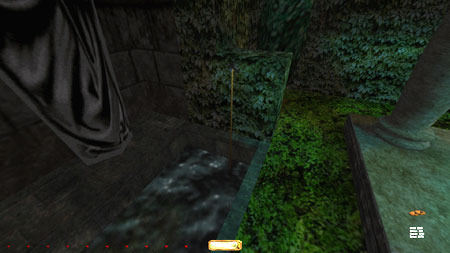
Next are the caverns proper. They are very dark and hard to navigate. There's
also a large sequence of underwater passages that I tried exploring, but I
could find no air pockets and kept drowning even while taking healing potions.
I had to skip this area completely and I don't know how the author expects the
player to casually explore; it made the WaterWay Tunnels look more
appealing.
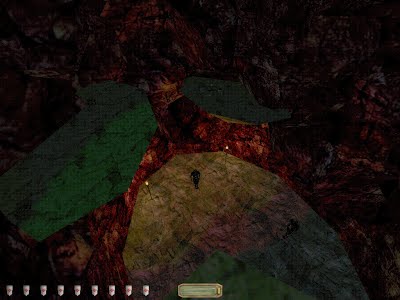
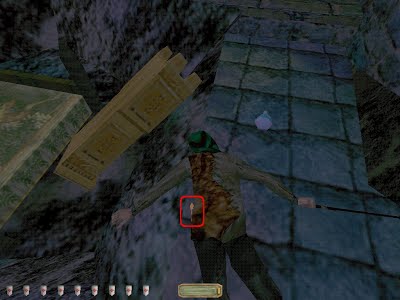
Continuing on, there is a vertical cavernous shaft with ridges or platforms
that need to be jumped down on a la Tomb Raider. The distance between two of
the platforms is too much and I could not jump down without taking at least 1
damage. But ghost rules begrudgingly accept damage from falls:
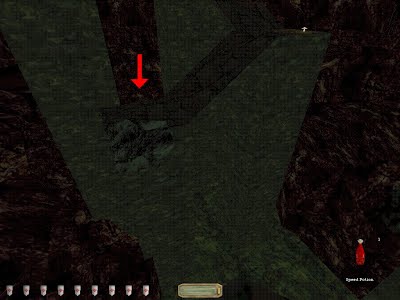
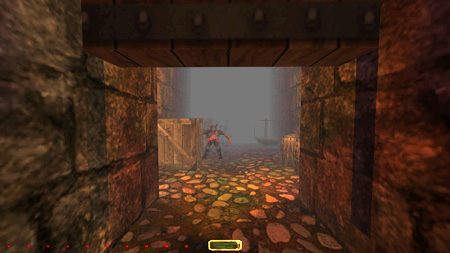
Further into the mission are the catacombs, a pointless expanse of open space
with lots of roaming enemies; I just kept to the walls. Later I came across a
large chasm separating two ruined pillar-like walkways - very much like the
Mines of Moria scene in the Fellowship of the Ring. I had to use a speed
potion--hence the chemical success--to make the leap across:
The fortress is huge, labyrinthine, and busy with pagan haunts and burricks.
The mission is so dark and the ambient light set so low that I can't imagine
trying to search for loot in the fort. I had to keep my eyes really close to
the screen to see what I was doing, especially when jumping around.
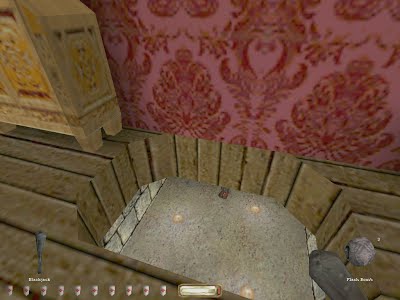
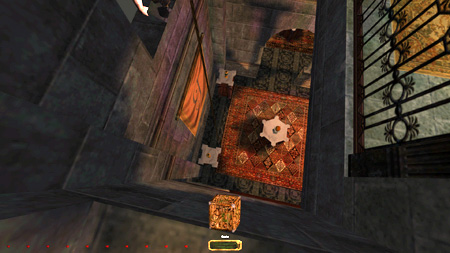
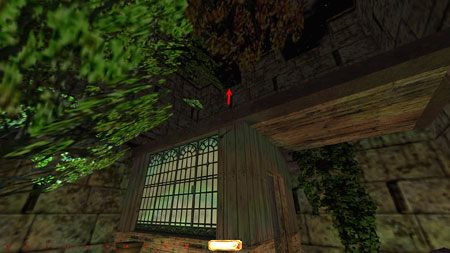
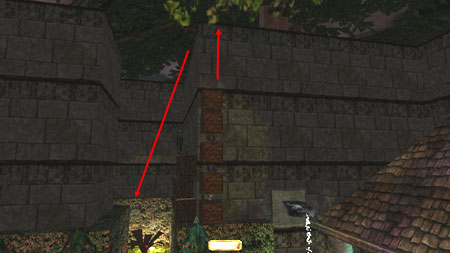
After gaining access to the roof of one of the fort buildings, I found a low
wall that could be mantled onto. But there is an avalanche of dirt blocking the
way to a dead pagan with an important key needed to get out of the fort:
Mantling onto the dirt mound didn't work. The trick is to run and strafe to the
right and just hold those two keys: the player will then move very slowly
diagonally to the right. Once it appears you're about to make it on top of the
mound of dirt, crouch and move slowly so as not to drop off and accidentally
make foot noise that could alert a nearby haunt. If there is another way to
climb up or circumvent this dirt mound, I never found it.
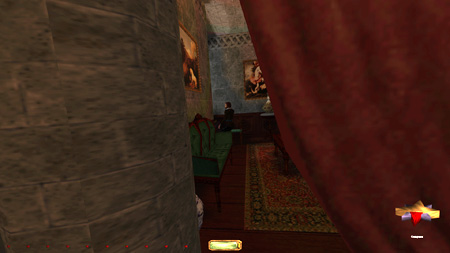
Here's the important dead pagan concealed in a room that collapsed upon itself:
Later, I got to the pagan village that was blocked off back at the mission
start. This area is pretty annoying to sneak through because there are no
dynamics of light: the light gem is either bright yellow with a red bar or
pitch black. I believe it's the moon which is causing the light extremes.
Sometimes standing in what looks like very dark shadows is actually as bright
as daylight. Not surprisingly, I encountered 1st alerts galore as I snuck
around the village.
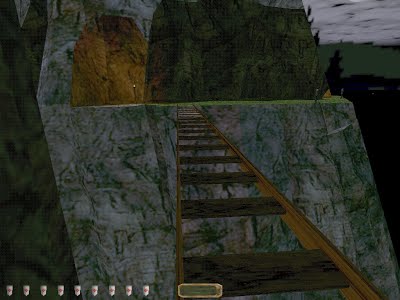
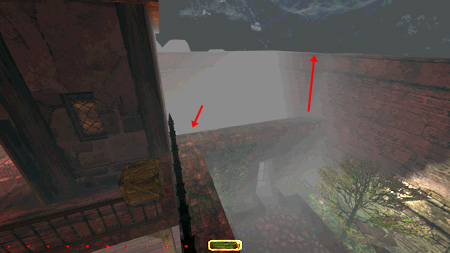
Beyond the village is a mountainous region connected with a long railroad
track. It is possible to fall through the planks, so like a tightrope walker, I
moved across the thin outer frame:
Last edited by Hexameron; 01-02-2011 at 07:11 PM.
- 01-04-2011, 10:46 PM by Hexameron #252
![]()
Hexameron
- View Profile
- View Forum Posts
![]() Gamer
Gamer
Join Date
Oct 2007
Posts
330
![]()
FM: The Hidden Stone
File: hiddenstone.zip
Ghost - Failed
Time - 00:23:27
Loot - 120/885
Pockets Picked - 0/9
Backstabs - 0 Knockouts - 8
Damage dealt - 34 Damage taken - 0
Healing taken - 0 Kills - 6
Cause of Failure:
- Cannot kill "Greed", "Wrath", "Sloth",
"Envy" and "Pride" without alerting them
Comments - This is one of those missions that eschews the spirit of Thief
for melee combat - the objectives are to destroy the seven sins embodied by
human avatars. Most of them cannot be approached and killed without alerting
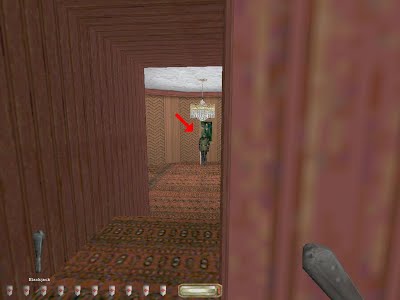
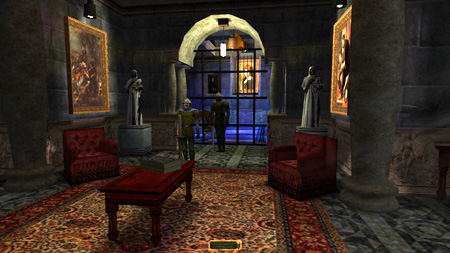
them in the process. For example, to even have a chance at killing
"Greed", you have to frob a book to make him spawn in a very bright
foyer; once he spawns, there is not enough time to run and hide before he sees
the player. I tried using moss on the marble, leaning forward to read the book
and then retreating into the dark, but the foyer is too bright:
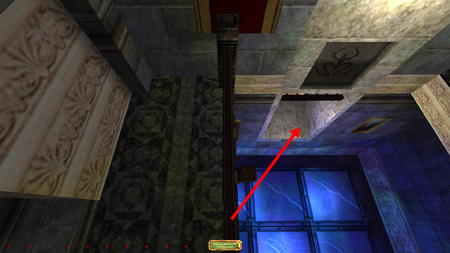
"Wrath" and "Sloth" are located in a sewer and cannot be
stealthily approached because the only access to the sewer is a hole right
above them:
I dropped a flash bomb down the hole and then KO'd them both. I then deposited
their bodies along with another sin into the water so they would drown:
"Envy" is a male thief who becomes alerted at one point after seeing
a dead servant. He is guarding a keeper book that triggers a new objective to
"find the lower sanctum". Since he just wanders around a bright room
in hunt mode, I had no choice but to run in and chase him in circles until I
could knock him out.
"Lust" is a noblelady in the upper bedroom; I just snuck up on her
and KO'd her, then beat her to death. "Gluttony" is a servant in the
kitchen; one broadhead did him in. "Pride" is standing in a brightly
lit room. I had to lob a flash bomb into the room so I could KO him and then
kill him:
Once the chest on the altar is opened, fires erupt in the chapel and a
super-hasted keeper enters the area on 3rd alert. I anticipated something bad
would happen after opening the chest, so I recoiled into the shadows instantly.
Regardless, the keeper is scripted to be on 3rd alert and will zoom around the
chapel at super speeds; it's like watching a fast-forwarded version of an AI in
hunt mode. I waited until he speed-walked in my direction, leaned forward, and
KO'd him. I took his key and found the exit near the cafeteria.
- 01-09-2011, 12:30 AM by Tannar #253
Tannar
- View Profile
- View Forum Posts
![]() Gamer
Gamer
Join Date
Sep 2008
Posts
56
![]()
Nice reports, Hex. Nice to see that you managed Heretics and Pagans. Good
job! I gave up on that one.
- 03-20-2011, 12:46 PM by Old Man #254
Old Man
- View Profile
- View Forum Posts
![]() Gamer
Gamer
Join Date
Jun 2002
Location
London, Ontario, Can
Posts
395
![]() Furious
Flames Cabal Part I
Furious
Flames Cabal Part I
Furious Flames - Cabal, Part I, v1.54 by Tiens (Tatiana Baletskaya)
Difficulty: Thief in Law
Time Elapsed: 287 minutes (4 hours, 47 minutes)
Loot Stolen: 6,895(loot display shows only 6,710) out of 7,250 (95%)(only 8 to
spare!)
Times caught: 1
Locks picked: 22
Pockets picked: 6
Bodies discovered: 17
Damage taken: 0
Ghost Mode: Failure (with an explanation)
Thief game: version 1.1, Thief: Deadly Shadows
Restrictions: No blackjacks, No kills
All other statistics: 0
What a wonderful Fan Mission to come back to Thief for after some two years and
more away!
The scenery and the atmosphere and the immersion were enough to keep me at it
for over two weeks every day with some days as much as ten hours. And, yes,
this reminded me why I say Thief is my all-time favourite game.
I'm really disappointed with this Times caught: 1 statistic. I really did think
I was clean. But then I haven't played in so long I suppose I'm not really all
that surprised. Suffice to say I suspect this Fan Mission can be played in
Ghost Mode successfully. Well, Thief: Deadly Shadows Ghost Mode. Whatever that
may be. There were many, many alerts for stolen goods and lights put out. And
some alerts for sounds made by Garrett too. All unavoidable. Well, and satisfy
the 95% loot objective. I really did think noone raised his or her or its
weapon nor rushed off to bring help with any of these alerts but I guess one
time ... and they sometimes miss the alert on their first pass by. Bodies
discovered for the most part are Keepers killed by City Watch in staged fights.
Ha, ha, the whole thing starts with Garrett overlooking from his balcony or
rooftop the City Watch 'putting-the-boots' to a couple of poor saps in South
Quarter. Anyhow, I thoroughly enjoyed attempting to Ghost this mission. Best
fun I've had for a while. And it felt like Ghosting too.
There are three more parts to this mini-campaign. All by different authors. And
all Russian, I think. I will be playing them. Although I think I'll take a
break for a bit. I've now run this Fan Mission through several times including
forging ahead in 'catch-me-if-you-can mode' to see what options I may have for
what was coming up. A tactic I recall having used often in the Original
Missions.
A couple of very good bits for me. The robots have been incorporated from T:MA,
but they are better looking and whoever did the animations had me daydreaming a
few times just watching them going about their business. How you can animate a
robot to seem fully capable and putting on a show of it at the same time is
special. And I could imagine them frothing at the mouth when they were alerted
and tore off after whatever they were tearing off after. I'm sure it wasn't me.
And Benny is also here in all his past glory. I slipped up in the Summer Cafe
and Benny started slashing at me so I slid back off the bar. He had to run
around the end. I heard him panting "This is work!" as he came
lumbering toward me. When I finally succumbed and Garrett was melting to the
floor Benny said "That's that!" and a few seconds later, you guessed
it, "I need a drink!" I literally LOL'd which I seldom do at the
computer. Nor did I fight back being such a fan of Benny. I just stayed put
cheering him on.
(/spoilers)
Some details of how I played difficult Ghost Mode spots.
There were two spots where I had to show myself in full view in full light.
Speed was my only tool. There are enough enemies in the Hammerite Factory
Chapel that none of the useful lights can be put out without violent
objections, weapons drawn, all sympathetic partners come a-running. The only
way I found my way to the loot was by staying out of range or spending as
little time as possible at a full run in the danger zone. The Hammerite Priest
never moved nor drew his wand although he may have grumbled something. Almost
at the end, a piece of loot I had earlier decided to pass up but needed to get
to 95%, a telescope. Two ruffians standing face-to-face about two feet apart
about thirty feet ahead of me and my only access via a short tunnel to a space
just beside them fully lit by a light that I could not target with my Darkness
Arrow due to the tunnel ceiling until I had been in the light for a few feet. I
tried to split the difference and approach them edge-on from the middle between
them. But then I would have been inside their 180 degree peripheral vision
slightly. They never drew their weapons and only commented on maybe seeing
something. Nor did they move.
An empty bookcase had to be moved to get some other loot I had previously
decided to skip but needed to get to the 95% loot objective. The audio
associated with this is similar to the sliding doors but there is no evidence
afterward of what may have become of the bookcase. Although, since it happens
in the middle of a building burning in full flames well past the salvage stage
that one more destroyed bookcase wouldn't bother even the insurance companies.
A note about the loot bug I encountered. I noticed early on that some loot
items displayed one value while being frobbed but where entered into loot
inventory with different values. Just the same it all seems to have been
accounted for in the percentage figure. 95% is the correct percentage even
though I came up well short of the actual value and the game seems to have
adjusted for that. I can only wonder if I may have been able to skip those
couple of loot items I'd planned on skipping if these figures had been
accurate. A Purse of Coins showing worth 150 loot when taken got into my loot
inventory as only 10. That's 140 right there and a significant chunk of the few
hundred I could spare and still squeeze by. 95% doesn't leave much wiggle room.
Make use of the Darkness Arrows to extinguish electric lighting. And Freezing
Arrows for flame lights for that matter. I finished with a few Darkness Arrows
but left Riverside Station, the last stop, pretty much in total darkness and
this wasn't necessary except for my fatigued psyche with the end in sight.
- 03-24-2011, 08:22 PM by Peter
Smith #255
![]()
Peter Smith
- View Profile
- View Forum Posts
![]() Moderator
Moderator ![]()
Join Date
Feb 2000
Location
Land of Enchantment
Posts
2,698
![]()
![]() Originally
Posted by Old Man
Originally
Posted by Old Man ![]()
What a wonderful Fan Mission to come back to Thief for after some two
years and more away!
Welcome back, Old Man. Glad to see you are ghosting again. ![]()
"What we've got here is a failure to communicate", the warden
(Strother Martin), Cool Hand Luke
- 04-21-2011, 08:35 PM by Klatremus #256
Klatremus
- View Profile
- View Forum Posts
- Visit Homepage
![]() Gamer
Gamer
Join Date
Dec 2003
Location
Phoenix, AZ
Posts
203
![]()
FM: A Night In Rocksbourg - Ink and Dust
Ghost - Success
Perfect Thief - Failed
Supreme Ghost - Failed (but without any alerts)
Perfect Supreme - Failed
Time - 3:07:28
Loot - 6130/6500 (Supreme: 6020)
Pockets Picked - 8/12
Locks Picked - 11
Backstabs - 0, Knockouts - 0
Damage dealt - 0, Damage taken - 0
Healing taken - 0, Kills - 0, Bodies Discovered - 0
Secrets - 8/10
Consumables - None
See the entire report with screenshots here (FMs).
Loot list here.
Comments:
The time had come to ghost DrK’s third mission in the Rocksbourg-series, this
one titled ‘Ink and Dust’. His previous creations were out of this world good,
and the most recent installment was no disappointment. I had escaped the
streets of Rocksbourg, only to run into more enemies underground. The keepers
had come to my rescue yet again, and this is where my quest started.
The South Star
I was greeted in their library with instructions to see interpreter Thales. The
mission was split into different keeper compounds, or stars. In the south star,
I could walk about freely without worry. I could steal loot and read books
without a care in the world. The only things the keepers alerted to were active
weapons and pickpocketing. I roamed everywhere possible before seeing Thales,
enjoying the magnificent scenery along the way. DrK is one of those authors who
lifts the dark engine to new heights.
As mentioned, the keepers in the south star didn’t alert, but they still gave
settling remarks (i.e. “must’ve been nothing”). A similar situation was
encountered and described in the report for ‘A Night in Rocksbourg: Discovery’.
It was clearly the author’s intention to go about unnoticed, so I disregarded
their confounding behavior. Interpreter Thales later confirmed this by stating
he had made the keepers unaware of my presence.
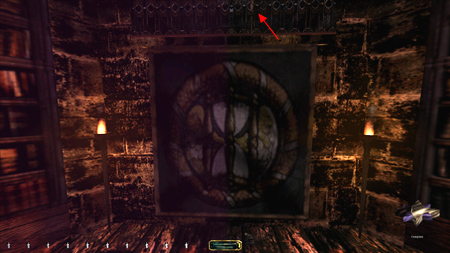
A few clever secrets were spread around the south star. I had a darn hard time
finding the hidden compartment in the Room of the Accession. The glyph was easy
to spot, but I couldn’t for the life of me find the loot. Eventually I did, at
the opposite end of the bookcase (see image below).
After speaking to Thales, the purpose of the mission got a bit clearer. I was
to steal two stones from the north star, hidden in the light and dark zones.
These and six other zones were only accessible through the creation of certain
elemental specific keys. I also needed to bring back the Book of Names and then
find a way out. He provided a key to various rooms around the south star and
said to go see Vlain for north star access.
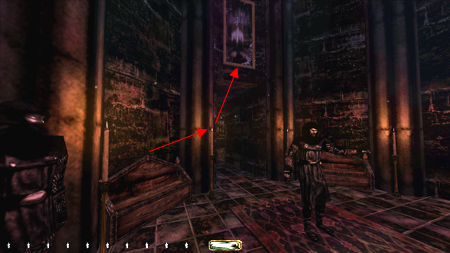
His key gave admission to the room of the readings, holding one more secret glyph
by the foot of a hall statue. It provided loot inside a nearby alcove (see
image). Also in the inner chamber was an order painting on the wall above the
entry. I leapt from the bench onto a candle (!) to reach it (see image below).
The storeroom was also available using Thales’ key. It hid a secret passageway
to a dusty loft with another painting (see image). The storeroom also held
three “special” elemental items used to make the elemental keys later. They all
made a distinct cling sound when taken, for easy recognition. The south star
held 8 of these items, out of 16 in total. I made sure to grab all before
wrapping up this part of the compound.
Vlain in the tower told me to go get Drac’s scriptures before he’d let me pass
to the north star. I so did, using a key found in Uprov’s footlocker by the
dining hall. It gave entry to the ‘forbidden and dangerous books’ room where
the tome was located. The key disappeared upon use and thus couldn’t be
returned.
The last piece of hard loot was in the sill of a stained window in soul Huso’s
quarters, only accessible by use of the south star key. I had to mantle over an
archway to even see it (see image).
North Star, Down Below
Well, if the first part was effortless, the north star was anything but. All
enemies were on high alert and ready to chase. I knew my way around from
before, but did a quick blackjack run just to get the layout into my head. I
needed to make a plan for this to go smoothly. I schemed on getting Dumah’s
quarters out of the way first, but the giant zombie guarding the door alerted
on me picking the lock. It was only a first alert, but against Supreme rules
nonetheless. There was an alternate way in by use of a nearby ventilation
shaft, although it would require a lot of stackable objects and possibly a
crate. I decided to wait with Dumah’s and instead focus on retrieving all 16
elemental objects (which I knew were stackable).
The factory at the bottom level was the most logical place to start. Two
patrollers covered the hallways in between the workshops. Descending the stairs
from Dumah’s, I listened at the door not to cause any commotion. Most doors
were loud, self-shutting, metal sliders; a huge pain for Supremers. I made sure
to listen carefully for alerts. The last thing I wanted was a settling remark
directly after a quicksave. Regular hardsaves were a safer bet.
Found three elemental objects in the repair workshop. The stationary keeper
didn’t mind me snatching the distilled water right before his eyes, and neither
did he hear the storeroom door being picked. I found a usable crate in a
control room on the upper walkway. I brought it along for later use.
A hidden passage to Tahsel’s room was located in the foundry (see image above).
It was clearly the intended way of entry, as the main door was guarded by two
enemies. His quarters held some loot and a key under a piece of meat. Tahsel
himself was found in a cave opened by a glyph next to the bed. Poor guy...
I ran into a tough spot northeast of Kimal’s quarters (which I skipped for
now). There was a flask with blood of salamander on the bottom floor of the
library that I needed, but the entrance door alerted the upstairs souls. One of
the souls (Traphael) would eventually descend the stairs ending up in the
downstairs library, where he stayed doing small patrol loops between the
different tomes. He didn’t arrive until the mass conversation above was done
though, so I waited in the southwest corner of the room outside the library and
snuck in along with him. That only halfway fixed the problem, because I had to
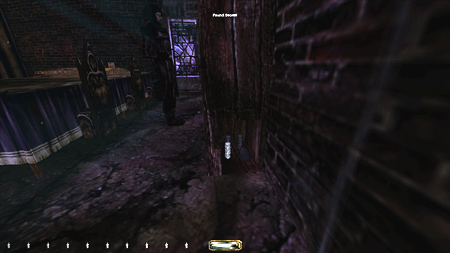
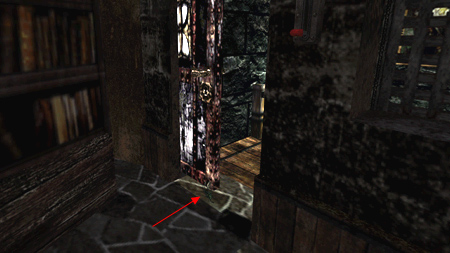
leave and again got caught opening the door. I then got the brilliant idea of
blocking the door with the crate and simply remove the crate to let the door
slide shut when leaving. Problem was, soul Traphael alerted to the noise from
the crate. I cycled through my inventory and found the most silent object
possible, the Trickster’s herb. It successfully blocked the door and didn’t
alert anyone (see image below). I had to wait until the door opening was at its
absolute widest before dropping the herb, otherwise I wouldn’t get through. It
was a tight fit, and even tighter leaving. It felt good retrieving the
salamander blood without Supreme busts.
North Star, Up Above
There was more action further up. Patrolling soul Oderij (the guy with fiery
hands) was by far the most dangerous. He occasionally entered the middle level
of the library where Edrys was stationed. On the east side of this level was a
tough piece of loot. A partly hidden balcony above a large banner had a
candlestick visible from below. Initially I planned on rope arrowing up and
started looking for attachment spots. This proved too difficult and even
unnecessary. The tome on the east side could easily be mantled and had a dark
spot that kept me hidden from everyone but Oderij. From here I could leap
towards the balcony and grab the loot through the railing. The souls below
alerted to the landing noise though, so I put the bag of fish scales on the
floor in the landing zone first. The image below shows me standing on the tome
facing the balcony; the fish scale bag is visible to the right of the light
gem. With this piece I reached half the mission’s loot count. Sneaking back
along the south side took me out before Oderij returned.
Grabbing the remaining special objects and loot around the premises was a
little fiddly due to the amount of patrollers. There were two conversations on
the lower grounds that triggered a total of four extra roamers. It was
definitely worthwhile to plan my route avoiding these triggers. The three-way
chat in the barracks was inevitable in order to retrieve the burrick’s excrements
from the storeroom. The three guards involved made the hallway outside the room
of the keys highly crowded, so I picked the lock on the door and got the
outside items ahead of time. One piece of loot, a goblet, was very well hidden
in one of the bedrooms on the south side of the barracks (see image).
The dining hall and kitchen were a breeze compared to the rest of the compound.
Another hidden piece of loot was found here, on the windowsill by the dining
table (see image). The secret passages were useful when needing shortcuts to
avoid heavily patrolled corridors. I utilized one to access the rafters above
the dining hall to steal the hard-to-reach order painting from the fireplace.
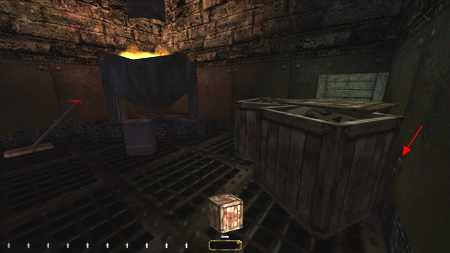
I now had all the items needed to attempt bypassing Dumah’s entrance door. As
previously stated, there was an alternate way in. The access chute was inside
the ventilation system by the door to the light area. A giant female zombie was
positioned right outside. The crate and all 16 objects were required to reach
the proper elevation (see image below). I alternated between soft and hard
objects, to avoid alerts from the outside patrollers. Dumah’s grounds were a
bit tedious, due to quite a few snaggable objects, but nothing to be described
in detail. The zombie down below easily alerted to sound so I treaded
carefully.
Heading For the Elements
I had cleaned the north star bar the elemental keys and their specific doors. I
knew from prior playthroughs that the vine area was hopeless. There is a
woodsie beast that alerts upon entry, with no way to circumvent. I even skipped
making the key and could return the unused objects for Supreme. The ice key was
also not needed for Supreme, as the soul studying nearby signaled to the door
with a first alert. Plant Ghost was in the clear for that one though. The
water, earth, air and fire areas were cleaned without trouble. I absolutely
loved the creativity in creating each area with an emphasis on the specific
element. The air section was a personal favorite.
Come time for the required doors (light and darkness), I placed the crate back
in the basement first (and the maintenance freezing back in the storeroom for
Supreme); it had served its purpose. To open the darkness door I needed Kimal’s
key. He was stationed outside Tahsel’s quarters. Tahsel’s key (taken earlier)
opened the meters room, which lever exposed a wall panel in Kimal’s chamber.
This panel revealed a lever that further uncovered the lock responding to the
darkness key, which raised a gate in the adjacent room. I had to time the final
lock not to alert the patrolling haunt, as he heard some of the ruckus through
the door. I made sure to reraise all the gates and return Tahsel’s key. I
placed the latter on top of the body part on the counter; dropping it onto the
metal actually alerted the zombie outside the door.
The darkness area was fun enough, with a couple of scares. DrK sure knows how
to make a player jump. A couple of large beasts roamed around but they were
easily avoided. Two things worth noticing for Supreme. I couldn’t reset the
code lock for the first gate. I could barely touch any button before it closed
behind me. The starting code was ‘0000’ and the correct combination ‘6143’. I
managed to touch ‘8’ and exit, leaving the display at ‘1438’. I guess this
constitutes a Supreme bust, although no rule directly states to reset number
displays. It didn’t matter, as Supreme got busted in the labyrinth beyond.
Three levers had to be flipped to access a tiny ledge leading to the dead
shadow stone. The sliding gate couldn’t be closed as that would have prevented
further travel. In addition, this entire area was completely sealed off after
escaping the chasing phantom. Supreme rule #7 states: “Put Everything back that
can be put back: doors closed and re-locked if they are re-lockable, chests and
gates closed if closable…” Well, the gate was closable and it left a trace of
my presence. Busted, at least by my judgment.
The light area brought no problems except I had to skip Thesal’s bedroom for
Supreme. The door was too loud to go by undetected. The ice area also had to be
skipped for the same reason. Plain Ghost were good in both instances. The ice
area held two pieces of loot in a hidden chamber revealed by a wall-glyph (see
image).
Upon returning to the south star I had gone from friend to foe. Only Vlain and
Thales recognized me as an acquaintance. The haunts seemed to be in constant
first alert mode, endlessly whispering ‘join us, join us now!’ I still kept my
distance though. I lifted Nyth’s south star key off his belt before heading for
Thales’. He was patrolling the tower carrying a lantern. I needed to return the
copy I got from Thales’ for Supreme, thus leaving the compound required a
second one. The blocking-the-door-as-it-locks method didn’t work for the entry
gate, since it shut automatically. Giving Thales his book gave me permission to
leave. I carefully returned the Trickster’s herb, the bag of cursed seeds and
the ice dust to their respective locations (kitchen and storeroom). Before
seeing Vlain I simply dropped Nyth’s key along his patrol route.
Notes & Busts
- The north star keepers didn’t alert but still gave settling remarks such as
“too much coffee this morning”. I ignored their behavior due to the author’s
obvious intention of Garrett roaming freely around the premises.
- I had to skip one piece of loot worth 200 gold in the hallway outside Vlain’s
office at the end of the south star. Cutting the banner to gain access is
property damage and not allowed under any mode.
- A valuable book, worth 170 gold, had to be skipped in the vine area. The
woodsie beast alerted when emerging from the doorway. The area and the key were
skipped, and the items returned for Supreme.
- Couldn’t reset the numbers in the combination lock display in the darkness
area. The metal gate lowered before I was able to go through. I also couldn’t
close up the sliding gate in the labyrinth. Both sections were unreachable
after taking the dead shadow. Supreme busts.
- Had to skip a candlestick in Thesal’s bedroom for Supreme. He commented on
opening the door.
- Had to skip the ice area for Supreme. The nearby soul commented on the door.
- [The hidden order painting quest couldn’t be completed for Supreme. One
panting is located in a secret storeroom accessible from the legends room in
the north star. The entrance door is pickable but has to be relocked using
Thesal’s key from the light area, due to Supreme rule #7. The key thus has to
be returned which alerts Thesal to hunt mode.]
Klatremus' Supreme Thief Site - Walkthroughs, Loot Lists & Ghost
Reports
- 04-21-2011, 08:39 PM by Klatremus #257
Klatremus
- View Profile
- View Forum Posts
- Visit Homepage
![]() Gamer
Gamer
Join Date
Dec 2003
Location
Phoenix, AZ
Posts
203
![]()
By the way, where would I post reports of OMs? I consider ghosting
TMA. ![]()
Klatremus' Supreme Thief Site - Walkthroughs, Loot Lists & Ghost
Reports
- 04-22-2011, 09:57 AM by Peter
Smith #258
![]()
Peter Smith
- View Profile
- View Forum Posts
![]() Moderator
Moderator ![]()
Join Date
Feb 2000
Location
Land of Enchantment
Posts
2,698
![]()
Good to see you back in the saddle again, Klatremus. ![]()
I would suggest that you start new threads for the OMs as you need them.
Separate threads for T1 and T2. We did that back in the old days, but those
threads disappeared long ago when the Eidos forum changed from one BBS software
to another.
Make the OM threads look somewhat official and similar to the FM threads as you
like. Then go ahead.
"What we've got here is a failure to communicate", the warden
(Strother Martin), Cool Hand Luke
- 04-22-2011, 11:14 AM by Klatremus #259
Klatremus
- View Profile
- View Forum Posts
- Visit Homepage
![]() Gamer
Gamer
Join Date
Dec 2003
Location
Phoenix, AZ
Posts
203
![]()
Most of the old threads you talk about can be found here, but I'm
sure you know that. I only plan on doing Thief 2, including 'The Unwelcome
Guest', so it'll only be one new thread then. Thief Gold I finished Supreme
Ghosting a while back, where my reports were more like walkthroughs. I
definitely won't do that again, and those who want to read them can go to my
site.
Thanks for the quick reply. ![]()
Klatremus' Supreme Thief Site - Walkthroughs, Loot Lists & Ghost
Reports
- 04-22-2011, 06:06 PM by Peter
Smith #260
![]()
Peter Smith
- View Profile
- View Forum Posts
![]() Moderator
Moderator ![]()
Join Date
Feb 2000
Location
Land of Enchantment
Posts
2,698
![]()
Yes, I knew that. I hand assembled those web pages myself without the
benefit of the UBB data base. ![]()
"What we've got here is a failure to communicate", the warden
(Strother Martin), Cool Hand Luke
- 05-10-2011, 01:33 AM by PotatoGuy #261
![]()
PotatoGuy
- View Profile
- View Forum Posts
![]() New
Player
New
Player
Join Date
May 2009
Location
No Mans Land
Posts
3
![]()
Great! Just now I'm replaying Soulforge and had a question about ghosting
a part, and just a few days ago the link I need is posted here. I'll be looking
forward to reading your ghosting notes on TMA, Klatremus. ![]()
- 06-05-2011, 10:15 AM by Klatremus #262
Klatremus
- View Profile
- View Forum Posts
- Visit Homepage
![]() Gamer
Gamer
Join Date
Dec 2003
Location
Phoenix, AZ
Posts
203
![]()
Thanks for showing interest PotatoGuy. I'm on mission 2 now, after the
demo and mission 1. I'll upload once mission 3 is done, then update for each
following mission. Interesting to read some of the old Ghost posts you were
talking about Peter. ![]() The
Ghosting community certainly was much more "present" back then.
The
Ghosting community certainly was much more "present" back then.
Klatremus' Supreme Thief Site - Walkthroughs, Loot Lists & Ghost
Reports
- 01-13-2012, 12:21 AM by PotatoGuy #263
![]()
PotatoGuy
- View Profile
- View Forum Posts
![]() New
Player
New
Player
Join Date
May 2009
Location
No Mans Land
Posts
3
![]()
I just started replaying uncadonego's The Time That Has Passed, and
decided to try and ghost it. After 20 minutes I already was stuck, it seemed I
really needed to KO someone - but I just had a feeling there was another way to
pass the guard. So I came here (for the first time in months), to see goldsla tried
the mission and failed ghosting starting at that exact same spot. I love how
you guys categorize and save every attempt, which makes searching this forum
for a particular question real easy.
I'm not around much but that doesn't mean I don't appreciate how the few of you
keep trying out wacky methods on this wonderful game. A big thank you to you
all.
Also I totally forgot about Klatremus' attempt of ghosting the OMs. Got some
good reading to do these next days. ![]()
- 03-17-2012, 08:52 AM by Klatremus #264
Klatremus
- View Profile
- View Forum Posts
- Visit Homepage
![]() Gamer
Gamer
Join Date
Dec 2003
Location
Phoenix, AZ
Posts
203
![]()
FM: The Black Frog - Mission 1: Songs and Laughter
Ghost - Success
Perfect Thief - Success
Supreme Ghost - Success
Perfect Supreme - Success
Time - 26:04
Loot - 1980/1980
Pockets Picked - 1/1
Locks Picked - 10
Backstabs - 0, Knockouts - 0
Damage dealt - 0, Damage taken - 0
Healing taken - 0, Kills - 0, Bodies Discovered - 0
Secrets - 8/8
Consumables - None
See the entire report with screenshots here (FMs).
Loot list here.
Comments:
I wanted to try ‘The Black Frog’, a freshly baked mission pack by the reputable
author Gäetane. I actually hadn’t played any of her previous creations, but had
been viewing the screenshots on her website for quite a while. This was a
highly anticipated release and I couldn’t wait to sink my teeth into some good
fan missions again.
The first mission didn’t require much of a report. Only a handful of people
even reacted to Garrett’s presence. The challenge was more to find all the
loot, remember to close up doors and replace used items. As always I was going
for Supreme Ghost, but even the added difficulty of that mode wasn’t enough to
cause problems. Despite a very easy Ghost, this was a fun mission to play.
I wonder if any player abstained from getting annoyed by the drunk mechanist. I
see myself as a patient and tolerant man, but that guy really got on my nerves.
I guess that was the point too, so well done Gäetane. There was a hidden
apartment with a ring in that plaza, and getting onto the barrel to mantle the
shed with him around my feet was the most frustrating thing I’ve done in a long
time.
A few tough pieces of loot was a stack of coins in an apartment east of home (see
image), and a purse on a ledge in the power station (see image). Other than
that there were multiple coins in most of the fountains. The rest was more or
less counted as secrets; I’ll refer to my loot list for those. All of them
could be reset to their original configuration, though it wouldn’t have been Supreme
busts if they couldn’t. The only one worth mentioning was a small switch behind
the bed in the apartment south of the lookout tower (see image). For some
reason I had a hard time finding the frobbable tile in the chapel also.
Had to follow Pingus to steal his hidden treasure (see image). There was no key
assigned to the gate, besides the one inside the tomb.
The overall happy atmosphere in the streets was apparent. The entrance plaza to
the inn had a real catchy tune. Made sure to grab the messenger’s key before he
got shot, in order to get the pickpocket count. That wasn’t required for Ghost,
but it gave a sense of completion nonetheless. Locked Irvin’s sister’s door and
replaced the key for Supreme afterwards. I didn’t have to take the map for it
to exist in the next mission, so I left it be.
Klatremus' Supreme Thief Site - Walkthroughs, Loot Lists & Ghost
Reports
- 03-18-2012, 07:47 PM by Peter
Smith #265
![]()
Peter Smith
- View Profile
- View Forum Posts
![]() Moderator
Moderator ![]()
Join Date
Feb 2000
Location
Land of Enchantment
Posts
2,698
![]()
![]() Originally
Posted by Klatremus
Originally
Posted by Klatremus ![]()
I wonder if any player abstained from getting annoyed by the drunk
mechanist. I see myself as a patient and tolerant man, but that guy really got
on my nerves. I guess that was the point too, so well done Gäetane. There was a
hidden apartment with a ring in that plaza, and getting onto the barrel to
mantle the shed with him around my feet was the most frustrating thing I’ve
done in a long time.e to take the map for it to exist in the next mission, so I
left it be.
LOL. Well, I have played that mission 8-10 times, and the guy never
annoyed me that much, and he hardly ever interfered with the rain barrel move.
I guess you were just unlucky. When I have entered the rain barrel area
(perhaps after luring him out inadvertently), I have usually been alone. Hope
to hear more of your experiences with the BF, Klatremus.
BTW, you should play the rest of Gaetane's misisons, too. All excellent game
play, all good for ghosting.
"What we've got here is a failure to communicate", the warden
(Strother Martin), Cool Hand Luke
- 03-30-2012, 10:03 PM by Klatremus #266
Klatremus
- View Profile
- View Forum Posts
- Visit Homepage
![]() Gamer
Gamer
Join Date
Dec 2003
Location
Phoenix, AZ
Posts
203
![]()
FM: The Black Frog - Mission 2: The Portrait
Ghost - Success
Perfect Thief - Success
Supreme Ghost - Possibly (see notes and comments)
Perfect Supreme - Possibly (see notes and comments)
Time - 3:18:25
Loot - 2370/2370
Pockets Picked - 2/2
Locks Picked - 6
Backstabs - 0, Knockouts - 0
Damage dealt - 0, Damage taken - 0
Healing taken - 0, Kills - 0, Bodies Discovered - 0
Secrets - 6/6
Consumables - None
See the entire report with screenshots here (FMs).
Loot list here.
Comments:
This is where the mission pack really gets started. We finally see Gäetane’s
true talent at work. Yes, it’s your standard break-and-enter map with something
precious to steal in a difficult location, but this time it’s done with style.
A highly non-linear mansion with plenty of secrets rewarding the thorough
player. I also like when readables (actually reading them)
constantly provide worthwhile hints. Kudos to the testers and translators for
helping Gäetane out in that department. I can’t wait for the upcoming missions!
Per request of Belmont, I was to steal ‘The Lady of the Shadows’ from collector
Lord Vincenzo Garivaldi. I knew the portrait was protected by elaborate
security systems and I would have to circumvent them to obtain my prize.
Unfortunately, it sounded like Supreme was in for a tough time. On my own
personal agenda was the task of finding out why Belmont was interested in the
portrait, despite its low value. In addition, I needed to find out more about
the situation as a whole, perhaps the vaguest objective of the bunch. The
‘Breath of Karras’ plus 2,000 in loot were also on my list of to-dos. Lastly, I
had to find an alternate way to escape the proper. That sounded like enough
trouble for one night, so I got started.
Security Systems
My arsenal contained nothing of use except the compass and lockpicks. I found a
rope arrow in the shed near the beginning outhouse. This was a highly necessary
pickup and no bust for Supreme. That mode enforces (at least in spirit) the idea
of picking up as little as possible, except for loot and direct objectives. I
am very much a stickler for rules and always try to keep pickups to a minimum.
I had already done an exhaustive blackjack run, so I knew what items I
absolutely had to get.
Supreme has a few rules that made this mission considerably more difficult than
regular Ghost. “No turning off of watchers, or other security systems” was the
most significant one. It meant I couldn’t turn off the electric floor or the
camera in the portrait vault (see image below). If I could somehow circumvent
having to shut those off, then I would not only avoid the busts, but I wouldn’t
have to deal with the stationary swordsman in the garden either. He protected
the key for the camera switch and would almost certainly require a first alert.
Using that key also required cutting open a corpse with a hatchet, and not to
mention short circuiting a second camera in the basement using a water arrow.
Both situations were at least arguable Supreme busts and highly desirable
skips. So I decided to enter the vault and scope the territory. Hopefully it
would give me some clues to a possible solution.
The side shaft proved an excellent spot for recognizance (see image). Luckily,
the grate didn’t make any noise. The watcher had a pivot angle of 180 degrees.
There was a guard outside the main gate, facing away. Another guard patrolled
the outside rooms, coming to a halt in front of the entrance with regular
intervals. The floor was glass, but made metal sounds. The small outcropping
from the shaft was metal as well. The floor only caused damage straight out
from the portrait cage. Either side was safe. I couldn’t mantle the portrait
ledge without taking at least one point of damage. I must have done that jump a
hundred times, seeing if there was a chance the damage wouldn’t kick in fast
enough, but it always did. All hope wasn’t lost though, as I found a neat
little “safe spot” just to the left of the shaft ledge. Inching down I could
hide from the watcher before it swung back. There wasn’t much in it, as I
occasionally had to lean towards the wall not to get a chirp. As soon as the
watcher went yellow, the guard would start looking. It didn’t matter, as I had
to avoid both. I practiced getting back into the vent from here also. It
required a walk-jump onto the ledge and further taps of the walk-key to lurk
inside. Garrett sometimes has a hard time entering crawlspaces, and leaning
forward into the chute was the key.
I realized I had to attempt some acrobatics from the upper floor railing to
reach the portrait. With an angled strafe-run, I could be able to land inside
the cage without taking damage from the fall or the electrical floor. There
were quite a few factors to consider though. I needed to find the proper
position, angle, velocity and landing spot. I had to consider the roaming
robot, the pivoting watcher below and the patrolling swordsman outside the
vault gates. I also couldn’t make noise on the railing or during the drop. I
used the western railing, but assume it could equally well be performed from
the opposite side. There was a split in the railing’s top frame about one third
of the way from the north wall. This was my starting position. I first mossed
the vault’s northwest corner, to make the escape quiet, if the
jump proved to be successful. I waited for all patrollers to be gone and for
the watcher to be on its way east. The latter was more trial and error,
quicksaving and checking its position, then quicksaving again half a second
later until it no longer chirped when I dropped. Coming from the west side I
had to land in the right (east) corner; that allowed for more headroom and
prevented me from bouncing off the ceiling and onto the floor. I don’t know how
many quickloads until I got the hang of it. A few times I would land on the
edge, only to slowly slide down from lack of forward momentum. Once I got in
there with taking damage, alerting the front guard to my grunt. That’s when I
knew it was possible. Dozens of jumps later I finally got it! I hit escape as
fast as humanly possible and did a hardsave. Now I had to worry about grabbing
the portrait and getting back to the corner by the shaft before the watcher
caught me. It didn’t take hardly as many tries. The main problem was bumping
into the cage corner, which slowed me down to the point of not making it in
time. It was just a matter of the right keystrokes in quick succession.
Eventually I was safe.
Now that I knew it was possible, my thoughts went to removing the Supreme bust,
mossing the vault floor. Any use of moss arrows is disallowed in that mode and
there was another option. If I could make a crate-bridge to travel across from
the portrait cage to the wall, I might get away with a clean Supreme steal.
That might even make the entire mission Supremable, which would be awesome! It
was definitely worth a try. Three crates should do it, and there was a trio of
such in the attic accessible from the southern hall on the upper floor (see
image). The entry door was partly hidden behind drapes. I brought them down to
the vault one by one, via a rope arrow into the collections room (see image
below). The use of crates is perfectly allowed for Supreme, as long as they are
returned and not stacked on an enemy’s patrol route. Crouch-dropping the crates
proved to be silent enough to avoid comments from the vault guard. I made a
straight line of crates starting a few feet out from the safe corner. They were
pretty much flush with each other, the furthermost placed just before the
floor’s damage area started. If placing a crate onto this portion, it broke
into a million pieces and alerted the whole neighborhood. It seemed wood
suddenly was electrically conductive. Once happy with my placements I made my
way up to the second floor to redo my leap.
At first I had a hard time finding the spot from before. I was actually too
close to the northern wall without realizing it. Once I found the proper range
it didn’t take too long to nail the jump again (first image below). Leaving the
cage took between 10 and 15 tries. A few times one of the crates would shatter.
That is property damage and not allowed for any Ghost mode. It leaves you
unable to return the crate too, for obvious reasons. The second image below
shows the portrait in hand, my successful crate-bridge and the watcher not
alerting to Garrett in the corner. Now all I had to do was return the crates
and continue my mission. I remembered to touch one of the buttons in the code
panel to close up the vault cage. There was no way to close the gate to the
code chamber itself. Supreme intact!
As I returned to loot the rest of the collection rooms, I found to my
disappointment that the guard who was supposed to be asleep in the northwest
was wide awake and stuck in his chair. I reloaded previous savegames to see
where I alerted him and deduced that it had to be during the crate-placing
ordeal. I might have stepped on the tile when ascending the rope but not heard
the comment. At any rate, I had to restart and do the entire set of moves over
to save Supreme. This time it went much smoother. I think I stole the portrait
in less than 40 minutes. That verified this method to be highly repeatable, it
was just the experimentation that took an awfully long time.
It was wonderful to loot all the collection rooms and peek into the vault from
the outside. Everything was left intact except for the missing portrait. I’d
love to hear them explain that one in the morning.
General Looting
From here, much of the remaining mission was a breeze. There were a few tense
spots in areas with heavy patrols, such as the main hallways on either floor.
Other than that it was fine. I did Lady Garivaldi’s first. Found her secret
under the desk and tested to see if the chapel key could be returned. Her feet
were resting on the carpet, so that would be sufficient. Grabbed the vase
outside Sir Garivaldi’s and entered the west tower through the passage behind
the drape. Climbed a rope and grabbed the tiara up top (see image). Dropped to
the bottom and started looting the main floor. Spied on Gilles and saw him run
away. This would trigger his body in the bath. Grabbed the items in the kitchen
when the servant left. He had a fairly big loop so there was plenty of time.
Crossed the main hall and took the statue there on the way. Back around through
the dining room towards the patio. Entered the library and cleaned Sir
Garivaldi’s through the secret entrance. This way I didn’t have to pick the
doors and could leave his main key alone. Grabbed the garden key and went back
downstairs. I locked the garden door but blocked it open. That way I could
return the key right away. I would get back here later but was a little unsure
of the method as of yet.
Moving north I stole Gilles key from the pool. The splash didn’t alert anyone
upstairs if I waited for them to clear out. The roaming bot was around but it
never indicated any sounds for first alerts. I don’t know if it even had any.
Took the ring from the secret passageway and returned to the hall outside the
library. The guy studying to the south was now standing (see image below). This
meant I had alerted him somewhere during my recent endeavors. I reloaded and
found him to alert to me roaming around the pool. This was tricky to spot due
to the closed door. He saw me through the glass if I moved too fast. I stayed
on the pool’s north side this time to avoid his gaze.
Dodged the front yard guard and entered the chapel. Locked the doors from the
inside as I wouldn’t get out that way. Got the code scroll from the east tower.
That was an objective and couldn’t be returned. Lock-blocked the tower door and
returned the key to the middle floor desk. Crossed the hall and descended to
the basement. Took the Sir’s journal from the workshop and left. That was
another objective and also couldn’t be dropped back. The secret switch in the
wine cellar was a tough one to find (see image). Thanks to Gäetane for letting
me in on her secrets! Went up to the second floor and returned the chapel key
to Lady Garivaldi’s carpet (see image). I had to go into the actual pool to
return the workshop key without alerts. The splash from the high drop seemed to
carry for miles, but from surface level it was quieter. The key eventually
found its way to the bottom.
The Garden Coins
The only items remaining were the coins in the garden fountain and Karras’
Breath. The latter I was a little unsure of how to handle, so I decided to go
for the loot first. It couldn’t be taken in conventional fashion by any stretch
of the imagination. I’ll explain. The ‘Garden of the Muses’ was divided in
half. The west part contained a patrolling swordsman and the “secret” exit. No
problems there. Another swordsman, stationary this time, guarded the entrance
to the eastern half. He faced west, but could easily spot anyone coming through
entrance path. The area was lit up by mushrooms and a lamp on the far wall. For
plain Ghost I could climb the grassy side and rush past the east corner, coming
to a halt in the shadows. This spawned a comment though, which is not
allowed for Supreme. It wasn’t possible to eliminate that alert by sneaking
or running. There simply wasn’t enough shade and the guard was too
inconveniently placed. It was only a matter of a few feet rounding the corner
though, and Perfect Supreme sounded too tempting to give up just yet. What to
do...? Could I enter that part of the garden in a different way perhaps? After
a lot of searching, I finally found a way using the shed in the front yard. It
could be ascended with a rope arrow, and this gave me access to the eastern
wall (see image below). I couldn’t reach the muses garden directly, but the
chapel took me to the manor’s main roof. Circling north I could reach the
library. From there, the garden was in view. I could drop onto the spiked
fence, luckily without taking damage. Despite being in plain view of the
mentioned guard, I received no alerts if creep-crouching along the rim. Maybe
his field of vision didn’t extend that high. Regardless, I ended up on the
eastern wall behind his back. With accuracy, I could fling a rope arrow into
the grassy wall below and catch it jumping down. Voila!
The coins were in the backmost pool. Sliding into the water still alerted the
guard, so I had to utilize the rope arrow again to descend quietly (see image
below). The corpse on the altar had the key for the basement switch. Due to my
circumventing the security systems, I didn’t have to deal with any of that. Instead,
the problem ahead was leaving this part of the garden. There was no orthodox
way of getting back onto the upper walls. No attachment sites for rope arrows
were feasible, so the only obvious way to exit was past the corner to the
north. I could get closer coming from this side, but rounding the corner always
triggered an alert. Again, plain Ghosters don’t have to go through any of this.
First alert comments are allowed for that mode. Eliminating first alerts for
Supreme, however, is a whole different ballgame.
I soon realized drastic measures had to be taken. My thoughts drifted toward
crate-stacking as my only possible means of success. Luckily I had a savegame
from the end of my blackjack run to test things out. Eight crates total were
needed to reach the proper height. Six crates to make the main stack, and the
other two to elevate the last ones to make them reachable. I had to ascend the
wall as close to the exit corner as possible, in order to reach the crates from
the north side to replace them afterwards. Everything had to be returned to
their original location for Supreme, otherwise there was no point in doing any
of this. That meant I had to reload and set up the crates close to the corner
first, then climb the walls and roof like before, grab the loot, and finally
stack the crates that would be reachable from the east side. Supreme rule #7
states in part: “You cannot stack boxes to gain access to an area when your
stack is on the patrol path of an AI. If it can be done in a shadowed
area off a patrol path or even in direct light where no one is patrolling, that
is fine.” The ledges surrounding the gardens were of the latter kind, so no
busts to Supreme in stacking crates here. The east tower conveniently had eight
boxes spread across the three floors. It was pretty much a straight shot from
there to the garden. The only slow area was getting through the patio. It took
time, but eventually all the crates were set up as in the image below. I
couldn’t stack any more crates onto the southernmost one, as this alerted the
guard. The tall stack was beneficial because it would help me reach more crates
when building my stack from the other side. It seemed the wall corner marked
the border for the guard’s field of hearing, as I could stack crates north of
this completely unalerted. The corner in the far northeast was a good spot to
wait for the patrolling swordsman in between placing each crate. Once all this
was done I took the trip over the roof like before, stole the loot and was
ready to commence my project.
My hope was short-lived however, as I realized stacking boxes on top of each
other alerted the swordsman to hunt mode. What was alert-free on the north side
of the corner, busted even plain Ghost on the gazebo side. My plan needed
further adjustments. What I needed were soft objects that could be placed in
between each box pair. If I needed six boxes to climb the wall, five soft
objects were required to cushion all the box drops. Experimenting using my
blackjack-run savegame, I actually found only five boxes to be necessary, since
the extra objects added to the stack’s height. That meant a maximum of four
soft objects had to be brought along. The best ones to use was 1) the chapel
invisibility potion, 2) the fruit from the basement workshop, 3) another piece
of fruit from the northeast bedroom upstairs, and finally 4) the crumbled piece
of paper in the trashcan east of the patio. All of these could be taken and
replaced later without busts. The deer leg in the north servant’s quarters
might also have been useful, but picking the door alerted the fireplace guard.
This meant, of course, that the hatchet used to obtain the key for the basement
camera switch also couldn’t be taken without busting Supreme. My circumventing
the security systems earlier was therefore confirmed necessary for that mode.
Grabbing the objects entailed retaking the workshop key. Making my way across
the roof for the third time, hopefully the last.
The order of objects in my stack was as follows: Crate, potion, crate, fruit,
crate, fruit, crate, crate (see image below). Notice I didn’t end up using the
scroll at all. I was high enough at this point not to alert the guard from the
last two crates touching. Also, stacking the scroll elevated me too much to
reach the fourth crate in the stack around the corner. From the top, the
guard’s head was hidden underneath the gazebo eve, so mantling the top wall
wasn’t too difficult. Phew! What work for a measly few coins! But that was it;
full loot all within Supreme rules.
I returned all 8 crates, the tower key, the invisibility potion, the 2 fruits,
the scroll, the chapel key and the workshop key.
The Breath of Karras
The final problem was Karras’ Breath. When taken, it closed the gate and
triggered the alarm due to the weight sensitive pedestal. I argue this
situation to be similar, though not identical, to the alarm situation in TDP’s
‘Undercover’. Since it has been deemed acceptable by the ghosting community to
trigger that alarm, why not this one? The only difference is the existing
option to avoid triggering the alarm, by placing the little bag from the secret
chamber upstairs on the pedestal first. Does the mere existence of this
alternate method cause triggering the alarm to be a bust? To me, no, but I know
other players will have a different opinion. I see the alarm as an inevitable
occurrence, no matter what method is chosen. When Lady Garivaldi awakens in the
morning, she’s bound to raise whatever alarm she can get her hands on. By
letting Garrett trigger the alarm, you’re simply forcing the inevitable fate. I
know that seems like an argument made purely to justify the Supreme success,
and it might well be. Instead of having the debate with myself, I’ll leave the
stats as a ‘possible’ success. That way, readers can feel free to chip in with
comments. Notwithstanding, this mission was at least Perfect Thieved without a
single first alert, without deactivating any security systems, without using
any water or moss arrows, with no unnecessary pickups and with everything returned
to its original state or location.
Some of the guards were on high alert after raising the alarm, but nothing I
couldn’t sneak past. I utilized the rope arrow up to the stone window directly
above the collections room like before. It was an efficient means of escape.
Managed to drop the secret exit key on the swordsman’s patrol path before it
locked shut. Done deal!
Notes & Busts
- Taking the Breath of Karras closed the gate and triggered the alarm. I am
unsure whether this is a bust. It is highly comparable to the classic
‘Undercover’ situation where the alarm is set off as a direct result of
stealing an objective. The only difference is that you can prevent it, by
placing the little bag on the pedestal. Of course, the bag can’t be returned
and that is a definite Supreme bust, so I chose the alarm alternative, in case
it is accepted. I finished the mission the “intended” way also, to get the
definite plain Ghost/Perfect Thief success.
Last edited by Klatremus; 03-31-2012 at 08:24 AM.
Klatremus' Supreme Thief Site - Walkthroughs, Loot Lists & Ghost
Reports
- 03-30-2012, 11:06 PM by Peter
Smith #267
![]()
Peter Smith
- View Profile
- View Forum Posts
![]() Moderator
Moderator ![]()
Join Date
Feb 2000
Location
Land of Enchantment
Posts
2,698
![]()
I enjoyed your writeup of BF #2, Klatremus. I had a lot of fun testing it
and achieved normal PT many times.
I am not sure if or how this relates to your attempt, but the muses garden can
be ghosted normally without crates or ropes. You get onto the ledge of the wall
by the window in the front section and jump around over the gaps, entering on
the left side of the path. I could not tell by your writeup whether you took
that ledge route or not and what you meant when you mentioned the
"entrance." Lower level or ledge? It is a bit of a challenge to get
around the corner of the ledge where you had your crates stacked, but it can be
done if you are fast. I don't remember whether the guard always mutters when
you round the corner or if muttering can be avoided. I was not concerned with
it. Multiple tries may be the answer there. I am pretty sure you can get back
out without a mutter.
It is possible to slide or jump into the water at the back without alerting the
guard. It takes a few tries and approaches, which I must learn every time. It
is easy to jump back up onto the ledge at the back near the fountain after
doing so.
I would say, 10 years late, that triggering the alarm with Karras Breath is a
bust, strictly speaking. Of course, the alarm can be avoided by using the
weight bag, and you are right -- it cannot be returned because there is no
other weight. I don't know what we were thinking with Undercover, apart from
the fact that that alarm cannot be avoided when satisfying the talisman
objective, and it is fun trying to get out unseen after the alarm is triggered.
Your success at taking the painting without turning off security systems was
very interesting and ingenious. Keep up the good work.
"What we've got here is a failure to communicate", the warden
(Strother Martin), Cool Hand Luke
- 03-31-2012, 08:12 AM by Klatremus #268
Klatremus
- View Profile
- View Forum Posts
- Visit Homepage
![]() Gamer
Gamer
Join Date
Dec 2003
Location
Phoenix, AZ
Posts
203
![]()
Thanks Peter!
As far as the garden goes, I'm sorry for not being clear enough in my write-up.
I could enter the gazebo side via the grassy ledge to the left of the path easy
enough following regular Ghost rules. I got a comment every time, but as you
know that's allowed for that mode. I could get out the same way with only
another mutter from the guard. I could not get in or out without those mutters
though. Believe me, I tried enough times. That's why I had to enter by
way of the roof, and leave by way of crates over the tall wall
by the corner for Supreme. The only way to bring the crates in was placing them
on the ledge by the corner on the north side and grabbing them once I was on
the opposite side.
I didn't try very much with the fountain in the back. The rope was a good
method for me.
I will leave Karras' Breath as a possible success, but I agree with you that it
feels mostly like a bust. Regardless, this was fun to ghost.
Klatremus' Supreme Thief Site - Walkthroughs, Loot Lists & Ghost
Reports
- 04-05-2012, 10:44 PM by Klatremus #269
Klatremus
- View Profile
- View Forum Posts
- Visit Homepage
![]() Gamer
Gamer
Join Date
Dec 2003
Location
Phoenix, AZ
Posts
203
![]()
FM: The Black Frog - Mission 3: Tears and Sorrow
Ghost - Success
Perfect Thief - Success
Supreme Ghost - Failed
Perfect Supreme - Failed
Time - 48:07
Loot - 1000/1000
Pockets Picked - None
Locks Picked - 2
Backstabs - 9, Knockouts - 0
Damage dealt - 300, Damage taken - 0
Healing taken - 0, Kills - 10, Bodies Discovered - 0
Secrets - None
Consumables - None
See the entire report with screenshots here (FMs).
Loot list here.
Comments:
While not my favorite mission of the pack, it still provides a nice change of
scenery from the first. The creatures are scary and the limited visibility
makes each street corner unpredictable. By letting the player observe the
changes to the city, the story unfolds itself in an effective manner. I wish
there had been some more loot around and that killing the dogs would’ve been
optional or hidden. That takes nothing away from the wonderful mission pack
Gäetane has put together!
I was simply to meet up with Belmont and give him the painting, then head out
of town by way of a boat. I had a strange feeling it wouldn’t be that easy.
Not a whole lot to report before seeing Belmont. The streets were filled with
five patrolling and three stationary werewolves, or whatever they were. They
were easy enough to dodge. There was plenty of shade and not much to pick up.
Went for my rope arrows first. They were all that was needed for the objective
that would trigger when I got Belmont’s first key. It led to the window that I
managed to reach without a rope arrow in mission one, but alas then it was
locked. Now, however, it was open and provided the second key (see image). This
took me to the Mayor’s house and furthermore to cemetery well. Got the new
objectives and my only piece of loot. I was to unlock the gate at the dock and
kill all the dogs.
I generally don’t like forced kill objectives. This was not an exception and to
me knocked the mission down a notch or two. Regardless, I still had to adhere
to the other rules and not alert anyone in the process. I am not entirely sure
how to interpret Supreme rule #5 when it says “[...] Use nothing that would
leave a trace or remnant of evidence. [...]” This could refer to all
non-retrievable equipment, but then rule #6 goes on to talk about no water or
moss arrow use. Why would these be mentioned in an additional rule if they were
already included under the previous point? I therefore infer #5 to refer to
visible evidence only. Traditionally, I have viewed Supreme to disallow any and
all consumables, but I guess that is too strict. Especially when the objectives
directly calls for damage to be dealt. The sword was by far the “sneakiest”
weapon of choice. One overhead blow to an unalerted dog would kill it. It was
just a matter of finding good hiding spots. Blood stains would constitute a
clear bust to the aforementioned rule, so I had to redo the blows until no
blood showed up. The blackjack could’ve worked if the beasts had been possible
to knock out. Alas, they were not. The two patrollers by the chapel was taken
care of by the entry gate to Irvin’s sister’s house. The stationary beast by
the fallen metal beam didn’t alert to them dying. If one of the dogs was too
close, it would come looking, which was a clear bust.
Three more patrollers further south stuck fairly close together. I waited by
the archway close to the starting point for them to come by (see image). They
would occasionally get hooked on the fountain and spread more apart that way. I
had to wait a few loops before they were far enough apart not to alert. I
removed the bodies in between each death, although they usually didn’t spot
them. The dog in the rooftop apartment in the far south was already alerted to
the rat under the cabinet. This meant he needed 4 overhead blows to die. He
didn’t give any visible or auditory indication of alerting to my sword, so I
figured I was good here. At least he had his back turned the entire time while
I stuck to the shade. He was too caught up in his rat hunt to notice getting
killed I guess.
The last two were stationed in the alleys to the east. The one south of the inn
alerted to either of the nearby doors. This was a first alert growl, so plain
Ghost was good. Supreme had to find a different way. The last beast stood
ground just outside the dock gate. Two torches lit up the alley enough to
prevent me from reaching him unseen. I tried flinging rope arrows into the
wooden beams and tarzan my way along the ceiling, but he still gave a growl.
Plain Ghosters shouldn’t have any problems getting behind him for the kill. It
seemed like I needed a different way to access the dock for Supreme, then come
in from his backside. Alas, that mode failed not long after, when I realized
the beast gave a howl when the dock gate opened. There was no way around this,
as opening the gate was an objective. The only solution at this point was to
kill him from the front. A gas arrow or a fire arrow could’ve worked, but they
weren’t present in the mission. Broadhead arrows were useless as you need more
than one arrow and got detected after the first. I tried flinging a mine into
the dog’s feet, but it was far too loud and alerted him to hunt mode long
before it went off. If the ground had been silent or if moss arrows were
allowed, then I guess Supreme could’ve succeeded, but it wasn’t to be. Come to
think of it there were no moss arrows around either. Instead I took the first
alert and looked for a different way over the fence, to prevent additional
busts at least.
One crate took me over the fence south of the inn balcony (see image above).
From here I could access the back alley and kill the dog rummaging around the
trash. I then had to jump the fence again and bring the crate along to access
the outer wall to the south. From here I could reach the docks and kill the
last beast from behind (see image below).
Finally, I returned all the keys and the crate, and went back to the docks to
finish the mission.
Notes & Busts
- The beast by the dock gate gave a growl indicating a first alert when raising
the door. There was no way to kill him without alerts from the front, so this
ended up busting Supreme.
Klatremus' Supreme Thief Site - Walkthroughs, Loot Lists & Ghost
Reports
- 04-27-2012, 07:33 AM by Klatremus #270
Klatremus
- View Profile
- View Forum Posts
- Visit Homepage
![]() Gamer
Gamer
Join Date
Dec 2003
Location
Phoenix, AZ
Posts
203
![]()
FM: The Black Frog - Mission 4: The Lady and the Thief
Ghost - Chemical Success
Perfect Thief - Chemical Success
Supreme Ghost - Failed
Perfect Supreme - Failed
Time - 5:04:07
Loot - 125/125
Pockets Picked - 1/2
Locks Picked - 5
Backstabs - 0, Knockouts - 0
Damage dealt - 0, Damage taken - 0
Healing taken - 0, Kills - 0, Bodies Discovered - 1
Secrets - 1/9
Consumables - 1 Moss Arrow & 1 Invisibility Potion
See the entire report with screenshots here (FMs).
Loot list here.
Comments:
Another astonishing mission from Gaëtane! What I like most about this campaign
so far is the variety of atmospheres present. It is similar to the feeling I
got playing The Dark Project for the first time; something that unfortunately
got lost in Thief 2. You don’t get to play an outdoor, pagan, village mission
of this quality every day. Word is the concluding mission is even better.
The keepers wanted me to retrieve the glyph called The Black Frog. I wasn’t to
steal it just yet, rather just gather some information on it. I figured things
would expand as I went along.
One technicality to note first. Discussed some time back on the Eidos forums
was the interpretation of Supreme rule #2: “Complete all objectives.”
The question was whether this pertained to optional objectives and/or
hidden/bonus objectives, that is, objectives you don’t even have to disclose
(be aware of) in order to finish the mission. The entire ghosting community
present at the time agreed (after a few days discussion) on the following specified
wording for said rule: “Complete the mission without leaving any incomplete
(unchecked) objectives. Objectives declared irrelevant (a red circle) do not
count.” Essentially, this means whatever objectives are listed at any given
time are required for Supreme (whether marked as optional or not). This does
mean, however, that you can deliberately circumvent disclosing
objectives not necessary to finish the mission. This would come into play a
total of three times during the course of this mission. The objectives in
question were 1) finding a map, 2) saving the village chief, and 3) discovering
the treasure of the Children of the Black Frog. My plan was to attempt all
three, then trigger the readable linked to the objective’s disclosure after the
fact. If a bust incurred, I would simply skip it. For plain Ghost, all optional
objectives are exactly that, optional.
Grabbed the rope arrow on the shore at start. The initial camp with the rusty
lever posed no real problems. Snuck along the left rim and evaded the guards
that way. Creep-crouch-strafe is the fastest way of moving without altering the
light gem. It almost seemed the author was aware of this, as many situations
spawned first alerts if moving faster.
The Village
The village was a daunting challenge. A total of 8 guards were inside or at
some point within view of the central courtyard. Two had routes crossing the
bridge, but they were the least of my worries. In fact, the three stationary
swordsmen ended up being the biggest pain in the butt. Initially I thought of
entering east, but a wooden railing stopped movement in that direction. I
couldn’t mantle up it, and rounding the corner at the south end caused a
comment from the well guard. Remember, we’re doing Supreme Ghost here, so no
first alerts of any kind are allowed. Directing my attention to the west side,
it almost seemed too good to be true to evade the same guard’s looks over here.
But that’s exactly what I did. I had to creep-crouch through the weeds hugging
the rock (see image below). I was almost sliding up the rock at one point. The
slightest move out into the open would make the guard comment. I also had to
finish this move before the guards patrolling the route around the house and
past the well returned. I rushed in between the barrels here and hardsaved.
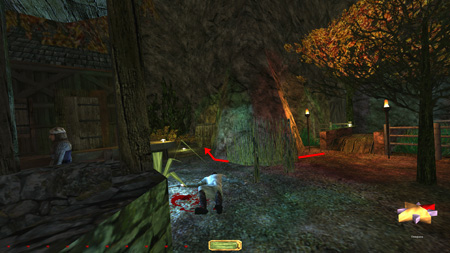
To continue on I found the only way was to mantle the roof. Rounding the house
corner left me too exposed. The only place to successfully utilize a rope arrow
was toward the east end of the eave (see image). There was an incropping in the
wall higher up that made the rope unreachable. It didn’t matter, as the
elevation made me darker. The roof itself was quiet also. I crossed to the
other house further south. Here the sound of the roof tiles reappeared. I could
slide down to the wooden walkway below unharmed.
From here I had to plan my moves (see image below). The only way to enter the
house with the rusty key was through the double window on the west side of the
building. However, passing the yard straight across from here caused comments from
the guard by the well. Instead I mantled the fence on the south side and
dropped down inches east of the large rock. This was just out of view of the
south-facing guard by the well. I could creep-crouch into the shade on the east
side of the wall. The mushroom kept me lit up, but at the wall’s short end I
was pitch black. Staying out of the fungus’ radiance, I crept up to the ledge
by the boat. This entire wall was black and I could easily enter the window
from here. On the second floor behind the cabinet was the key (see image). I
didn’t read the book as that would spawn the optional objective to find the
treasure of the Black Frog Children. I wasn’t sure yet whether that could be
completed within Supreme rules.
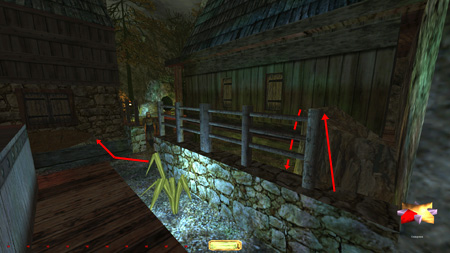
I had also skipped Keeper Gerald’s message from the shore in the beginning, but
I still wanted to attempt to steal the map in the shack south of the village.
The shanty key was in the basement of the tower. A stationary swordsman guarded
the main entrance. I couldn’t pass his view on the east side along the ground,
but the roof of the house to the south provided an alternate approach (see
image below). I could have dropped to the ground to the guard’s right and
picked the door, but that would leave the door needlessly unlocked. It’s not
against any of the Supreme rules, but I felt it in the spirit of that mode to
enter the tower differently. As it turned out, the alternate method was just as
easy. A rope arrow placed above the upper floor window could be reached with a
precise jump from the roof corner. Given none of the patrollers were near, it
spawned zero comments. The key was hidden underneath a bucket in the prison (see
image).
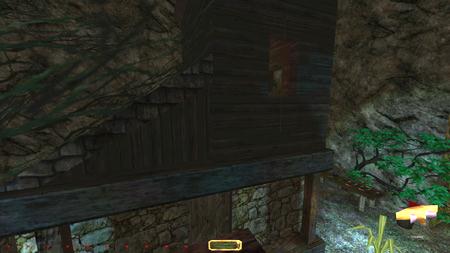
I utilized the eastern window on the main floor to exit. The outside patrollers
could see through these windows, which necessitated
intensified cautiousness. The canyon to the east had a single patroller, easily
dodged by mantling the grassy ledge on the left. The nearest corner was dark
and I could wait for him to pass. Lize’s father was especially wary in the
shack; a single stumble on the wood floor and he commented. I took my time and
stole the map (see image). The way back to the tower was equally unchallenging.
Dropped the key back in the basement and left through the west window this
time. Although the outside was bright, the stationary guards here failed to
comment.
Instead of taking the long way back around the village, I flung a rope arrow
into the tower wall and hopped onto the fence (see image). I could reach the
arrow from the top of the fence afterwards. The top surface gave a metal sound,
so the landing had to be soft not to cause alerts. After a few tries I found
the accurate height and trajectory. Dropping to ground level from here and
rounding the corner took more stealth. Inching off the fence bounced me out
into the yard a tad after hitting the stone foundation. This little
acceleration was enough to trigger a comment from the stationary guard. I
fiddled a bit with it before I managed to press against the wall after dropping
by the smallest of inching known to man. It didn’t cause any alerts this time
so I rushed into the dark corner to the north. From here the path back to the
bridge wasn’t too hard. I dropped into the canal and followed the waterway
west.
Children of the Black Frog
Before disconnecting the tower beacon, only one patroller was present. The rest
were locked in the temple. I had no trouble retrieving the spring wiring and
getting the lift up and running. I took the moss arrow from the tower’s bottom
floor also. I would need it later. Used the cave to get back to the main
entrance safely. About 6 or 7 new patrollers had emerged from the temple. The
gate was locked and the door to the lever was unpickable. The key was on the
temple keeper’s belt. I could reach it from the shadows by the tunnel easily
enough. I had worries that he would alert to it being returned, but he didn’t utter
a peep (see image below).
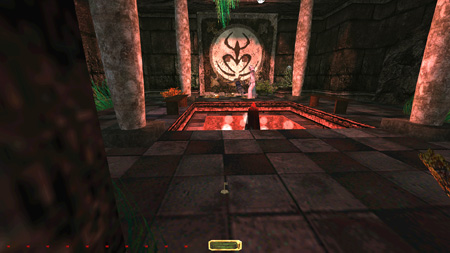
The optional objective (not yet disclosed) required teleportation to a
different section of the temple by frobbing the stone in the pool. It was
reachable from the encircling walkway. Beyond the portal was a torture chamber
with one caged zombie. He didn’t alert normally, only if wielding my sword.
Garrett gave a cue when frobbing the fountain of youth. Although the objective
didn’t show yet, it would now trigger as accomplished later, if I
could get out safely. Frobbing the stone from this side took me back to the
pool with the guardian. To my astonishment, there was no splash from the water.
I had assumed this a certain bust, so it was a pleasant surprise indeed. I
mantled the east side and with a little luck made my way back to the hallway.
The patroller didn’t have first alerts it seemed; instead he went straight to
hunt mode if triggered. I lock-blocked the gate door and returned the key
immediately. I didn’t close up the temple door. I figured it part as a script
and out of my control as a result of disabling the tower. After opening the
gate I flipped the contraption again and rushed out before it slammed shut
behind me. I also remembered to reset the lever on the outside. It was set to
the ‘open’ position from before; flipping it didn’t do anything, but was still
required by Supreme rule #7.
I got out of the river on the south side. I couldn’t jump the bridge fencing
without alerts, so I flung a rope arrow into the wood and ascended it from the
water (see image). I could mantle it alert-free, as mantling doesn’t register
as a speed enhancer. All I had left in the village was to return the rusty key
and read the book to trigger the already completed optional objective. I found
it incredibly much harder to sneak west along the grassy mountainside this
time. The well guard facing my direction commented every single time. It was so
tough I starting to doubt whether I actually had managed it before. Then I
found you have to hug the rock all the way from the torch by the bridge.
Garrett gets partly stuck to the material then, enough to avoid the comment.
Before reaching the barrels I had to do a small hop to get released, but no
comment spawned, surprisingly. I hid in the corner on top of the nearest barrel
before patrollers returned.
The rest of the village was trouble-free. I entered the house like before to
return the key and traversed the roof over to the tower guard. Jumped onto the
railing using a rope arrow further west and waited for the perfect moment to
leave. It took a bit of patience to hang around for the best time, but in the
end I crossed the bridge safely. I returned all the way to the starting shore
to read the scroll and get my second optional objective ticked off. Gerald’s
message was droppable, so I left it there.
The Sanctuary
I couldn’t find a way to enter the waterfall close to the main tower. The
swordsman there covered all entry points (see image). I tried every conceivable
angle, speed and height, but came nowhere close. I was thus forced to head
north up the stony ledges. This took me to the sanctuary entrance village,
which presented a choice. Further north would take me to the Old Black Frog
Temple. A side path from its entrance led me to the old mill, where my third
and last optional objective was present. A lantern guard and ill-placed
stationary swordsmen made that an easy Supreme skip. I doubt even plain Ghost
would’ve been able to pass that test. The temple would also have to wait,
although required to finish the mission. For now, I was headed toward the
sanctuary.
There was a scripted fight between two dogs and the four swordsmen that took
place as soon as I entered the farmer’s house here. I could drop via the west
edge of the roof without damage and trigger the incident in the living room. I
replayed the scenario until the dogs had killed all the guards. The last
remaining dog hunted its way north and ran into the other guards there, who
eventually killed it. They came looking but left fairly quickly (see image).
The rules explicitly state such scripted events to be allowed, as long as
Garrett isn’t seen or heard in the process. Supreme rules don’t mention them,
which made me assume regular Ghost rules in this case. Regardless, the
sanctuary entrance was now completely free of guards.
The bridge up ahead held one swordsman facing the entry doors and another
patrolling east-west. Despite the bright lights, I could easily sneak around on
the south side. Mantling up the rock here I could position a rope arrow into
the south end of the wooden frame above the brazier (see image below). The
outer ledge going east was metal, so I had to be careful of the guards below.
Two conveniently placed wooden beams made the following section passable. It
was tricky to jump off the aforementioned metal ledge without making noise. The
clue was to jump with the walk-key pressed instead of the run-key. That
sometimes eliminates the takeoff sound of the jump. The south tower had the
lever to the main gates, accessible via another rope into the wooden overhang (see
image). I really must praise Gaëtane for her mission design. Such incredible
effort has gone into making challenging yet realistic situations for sneakers
like myself. If placing the arrow onto the far eastern tip of the overhang, I
could mantle it on my way out and jump across the gap to the main sanctuary
building. Furthermore, there was a useful ledge above the main gate (now open).
I finally cushioned the drop onto the burning torch and fell to the ground
unscathed.
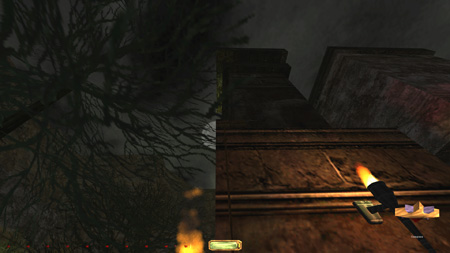
The sanctuary itself had four more dogs. One was stationary, staring straight
at the entry door. Another was patrolling the same area, doing fast clockwise
loops. The south side was out of the question, due to an abundance of light
sources and said patroller. The north looked more promising. The stationary
guard gave a first alert before reaching the hall though. The picture below
shows the furthest I could move without any growls. No matter how slow I went I
entered a patch of light from the surrounding torches. It was tough to dodge
the patroller too once I was out of view of the sentry, so I started looking
around for other alternatives. The only likely way to avoid the alert was
reaching the walkway above. The northwest corner had a possible mantle point,
between the wall and the nearest statue. If I could find say three boxes, I
might be able to reach that ledge unseen. It was definitely worth a shot, as I
saw the rest of the sanctuary as potentially Supremable. It sure would be nice
to evade that first alert. I decided to reload and head for the fishery
instead. I might be able to find what I was looking for there.
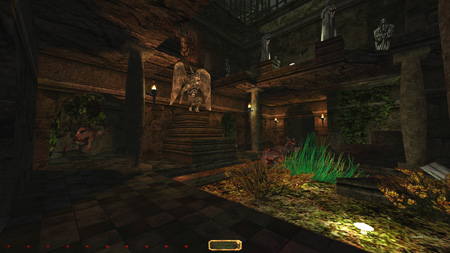
I could enter the waterway underneath the bridge through the hole in the
northeast (see image). There was a small outcropping that prevented sound when
dropping. From there I inched into the water. If slow enough it didn’t make a
splash. The patroller above caught me a few times when heading for the cave
entrance. It was tough to hear from underneath. I learned the safe pathway
after a few tries.
The Abandoned Fishery
I grabbed all the loot and passed the frog unseen. Entered the westernmost
ruins by a rope arrow into the northeast corner. I dropped inside and could
time the spider patrol on the ground floor (see image). The adjacent building
had a small spider patrolling two rooms. To avoid her and the big spider
stationed in the next room, I had to follow her into the corner where she
turned. There was nowhere to hide once she returned. She normally turned left,
so I slipped right into the corner with the barrel (see image below). I had to
be very close, otherwise she’d alert when pivoting. Many times
I got a first alert from the floorboards creaking. Crouching while tapping the
run-key got me past her in the end without any chirps. I got quite good at this
method after a while, and I needed to be for later.
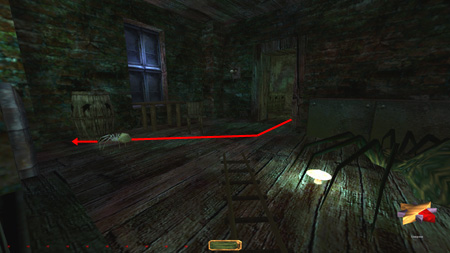
The lever for the basement gate was upstairs. It was in a tiny alcove on the
wall, quite difficult to see. My three needed crates for the sanctuary stunt
was also located here (see image). I didn’t bring any right now as the lights
were on downstairs. Instead I watched the guard’s beheading and opened the
tower beacon entry from the basement. Then I went back upstairs and reset the
gate/lights and brought along the first crate. I left it outside away from any
patrols and flipped the now accessible beacon lever. I then had to return to
the basement to close the entry in the same fashion as before. I brought along
the second crate on my way out. Then had to return for the last crate a third
time. Tedious, but worthwhile. I left all the crates on the shore in the frog
cave (see image). I couldn’t enter the water from this side; I had to utilize
the alternate exit to the main tower and backtrack to the sanctuary like
before.
Sanctuary … Again
I fetched the crates from the canal one by one. Brought them into the courtyard
and started stacking on the north side. The stack went easy enough without
alerts, but the jump was tougher. I’m not talking about finding the exact spot
to mantle, although that was also tough, but instead there was a mushroom on
top of the walkway that lit me up at the apex of the jump. I studied the light
gem closely throughout the hop, and there was a slight yellow flicker midway
through the air. This gave a growl from the stationary dog below. I tried
jumping from various angles using different degrees of velocity, but there
wasn’t much room to work with. The mantle was too narrow to allow for
flexibility in the variables. Instead I looked to the south side. I noticed
there was no mushroom on that side, so if the stack was possible, that might
just work. I couldn’t stack the crates as far east as I could on the north
side, due to this side being brighter at ground level. The dog also heard the
crates knock together here. I’m not sure why that didn’t happen on the opposite
side, but I think it might result from him sliding to his left. These dogs
exhibit the greatest level of fidgeting I have ever seen. They knock the hammer
acolyte from Cragscleft right out of the woods. Not to mention Angelwatch’s
golden boy. I could still create the stack, just a tad farther west. From the
top I needed to find the perfect angle and speed to make the mantle successful
(see image below). I think I tried 30-40 times before nailing it, but no first
alerts spawned and Perfect Supreme still intact!
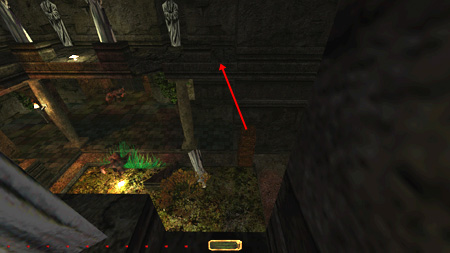
I crossed to the north by mantling the gap by the gargoyle. The secret door
alerted the patroller unless he was over by the inner sanctuary doors. I
dropped through the hole and planned my way over to said doors. I found a
perfect shadow in the hallway outside the tomb, along the west wall (see image).
As the dog passed, I creep-crouch-ran over behind the pillar before he swung
north. I needed to make my way to the doorway shadows before he returned.
Opening the double doors also had the potential of alerting the patroller on
the other side. I was lucky this time and received no remarks. I closed the
door when both were away, just to make the progress easier. Either side of this
yard had dark alcoves, perfect for traversing the path. I reached the back room
without growls and could shut off the tower beacon here. Used the same method
to return to the doors.
Back on the north side I had to plan differently to return to safety (see image
below). The southeast corner by the door gave me enough shade to observe the
patroller without comments. Since he traveled clockwise, the path to the east
hallway wasn’t as straight-forward as before. I needed to use the pillar to the
right to block his view. Then, as he passed the pillar going south, I inched
north a bit to stay out of his view. If not, he would catch me as he emerged
around the pillar’s south side going west. As he headed north again, I could
reenter the perfect shadow pictured to the right above.
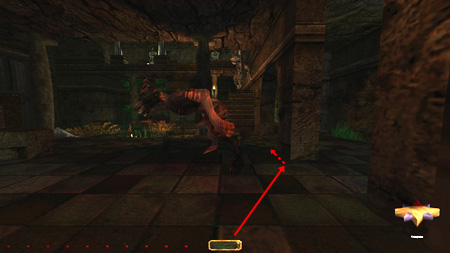
I couldn’t drop from the south walkway where I mantled up. The ground was too
lit up and Garrett can’t land in a full crouching position. He does a little
half-stand, despite pressing the crouch button. That was enough to spawn a
growl from the stationed dog. Instead I could drop alert-free from the
equivalent north side, where the above picture was shot from. The mushroom that
previously made me unable to mantle this side was blocked by the statued
pedestal. If hugging the edge and creep-sliding off it, I never entered its
patch of illumination. Now all I had to do was bring the crates. The sanctuary
passed without a single first alert!
The Old Black Frog Temple
I left the crates in the shade outside the sanctuary entrance. I had a feeling
I mightn’t be done with them. Remembered to close the sanctuary’s main gate
also. The only place of significance left to venture was the old temple to the
north. It brought the first, yet inevitable, Supreme bust. The only way to
unlock the entrance (and finish the mission) was to shoot the mouth of the
incropped face with a moss arrow (see image below). Nothing else would unlock
the sliding monument. This directly violates Supreme rule #6 which specifically
mentions moss arrows as being forbidden. No ifs or buts about it, so there it
was. Personally, I think there should be a clause in the rules to allow
consumables for intended mandatory puzzles, as long as you don’t alert other
enemies in the process. But hey, I don’t make the rules now, do I?
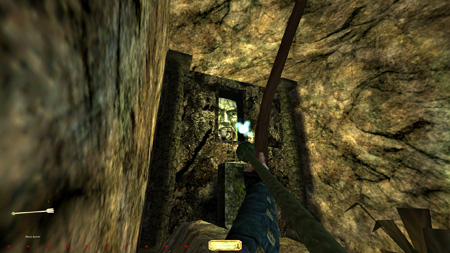
The temple itself posed some serious problems. In order to access the beacon
lever in conventional fashion, I had to flip two skulls, each behind puzzles in
chambers on either side of the main cave. One of those skulls was protected by
a zombie-like monster, who I was required to kill so as to advance (see image
below). When doing so, a gate raised providing the exit. I could block said
gate with crates or boulders, but that blocked my own exit also. I wasn’t able
to squeeze through with the captured configuration at least. Even so, that
didn’t remove the problem regarding the zombie. He was the most alert-sensitive
enemy I have ever come across. He appeared at the end of a hallway some
distance away. I think I was able to reach a dark spot in the opposite hallway
(leading to the abyss) before triggering hunt mode. I cannot be sure, as he
still kept looking for me. I think he might in fact have spawned in second
alert state. If giving up, he retained a position in the middle of the center
room. Normally he faced south, which was bad. One time he stopped like in the
picture, towards the northwest. I experimented with him in this position, but
found no way around. The moment I crept into the light behind him, he turned
around and started slashing. I waited for a good 10 minutes to make sure he was
fully settled, with the same result. There was no other place to hide where he
wouldn’t find me. I needed to be pitch black also, otherwise he would sniff me
out like a hunting dog. I thought perhaps I could’ve nudged him forward to the
corner, then been able to sneak down the opposite hallway and finally get past
the crates somehow. Of course, nudging is only allowed as a last resort in
regular Ghost, being considered an engine exploitation. A different last resort
exploit was transmigrating the gate which closed off his hallway. If I could
get through, I would never even have to trigger his presence. There were wooden
frames on the walls under the ceiling, and I could use that to swing myself
into the frame of the gate. I got all the way to the opposite side but couldn’t
release myself from the last layer. I tried for a good while but gave up in the
end. I would’ve had to penetrate it the opposite direction afterwards anyway. I
fiddled with this situation for so long I ended up taking a break for a day or
two. Perhaps new ideas would come to me.
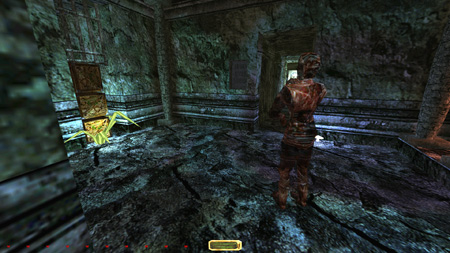
And one new idea did come. It had actually been in the back of my mind all
along, but never really seemed like a feasible option. Could it be possible to
stack my way directly to the beacon lever? It seemed like an endless distance,
but there was a ledge underneath that could pose a solution. The general
problem when making big stacks is that you need additional side-stacks in order
to reach the stackable items. The taller the main stack, the more extra items
you need, an exponentially baffling enigma. But if I could throw items up to
that middle ledge, then no more than the main stack might even be necessary. I
would be able to reach the items there as I ascended. An additional help are
stackable items that stick to your inventory list, such as potions and fruits.
There weren’t too many laying around, but perhaps enough to help me out. All
large stacks’ basic unit is the crate, and I already had three over by the
sanctuary. I would need quite a few more, but there were none available
anywhere close. The old mill held a few, but that entire area was completely
inaccessible. Although intimidating, the village seemed to be my only option.
It felt like going back into the lion’s den.
I experimented with the save from my blackjack run and found that at least four
extra crates were needed, plus a few smaller items. The three boxes in the
village’s tower basement were easy picks. I also chose the fruit atop the
waterfall outside the village, and the invisibility potion in one of the
village attics (see image). When entering the village to get the crates, I
found to my astonishment that you can mantle the fence along the mountain to the
left after all. That would’ve saved me much trouble last time around. It was a
tricky mantle and discovered merely as a fluke, but highly repeatable once I
knew how. I still couldn’t mantle it from the east side though, but I still had
my previously developed rope jump from the roof eave. To prevent repetitive
bridge-crossings, I flung the crates across the canal from the south side
without alerts (see image). I made sure not to place any crates along patrol
routes, as that conflicts with Supreme rule #7. That rule is a bit tough to
interpret, but I think it refers to crates placed in shadows near a
patrol as ok, and crates placed in direct light as ok if nobody patrols near
it. I kept all my crate-drops to the shade, just to be on the safe side. I know
Supreme was already busted, but I was determined to keep busts to a minimum.
For the fourth and final crate, I had planned on visiting the shack where
Lize’s father was held captive. I was pleased to find several crates there, but
none could be returned without triggering alerts. I even tried dropping the
crate up by the entrance and push it down the slope, but he alerted every
single time. Gaëtane must have deliberately cranked up the sensitivity on some
of these enemies. My only option then was going back to the Children of the
Black Frog area. There were a few crates in the old ruin at the end of that
section (see image). This of course meant I had to retake the rusty old key
from the village also.
Hauling everything into the temple was a long and tedious process. The guards
by the temple entrance never gave first alerts it seemed. They jumped straight
to hunt mode. Perhaps they were in constant first alert state due to the dog
they previously killed. They were still as easy to pass as any regular guard
though.
Inside the temple I stacked all seven crates up on the middle ledge like
previously explained. I had to actually throw them into the air judging their
trajectory, but with a bit of practice it went just fine (see image below). I
started with the two boulders from the water. They had to form the base as
their sheer weight broke anything underneath. All the crates were now reachable
as I kept building my stack. I finished with the fruit and the invisibility
potion, eleven items in total. The mantle from the top was anything but easy. I
had to reach the ledge at the very apex of the jump. I had to rebuild the stack
once to make it work. I think I was too close to the ledge the first time. The
relief was sensational once I finally pulled myself up. Hearing the ‘objective
completed’ bell as I pulled the lever was equally satisfying (see image). To
get back down I went back onto the stack and then slid via the ledge back to
the walkway.
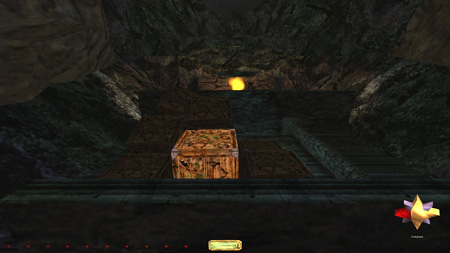
The view from down below was mesmerizing:
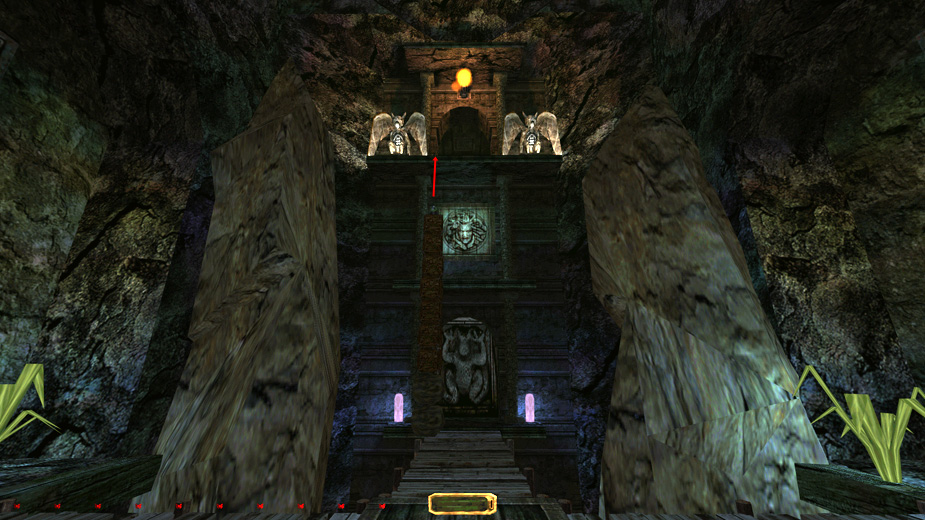
The Sentinel Tower
My final job was to return everything to their respective locations. That
didn’t pose any additional challenges compared to before. One of the patrollers
in the village had gotten stuck to the tree by the bridge (see image). Luckily,
he was facing southwest and no problem to sneak around. It actually made
returning the crates easier. Getting into the canal silently was the only
tricky part, but nothing major to report. Remembered to return the rusty key
and the fruit from the waterfall also.
The tower was now open. All four beacons had been deactivated. The lever for
the side gates couldn’t be reset, as that would prevent further advancement. I
guess this is another Supreme bust, but that mode was busted already. The
Charaka spawned right outside the castle entrance as I crossed a certain point
early in the hallway. It didn’t spawn in hunt mode but came running to a
certain spot before halting (if unalerted). It also had radically increased
alert awareness. The entire hall was lit, save for a few shady crannies behind
the side pillars. There was no way to reach the room at the end without second
alerts. I had to use an invisibility potion to make it there safely (see image
below). I felt very very cheated not to get a regular Ghost success here, especially
after all the work at the temple. I think there should have been a way to avoid
Charaka’s trigger or sneak past him. But alas, such is life.
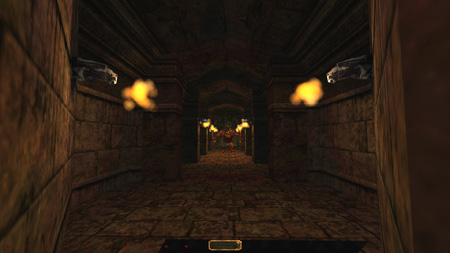
It didn’t take away from thoroughly enjoying my time through yet another
Gaëtane masterpiece! I feel fairly proud of my accomplishment despite the last
hiccup. No first alerts was a challenge I didn’t think I would pass, but the
dark engine showed its versatility yet again.
On to the frog…
Notes & Busts
- Had to use a moss arrow to enter the Old Black Frog Temple. Violates Supreme
rule #5 and is therefore a bust.
- Used an invisibility potion to escape the Charaka’s view when ending the
mission. Necessary to save plain Ghost. Renders the stats a ‘chemical’ success.
- Couldn’t close the gates accessing the area behind the sentinel tower. Unsure
whether this directly follows the objectives. It didn’t matter, as Supreme was
already busted.
- Setting off the trap in the last room is arguably another Supreme bust.
However, it follows the intended storyline and is the final mission-ending
trigger. If Supreme had relied solely on this event, I wouldn’t have called it
a bust.
- The body discovered is probably the final dog that attacked the guard outside
the temple entrance. The other patrolling guard here must have seen its body
later.
Klatremus' Supreme Thief Site - Walkthroughs, Loot Lists & Ghost
Reports
- 04-28-2012, 02:38 PM by Peter
Smith #271
![]()
Peter Smith
- View Profile
- View Forum Posts
![]() Moderator
Moderator ![]()
Join Date
Feb 2000
Location
Land of Enchantment
Posts
2,698
![]()
Bravo, Klatremus! ![]()
As you know, I was a tester of this mission. As a ghoster, I try to inform
authors of unnecessary busts such as banners that need to be slashed. But this
mission was one I thought was probably a ghost bust because of the apparent
need to kill the aforementioned zombie / mummy. I do not complain about lack of
ghostability when I think the game play is well designed, as it was in this
mission. To me, a mission does not have to be designed to be ghostable. Who
knows, maybe someone will come along with a method.
I tried to avoid that zombie many ways as you did, without success, but I did
not try the stacking. I don't think I am dedicated enough to have done the
stacking even if I had thought of it.
So, congratulations on your persistence and success.
FYI, I ghosted all other aspects of it, as you did.
To me, this was the most fun mission of the five, but I can see how some might
like #5 better. I eagerly await your report of #5.
"What we've got here is a failure to communicate", the warden
(Strother Martin), Cool Hand Luke
- 04-30-2012, 02:58 PM by Klatremus #272
Klatremus
- View Profile
- View Forum Posts
- Visit Homepage
![]() Gamer
Gamer
Join Date
Dec 2003
Location
Phoenix, AZ
Posts
203
![]()
FM: The Black Frog - Mission 5: The Black Frog
Ghost - Failed
Perfect Thief - Failed
Supreme Ghost - Failed
Perfect Supreme - Failed
Time - 1:39:43
Loot - 710/710
Pockets Picked - 1/3
Locks Picked - 4
Backstabs - 2, Knockouts - 0
Damage dealt - 40, Damage taken - 0
Iron Beasts Destroyed - 2
Healing taken - 0, Other Kills - 0, Bodies Discovered - 3
Secrets - 5/9
Consumables - 1 Invisibility Potion
See the entire report with screenshots here (FMs).
Loot list here.
Comments:
The campaign culminates in the best mission of the bunch. And that says a lot,
given the quality of missions 2 and 4. Unfortunately, it contains several
forced Ghost busts, but that doesn’t take anything away from the wonderful
experience I’ve had through this mission pack. I will take excellent
non-Ghosting missions before crappy Ghost-friendlies any day of the week. Thank
you Gaëtane!
Since Emilie trapped us at the end of the last mission, we found ourselves
kidnapped in a locked bedroom. The objectives were simple: 1) Find lockpicks,
2) find a sword, and 3) find the Black Frog.
Manor
Entered the adjacent bedroom easily enough. The dog in the courtyard could spot
me and hear the window lockpick, so timing was important. The windows on the
south wall led to multiple patrollers on the inside. They needed to be well
timed, plus their comments were difficult to hear. I fetched the invisibility
potion above the courtyard shed seeing as I was here (see image). It was most
probably needed later. If not, I could always return it. Found the proper
lockpicks and started looting the house.
Traversing the upstairs was straight forward. First, I picked up the map to
help me navigate. I could drop it back immediately, while still having it
accessible from the menu. Photographic memory, Garrett? Found two hidden coin
stacks in that same bedroom (see image).
I wanted to do as much as possible before overhearing the conversation from the
barracks. I basically cleaned the proper for loot, save the last piece in
Emilie’s apartment. The only real tough piece was the purse on the beam in the
great hall. I found you could jump on top of the chandelier and grab both the
purse and the rope from the shade (first image below). This helped me a lot. To
get back down I jumped onto the west side of the pitch black main rafter and
flung an arrow into the next one north (second image below). Attached to this
line, I could jump onto the wooden windowsill in the northwest, grabbing the
arrow along the way. There was a patch of shade here also. Then dropped to the
floor silently.
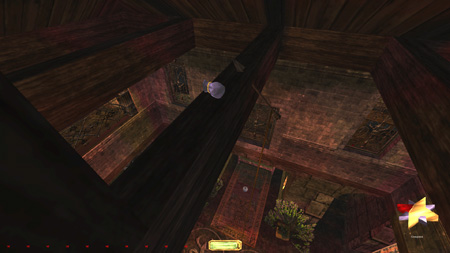
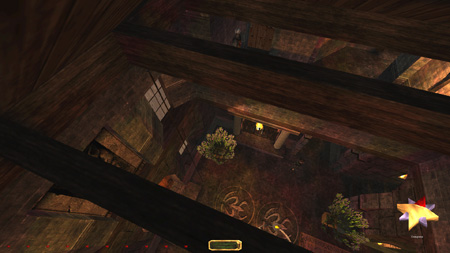
The main floor was definitely more populated than upstairs, but there were plenty
of shadows and patrols long enough to present frequent opportunities of
relocation. I eventually found my way to the guards’ quarters which presented
the first Ghost bust. A pickable door was boarded up and necessitated property
damage to advance. I tried transmigration using my rope arrow, but couldn’t
even get properly attached to the boards. There was no way to enter the door in
the front yard using this method either. I had to slide the painting back up to
avoid alerts when breaking the board.
Listened to the conversation and stole the key off Bazil. It stuck to my
inventory and couldn’t be dropped back. Entered Emilie’s apartment and used the
mirror key to enter the frog world.
Black Frog World
I guess you can argue busts in this place not to count, as it is simply a
figment of Garrett/Emilie’s imagination; a nightmarish reflection of reality. I
still treated it as a normal part of the mission. Reading the first book was
necessary to spawn the objective to escape. The other keeper messages were needless.
Frobbing the eyes made a sound that alerted anyone in the near vicinity. The
creeping skeletons didn’t have first alerts, but they made slow hunt and alarm
movements. The Charaka had all the alerts like normal. The first eye was in the
room where I found the first old pen lockpick in the beginning of the mission.
I waited for Charaka’s thumps to disappear and then frobbed it. This made the
northern part of this floor accessible, where I found the second eye in the far
northwest corner. This spawned a hammer haunt in the adjacent room. It was in
hunt mode to begin with, although I couldn’t tell whether this was my doing or
a scripted event. It settled down to restful mode after a while. I could
utilize the south wall in this room to exit safely (see image below). I didn’t
consider slashing the big eye further east as property damage, since I took the
small eye into possession afterwards. Although it did count as 1 backstab, 10
damage dealt and 1 iron beast killed in the stats. I guess anything considered
damage technically constitutes a bust, so I reported it as such.
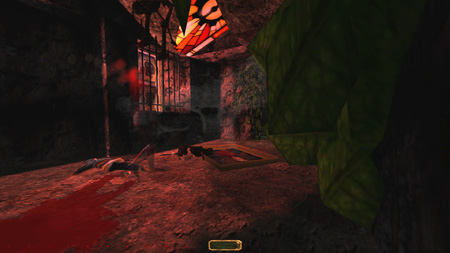
The eye could now be used to break the seal that protected Emilie’s apartment (see
image). This looked and sounded like glass breaking, so more property damage
was inflicted. Note that property “damage” doesn’t show up in the stats as
such. It is just a term indicating destroyed objects rather
than organisms. Replaying the scenario I also noted there were several
variations of the sound emitted when breaking the seal. Some were louder than
others. The quieter (or less noisy) one didn’t alert the Charaka or the
skeletons if they were some distance away. I was determined to avoid being seen
or heard despite the prior busts. I see those are “harder” busts to the spirit
of the Ghost mode than property damage or forced busts that doesn’t involve
enemies.
Inside the apartment the doll upstairs spawned a total of five frogs by the
downstairs entrance. Not only that, but the entrance got blocked and an
alternate passage had opened up in the nearby corner. Like I said, I was
determined to avoid as many busts as possible. This was the reason for bringing
the invisibility potion along. I could travel a fair ways down the stairs
before hitting the lit-up section (first image below). Drinking the potion I
quickly inched down onto the carpet and made a hop onto the table to the left.
Any sound on the wood triggered chirps from pretty much all the critters. After
a few tries I managed to reach the dark portion of the table just in time for
the potion to wear off (second image below). I know frobbing the painting in
the next room would kill them all, but at least that was out of my control. It
didn’t count as further kills or more damage either.
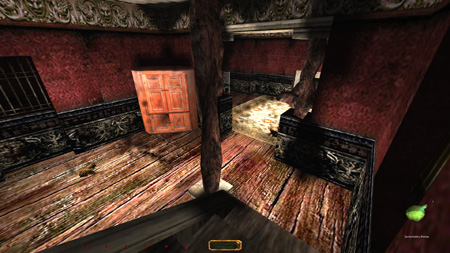
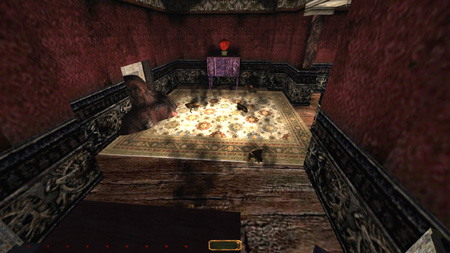
Two new areas had now opened up. One led to a basement section with a doll
part. The floating heads were the creepiest thing I’ve seen in a long time.
They didn’t have first alerts and dealt damage upon impact, even if
unintentional. There were several places around the cage room where I was safe
(see image below). I had to flip two body parts to access the doll. Made sure
to flip them back afterwards.

The second section was accessible from upstairs and led to the attic. It had
one hall where you had to jump-mantle a rather large gap in the floor. Another
floating eye was down below, but I don’t think he heard my feet tapping the
tile as I leapt across (see image).
The two doll pieces had to be placed in the garden lava to spawn Emilie the
Doll Monster. She spawned in hunt mode but I was still determined to avoid
alerts. I made sure to drop the pieces when the Charaka was roaming upstairs,
away from possible alerts. He was the least of my worries now though. There was
no time to hide between the second piece hitting the lava and the doll
appearing; that trigger was instantaneous. Neither was the doll piece
throwable, which would have made it possible to spawn her while concealed.
Instead I placed the second piece (the head) on top of the fencing and looked
for items to toss onto it, thereby pushing it into the lava. The flower pot in
Emilie’s apartment was the perfect tool (see image below). Leaning out from the
tunnel shadows, I could hit the doll piece into the burning liquid, while the
pot landed in the snow to the west. I eventually found the precise angle in
order to make that scenario happen repeatedly. The large doll appeared and
hunted for a while. It took about 30 seconds before she settled. I replayed the
toss until she stopped with her back turned, facing west along the southern
wall. I waited for her to settle further and snuck out as slow as possible. No
movement so far. I crept up to the wall, drew my sword and whack! She
disappeared instantly and left behind the frog key (see image). This was
obviously a bust, adding 1 backstab, 30 damage and 1 iron beast kill to my
stats. However, I was able to do it without a single additional alert. I
returned the flower pot to its original location afterwards.
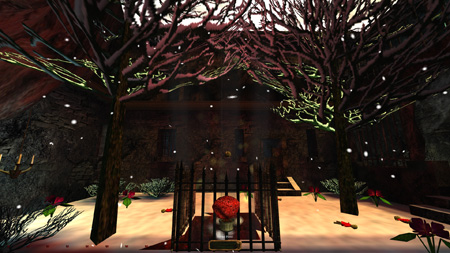
Back In the Manor
Returned the mirror key and got ready to finish things off. Belmont’s men had
now invaded the premises, and things looked distinctly different from before. I
imagine the various scenarios can play out in different ways, but things were
pretty straight forward for me. The dog got tempted inside where it fell to a
swordsman. I moved counterclockwise and entered the Priest’s Temple. Two
guardians had spawned protecting two keys. I grabbed both quite unbothered. The
inner patroller had a stop at either end of his route, making things
surprisingly easy. Neither of these guys first alerted.
Made my way to the upper floor via the kitchen. Found Garivaldi’s negative
crystal behind a panel in the corner of his bedroom (see image). Lock-blocked
the tunnels door before I returned both keys to the temple. No big deal. The
inner patroller didn’t do the stops along his route anylonger. Not that it
prevented me from moving unalerted.
Managed to prevent the Charaka from appearing, though I don’t know how. I crept
slowly through the halls, along the left side. When I reached the slope, I
walked like normal, and I never saw or heard it. This was a relief, as I
would’ve had to cover the place with moss to prevent busts. Nevertheless, I was
free to exchange the blue crystal with the red one. I could flip the gate lever
twice and still make it up the ledge if mantling (see image). The ladder was
too slow.
The ending was highly rewarding. Emilie got what she deserved. In retrospect,
mission 5 was more fun during normal play than Ghosting. Mission 4 was the
other way around. Despite all the busts, this was the perfect ending to a
superb mission pack. J
Thank you for one of the highlights of my Thief career, Gaëtane!
Notes & Busts
- Had to break one of the boards blocking the door to the basement. This is
required to overhear the conversation between Emilie and Bazil (I guess it’s
more of a monologue than a conversation per se). This is property
damage and a bust to all modes. [Also couldn’t prevent the door from
disappearing, but that is no bust.]
- The hammer haunt in the frog world seemingly spawned into hunt mode. I am
unsure whether this was a scripted event or as a result of me frobbing the eye.
I vote for no bust here.
- Slashing the big eye counted as 1 backstab, 10 damage dealt and 1 iron beast
killed in the stats. More Ghost busts.
- More property damage was inflicted when breaking the “seal” to Emilie’s
apartment in the Black Frog World.
- Used an invisibility potion to avoid the frogs in Emile’s apartment after
frobbing the doll upstairs. I valued not getting seen more than not using the
potion.
- Had to kill Emilie’s doll beast in order to retrieve the frog key and escape
the dream world. This was a bust, but was completed without any further alerts
or violations to the rules. 1 backstab, 1 iron beast destroyed and 30 damage
got added to the ending stats.
- Breaking the frog mirror to leave the Black Frog World might also be
considered property damage, and if so, another bust.
- The bodies discovered are from the clash with the Belmont guards. It had
nothing to do with me.
Klatremus' Supreme Thief Site - Walkthroughs, Loot Lists & Ghost
Reports
- 07-24-2012, 03:32 PM by skacky #273
skacky
- View Profile
- View Forum Posts
![]() Gamer
Gamer
Join Date
Jul 2012
Posts
41
![]()
Hey everyone! It's my first post here, and you ghosts gave me the courage
to make my own reports, so here you go.
FM: Augustine's Revenge
Game: Thief Gold
Ghost: Success
Perfect Thief: Success
Supreme Ghost: Failed
Perfect Supreme Ghost: Failed
Time: 2:03:31
Loot: 14482 out of 14482
Pockets picked: 10 out of 10
Locks picked: 14
Bodies discovered: 0
0 knock outs, 0 kills
0 damage dealt, 0 damage taken, 0 healing taken
For my first Ghost report I decided to tackle a tremendous mission, Augustine's
Revenge by Bryan Gleason (bbb) for Thief Gold. It's definitely one of my most
favorite Thief Gold fan missions, and probably one of my favorite fan missions
period. I knew right off the bat that Supreme was absolutely impossible, but I
wondered if Perfect Thief was possible. And, well, it is!
I started in a small courtyard with a few tools in my inventory and a locked
portcullis in front of me. Right next to me up a flight of stairs was a shutter
I could open, and behind it I found some broadhead arrows and a healing potion.
I didn't need these so I didn't grab them. In front of me was a door I could
open with an archer inside and a lever. This lever opened the portcullis so I
could proceed. I had to be careful though, because the exit was in bright light
and the manor guards across the canal could see me if I moved to soon or fast.
I decided to stick to the wall and go in a tunnel where two servants bragged
about a certain Maggie Mae Lord Robert was having an affair with. Sounds like
it could be interesting for Augustine's plot! After their little chat, I moved
to the end of the tunnel where I encountered my first Supreme bust. Bam, as
soon as that! A stationary archer in a tower on my left gave me a first alert
as soon as I walked outside the tunnel, since there was a very bright torch on
my left. I carefully hugged the wall on my right and crept to the safe, safe
shadows where I could move around freely. At the end of this little area was a
dead-end with a barrel. I jumped on it and discovered a neat little cache with
some goodies inside a chest. Now, on to that archer.
A Bafford sergeant also patrolled the area and carried a purse I pilfered. I
waited for him to turn around and went upstairs to the archer's tower. He had a
key I picked and dropped at the entrance of the tower, since he went into
search mode if I dropped it too close to him. That key opened the arsenal in
the tunnel where the two servants had a chat earlier, but since there was only
equipment inside I skipped it altogether. I returned downstairs where I
followed the slow Bafford sergeant and waited for him to turn the other way
again. I grabbed some loot from an open window and dropped down near a slow
patrolling Bafford archer underneath me. I saw a corpse in a courtyard and
decided to get close to it. Looks like some girl fell to her death from the
tall walls. Or did she? Either way, I did not tarry and resumed my progress. My
next step was the Gates & Co. Warehouse on the right in an X-shaped
crossroads. More slow guards that were easily avoided, and I also stumbled upon
a nicely hidden area with loot!
I decided to break into the warehouse from the back door. I had to pick the
lock and that door couldn't be re-locked in any way, so no bust here. I found a
chest under a flight of stairs as well as a secret room that could be opened
with a switch under the owner's desk. Inside was a nice amount of loot, but
sadly I couldn't close that door no matter what. Another Supreme bust, sad but
true. I got out of the warehouse the same way I broke in and decided to head to
the inn nearby. After another little chat between two guards, I broke into the
inn. I also had to pick the lock, and again there was no key to re-lock it.
Inside the inn I found some loot and a papyrus. I returned to the X-shaped
crossroads and took the left path to an area called West-End. I took to the low
rooftops and got to a hidden room with a lot of loot and a cryptic message sent
by Lord Robert to a certain Jerry. Hmmm..
I carefully dropped down and shot a rope arrow in a wooden platform in order to
get around a stationary archer. In front of me was a cashbox in a window with
some goodies in it, but I had to time the jump correctly since there were two
patrollers nearby. I thought dropping down would be tough since I was pretty
high above ground, but I turned out to be cake, I just needed to watch my step
and run fast enough. I managed to drop down without making a single noise. I
soon arrived in another area with a water tower. In front of me was a locked
gate and a wooden archway. I shot a rope arrow in it and went up. Near that
archway was a cache with some loot and a papyrus. I waited for the patroller to
pass by an dropped down nice and quiet. Then I shot a rope arrow on a wooden
platform again and mantled on it. Now, there was a stationary archer in a tower
facing the water tower and grabbing the loot inside a room on my right spawned
a first alert from him. I think I managed to get there without triggering a
first alert by moving VERY slowly and hugging the wall, but I may be wrong. My
memory isn't too bright on that. I'm planning on recording another attempt and
put it on Youtube so I'll definitely know if I managed to do it. But I digress.
After grabbing the loot, I climbed up the ladder, but as soon as I reached the
top that archer gave me a first alert. I was actually worried plain Ghost would
be busted since I was in bright light, but it turns out he only gives a first
alert. I had to accept it since there is no way I could have avoided it, and I
took the plunge inside the tower. The splash didn't alert the archer nor the
patroller down below, so I was good. After a nice swim I climbed up another
ladder and arrived in another area. The nice ambient music of Assassins played
and I knew I was in the right mood for taffing! Now, I was definitely on the
Thieves' Highway and a merchant walked around in circles in the streets below
but he didn't alert to my presence, so I could make as much noise as I wanted,
which was a blessing since the floor here was metal. I dropped down and grabbed
some loot off a bathroom below me.
I soon arrived in another area with a big high voltage tower in the middle of
it. Two patrollers here, a Ramirez archer on the left and a Hammerite on the
right. The Hammer walked in circles on a metal platform and went inside a small
building. I followed him and dropped down on the metal as quietly as possible.
I then followed him inside and grabbed some loot along the way. As soon as I
was outside following him, I noticed a locked door on my right. I had to pick
the lock and went inside. I found two empty bedrooms with loot and I got out
after filling my pockets. The Hammer was inside the building so I was free to
move a bit faster and make a tiny amount of noise. I mantled on the high
voltage tower and began to proceed to a small O-shaped set of corridors with
tiled floors and a patroller inside. Tons of loot to grab here, and plenty of
shadows to hide in. That area was cake. I also stumbled upon a cache full of
loot inside a fireplace. Looks like some guy has been stealing from the lady
living here; but I didn't care. That loot was mine now.
I had the choice to go upstairs or open a door leading to a small courtyard
with a patroller. I took the latter and picked the lock. No way to lock it
again. I followed that patroller and went inside a small building with a ledger
and a key on a table inside. I had to be careful since there was another dude
patrolling behind a locked gate and he could alert to my presence. The key,
named Strawberry Fields key, opened a nearby portcullis. I decided to break in despite
the alarming ledger, and soon found myself in the company of two patrolling
zombies. They had a preset route but their movement was random and erratic.
There was nothing on ground level so I followed them and shot a rope arrow on a
beam from the shadows. I went up on the roof and jumped across. Up on that wall
I found a way inside an attic, and from there I found a cache full of golden
nuggets and other stuff. Nice! While getting in was a piece of cake, getting
out turned out to be much, much more complicated. The zombies could easily see
me and the wall was too high for me to drop down without taking damage. I had
to shoot a rope arrow in the beam again and then jump across and mantle on the
tiled roof without making noise. From there I grabbed the rope and carefully
descended. The height was low enough for me to retrieve my rope arrow and drop
down without making a single noise. I then got out of Strawberry Fields, locked
the portcullis and returned the key on the table.
I now carefully went back to the tiled corridors and resumed my progress. I
found some loot in a study and in a very dark bedroom. I soon arrived on some
other rooftops with a patroller nearby on metal floor. I couldn't see him but
he was making a racket. There was another patroller inside the building in
front of me but avoiding him was so easy I don't know why I'm mentioning it. I
grabbed some coins from a window and mantled on the Crayman tower where that
dude on metal floor was patrolling. He had a very, very short route so I had to
be very quick. I opened to door, shut it and climbed down a ladder. No problem.
At the end of the two ladders was a patrolling Craybeast carrying a key. That
key opened a door nearby leading to a room full of loot again! I dropped the
key on the Craybeast's patrol route after having locked the door again. I then
went up the ladders (a bit troublesome actually) and got on the balcony
opposite of the Crayman tower. I had to time it right because the patrolling
archer on the tower could hear a tiny footstep before the jump, but I
eventually managed to do it without triggering a first alert. I then proceeded
upstairs where I found two caches of loot, and soon got to another area.
That new part was really easy since the only AI, a stationary archer, didn't
give a single alert. I shot a rope arrow in a beam in a broken elevator shaft
and got to the rooftops again. There I found a nice cache with some loot and
another one further away. I also found a third cache behind some crates. I
replaced them after I grabbed the loot. Now, the door in front of my led me to
a small area with a patrolling guard. He had a purse I made sure to steal, and
I found a very small backyard where I could shoot a rope arrow and climb up. I
soon found a small corridor leading to a room where a Hammerite novice slept. I
grabbed some coins in a windowsill and got back downstairs, no problem. The
only way to proceed from there was to take a plunge inside a basin down below,
but I waited for the patroller to get by so I could avoid all risks making
noise, since there was a roof underneath my feet. Turns out I jumped right and
I avoided it, but I had to fall to my death once to make that jump right. ![]()
I arrived in a quite familiar area after snatching some more loot, I was now on
the walls where that poor girl fell, and I had two choices to proceed. I
decided to take the lower path since the other one led me to an archer behind a
door I couldn't avoid. I waited for the patroller there to pass by and dropped
down. Now I took another Supreme bust here, as I had to douse a torch and take
two first alerts from a stationary archer in order to get some loot under the
stairs he was standing on. I tried to reach that area without dousing the
torch, but he immediately spotted me if I didn't douse it. Oh well. Supreme had
been busted long ago already, so yeah. My only choice was to take another
plunge in the sewers, so I took it. I made sure no one heard the splash, and I
carried on. I found a Sewer Key inside a grate on a wall and it opened a drain
hole on the floor. I followed this path and soon arrived in a basement-thing
with a stationary Craybeast. I thought sneaking past that bad boy would be difficult,
but it actually was cake. He didn't even give me a first alert. From there I
grabbed another key and read a papyrus I dropped where I found. The key opened
a small portcullis and I soon arrived in the manor grounds.
Lots of guards in the garden, one of them with a purse. Lots of shadows too,
which is nice. I took to the right side of the manor and met a drunk Benny
carrying a key. There was also two purses above him. I picked his key and
immediately dropped it since it was useless. Benny didn't alert as he was drunk
silly so I continued. I found some vases in the garden and I returned to where
I first arrived. I managed to move around to the left side of the manor without
problem and shot a rope arrow on a wooden balcony. Inside at last! I carefully
crept in the barracks and found a well-hidden golden hammer in the dark. Up the
ladder was a stationary archer on a well-lit balcony carrying a key, and this
balcony would eventually be my way out. The key I grabbed opened the door to
the second floor, but I decided to loot the first and ground floors before.
Three patrollers total plus a maid in the kitchen and two sleeping servants,
but it's so dark inside the manor there's no real problem. After I was done
looting the place I went upstairs and unlocked the door to the second floor.
There was two archers facing perpendicular directions, and one of them gave me
two first alerts while I went to grab the elevator key that was kept in a
secret room nearby. Another Supreme bust, but unavoidable. Other than that,
nothing really worth mentioning.
I went downstairs again to the basement and unlocked the elevator door with the
corresponding key. The elevator went all the way up to the second floor, and
this area was full of carpet and shadows, and loot also! I proceeded to loot
every room and then made my way to his lordship's bedroom. Inside I found some
loot, a Special Room key and a secret passage in the ceiling leading to an
astonishing cache with a terrific amount of loot. I met my loot goal then, and
descended again. However, I soon found out I couldn't close the secret passage
meaning I had to take another Supreme bust. Oh well! After that, I went
downstairs all the way to the basement and went upstairs to the first floor to
unlock that 'special room'. Inside I found a note about Maggie Mae and an
affair with Lord Robert, and I also found a switch leading to a secret room
with lots of bottles of wine, handcuffs and two papyrus. One of them was the
evidence showing Robert had Maggie Mae killed, and I was to deliver her corpse
and the evidence to the police station. I closed the secret room and the
special room and began to proceed to the balcony with that stationary archer.
Now, I know this isn't the intended way to leave the manor, but I'd have to
douse two torches and I didn't want to do that. Instead, I decided to take a
leap from the balcony on the left of the archer and mantle on the high wall
surrounding the manor. From there, I mantled on some building and dropped down
in the canals. The archer only gave me a first alert, which is mindblowing
since I was in bright light while jumping! I reloaded to make sure it wasn't a
glitch, and it turned out it wasn't. Perfect!
Now the funny part began; I had to sneak through the whole mission again to: 1)
get Maggie Mae's corpse, 2) drop the evidence, 3) loot the police station, 4)
return all the keys, and 5) get out from the manor again using the same way.
Let's get to it then! Again, I took a first alert from the stationary watcher
in the tower and followed the Bafford sargeant to Maggie Mae's body. I then
carried it all the way back to the tower where I could sneak inside the other
tunnel leading to the police station undetected. There, a fast Ramirez guard
patrolled the area in circles and I had to pick a door while watching out for
him. It was very close but I managed to do it. Inside the police station was a
green spider walking a short patrol route but I didn't care about him for now.
I waited for him to pass by and went all the way upstairs, picked the two doors
and dropped the evidence in the first room and Maggie Mae's body in the second.
I also stole the loot from the evidence room. The last piece of loot in the
mission is located under the stairs near that spider. Sneaking past him isn't
hard since the cells are open and they're pretty dark. Getting out of the
station was tougher since I had to be very quick and watch out for the fast
patroller and the spider. It wasn't so bad and I managed to get out undetected.
All that was left to do now was to sneak all the way to the manor again, return
the keys and get out.
Sneaking through The City without having to steal anything was a lot faster and
I arrived at the sewer in no time. Unfortunately I had to take a first alert
from the stationary archer in front of the water tower again. I took another
Supreme bust trying to re-lock the drain hole. Don't bother, it's impossible.
The drain hole closes too fast and/or the lock is too far away. I still
returned the key to its original location and closed the drain hole, but
couldn't lock it. I returned the key near the Craybeast and returned all the
keys in the manor. I took another set of first alerts returning the elevator
key, and I had to drop the Second Floor key I grabbed from the archer on the
balcony on the table in the barracks, since dropping it on the floor on the
balcony or in the barracks alerted one or several guards. I then got out of the
manor grounds the same way I did before, spawning another first alert from the
archer. As soon as I got out the mission ended, thus preventing me to close the
portcullis at the beginning.
Lots of Supreme busts, but Perfect Thief nonetheless! This mission was a
pleasure to Ghost and I had a blast.
Supreme Busts:
- Couldn't avoid first alerts from the watcher in the tower near the police
station. He gave me another first alert when I went for Maggie Mae's body.
- Couldn't close the secret door in the Gates & Co. Warehouse.
- Couldn't avoid first alerts from the stationary archer by the water tower.
Like the watcher near the police station, he also gave me two first alerts.
- I had to douse a torch and take two first alerts from the stationary archer
near the sewers in order to get the loot under the stairs he was standing on.
- I also had to take two first alerts from a stationary archer on the second
floor in order to grab the elevator key. He also gave me two more when I
returned the key.
- Couldn't close the secret passage in the ceiling in Lord Robert's bedroom.
- Took a first alert from the stationary archer in the manor tower in order to
jump and mantle on the wall in front of him. He gave me another one again when
I did the same stunt afterwards. Surprisingly, he didn't full alert!
- Couldn't re-lock the drain hole in the sewers, but I closed it without
locking it and returned the sewer key anyway.
- Couldn't return the Second Floor key close enough to the stationary archer,
so I dropped it on the table below instead.
- Couldn't close the portcullis at the beginning since as soon as I got out of
the manor grounds, the mission ended. (it IS actually possible to close it at
the very beginning of the mission and run past it while it lowers if you're
fast enough, it took me 6 tries but sadly I managed to do that after I wrote
this report).
Last edited by skacky; 07-24-2012 at 04:14 PM.
- 07-24-2012, 05:28 PM by Klatremus #274
Klatremus
- View Profile
- View Forum Posts
- Visit Homepage
![]() Gamer
Gamer
Join Date
Dec 2003
Location
Phoenix, AZ
Posts
203
![]()
Amazing work skacky! I am really impressed with your work here. Hopefully
all the busts didn't take away from your enjoyment. That's how Supreme is
sometimes. Trust me, I've been there too many times. You just have to learn to
live with it and do your best.
I haven't played Augustine's Revenge so I can't comment on specifics, but I
welcome your report in a heartbeat. ![]() Keep
up the good work!
Keep
up the good work! ![]()
Welcome to the forum!
Klatremus' Supreme Thief Site - Walkthroughs, Loot Lists & Ghost
Reports
- 08-05-2012, 09:55 PM by Klatremus #275
Klatremus
- View Profile
- View Forum Posts
- Visit Homepage
![]() Gamer
Gamer
Join Date
Dec 2003
Location
Phoenix, AZ
Posts
203
![]()
Game: Thief 1/2
FM: Gathering at the Bar
Ghost - Success
Perfect Thief - Success
Supreme Ghost - Success
Perfect Supreme - Success
Time - 18:15
Loot - 1487/1487
Pockets Picked - 3/4
Locks Picked - None
Backstabs - 0, Knockouts - 0
Damage dealt - 0, Damage taken - 0
Iron Beasts Destroyed - 0
Healing taken - 0, Other Kills - 0, Bodies Discovered - 0
Secrets - N/A
Consumables - None
See the entire report with screenshots here (FMs).
Loot list here.
Comments:
After finishing my Supreme Ghost run of Thief 2, I wanted to get back into fan
missions. Many of the classics were still waiting for me. Often I hear them
whistling gentle, seductive tunes. The Circle of Stone and Shadow (CoSaS)
missions had always tempted me, and the upcoming release of their next
installment, ‘The Nine Year Sleep’, was just the excuse I needed. And what
better way to start than to head back its roots. Trimfect’s ‘Gathering at the
Bar’ was the first fan mission ever made, and the mission that ultimately
convinced Looking Glass Studios to release Dromed publicly. It essentially made
today’s fan based community possible. Though simplistic and small by modern
standards, GatB offers fun gameplay and an entertaining storyline. This mission
also ended up becoming the inspiration for CoSaS’ first official release,
‘Gathering at the Inn’.
There are both a Thief 1 and a Thief 2 version of this mission available. To my
knowledge, only slight differences exist due to the updated engine, making the
mission more stable and prettier. I did my test run through the original and
the Supreme Ghost run using the updated version.
Interestingly, as per the briefing, I didn’t play as Garrett in this mission,
although I don’t know who the protagonist originally was supposed to be. I was
to steal Bafford’s scepter from the Grieving Burrick Inn and then meet my
contact by the fountain. Along the way I was to pick up two other scepters (to
throw off the owners) and 1,300 worth of loot. No blackjack was present at the
highest difficulty (impossible).
Headed for the chimney first. Its connecting passageways were highly useful for
Supreme. Eliminating first alerts in a building this heavily patrolled took
planning, hence the initial route. Iolaus was stationed in the restaurant and I
needed his key. It unlocked the bar safe with loot. Stealing it from the bar
side was near impossible. Coming through the fireplace from the chimney was a
lot easier (see image below). I could monitor his pivots and the other guards’
patrols from here.

The opposite end of the same passage took me to the mage’s bedroom, a very
tough area to Ghost if coming through the door. From the fireplace however, I
could stay hidden and time my steals. He paused at the desk in the far corner
long enough for me to grab all his valuables. Found a tiny coin on his
nightstand also (see image).
Entered the kitchen through the window. Snuck into the bar and stole the
valuables there. Noticed the lighting to be a touch different compared to the
Thief 1 version. I could actually lean under the counter and avoid being
spotted by the patroller coming through. Left the grey key in the safe for now.
I was hoping it wouldn’t be necessary. Iolaus’ key couldn’t be returned to the
floor where he was stationed. He alerted from the sound of it dropping.
Remember, Supreme rules force all keys to be returned to their original
location or to the enemy’s patrol route. Well, Iolaus made
patrols to the cellar if the power generator was shut down. I couldn’t actually
do this as it turned off the lights and is therefore not allowed for Supreme,
but that path was still part of his scripted route. I could therefore drop his
key anywhere along that route and avoid busting Supreme.
The second floor had an oddly behaved pair of guards. One would be stationed
near the meeting room door at the top of the stairs while the other patrolled
around the inn. Once he finished his route and returned upstairs, they would
switch, and the originally stationed guard would patrol instead. Confoundedly
strange indeed. They were easy to tell apart as one wore gold-plated armor
while the other was purpler (if that’s even a word). They both pivoted once
stationary, but the purple guard had angles more suitable for sneaking (see
image). He faced the door some and even the back wall; I never saw the
gold-colored guard do that.
Since I hadn’t picked up the grey key from the safe, I couldn’t enter the
‘authorized personnel’ door from the gallery. So I snuck in behind the guard’s
back instead and entered the meeting room after having pilfered his key. It was
one of the two existing white keys. Although they looked the same they worked
different locks. The stationed guard kept silent when unlocking the door, but
gave a first alert when I closed it. Strange. The workaround involved
exploiting the guard in Bafford’s bedroom. He appeared once entering the
meeting room. I had time to get to the shadows to the right before he came by,
given that he turned around and carefully locked the door before sprinting
onwards. If I timed the closing of the door exactly right, it
would swing shut just as he was about to sprint through. Since guards open
doors by proximity, he ended up preventing it from shutting entirely whilst
coming to a short halt (see image below). At this time I stole his key and then
he suddenly took off again closing the door behind him. The guard outside
didn’t give a comment from this, as (to him) other guards aren’t considered
hostile. I hope all that made sense. It’s a trick you can use any time a
stationary guard alerts to doors, as long as someone is patrolling through it
at one time or another. If you have trouble making this move, the grey key from
the safe would be your other option. Although I don’t know if it can be
replaced without alerting Iolaus. You’ll have to check that one out yourself.
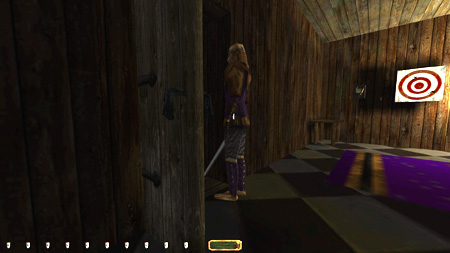
I left the meeting room through the secret study. Lock-blocked the exit and
dropped the second white key back onto the meeting room carpet. The gallery was
easy once I figured out the guard’s route. It was completely predictable; no
randomness at all. Snagged all the loot and left through the side window. I
guess the toilet would’ve been the less dignified method. Yuck!
Reentered through the north bedroom window (with the sleeping dude) and dropped
the first white key onto the stairs. Nobody seemed to care. Met Sheam by the
fountain and ended the mission.
Notes
- The door in the bedroom with the sleeping noble disappeared. I didn’t notice
it until after having saved. No bust, but worth mentioning.
Klatremus' Supreme Thief Site - Walkthroughs, Loot Lists & Ghost
Reports