|

Game: Thief 2
FM: CoSaS 2 - Mission X
Ghost - Success
Perfect Thief - Success
Supreme Ghost - Success
Perfect Supreme - Success  !!! !!!
Time - 2:55:53
Loot - 8385/8385
Pockets Picked - 10/14
Locks Picked - 20
Backstabs - 0, Knockouts - 0
Damage dealt - 0, Damage taken - 0
Iron Beasts Destroyed - 0
Healing taken - 0, Other Kills - 0, Bodies Discovered - 0
Secrets - None
Consumables - 1 dust bomb (to mark the door of Cloud's mistress)
See the entire report with screenshots here (FMs).
Loot list here.
Comments:
It almost hurts me to say, but ‘Midnight In Murkbell’
is no longer my favorite mission; ‘Mission X’ is. It is a masterpiece
surpassing all expectations. The depth of story and variety of gameplay makes
it a ride unlike anything else made for the dark engine. I have never had
that many “Wow!” moments in a single mission before. I am running out of
superlatives for what the CoSaS team has been able
to create. All I can say is that if you haven’t played this mission, don’t
read any further! I don’t want my spoilers to ruin your first playthrough experience. Instead, close this window,
download ‘Mission X’, pull up Darkloader and play.
I hope you’ve set aside plenty of time, cause this could take a while.
I, Dante, was to enter the Ivory Rose Casino dressed as a nobleman. Nobody
would react to my presence until I picked up my gear in the first floor men’s
room, my first and only relevant objective. The other up-front tasks involved
no raising of alarms or incapacitation of people integral to the storyline.
Those were already implied due to the Ghost rules. I would receive further
instructions later.
The main difference between this mission and others was that I was playing as
a member of a team. That didn’t really mean anything in terms of strategy; it
simply made the story richer and gameplay more exciting. The biggest addition
was the communications mask, which made Dante able to talk to his fellow
teammates. It would lead to two junctures where I would have to make a
decision as far as objectives were concerned. The copy kits were cool also,
an element I never imagined could be as fun as it turned out to be. The rest
of the new equipment was interesting, but not very useful to ghosters.
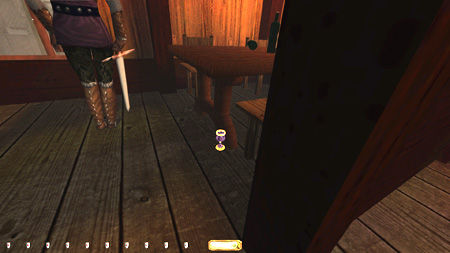
Much of the first floor was accessible before getting my gear. I grabbed the
purses in the pearl gambling hall and the minister’s key from the roulette
table there. I noticed that the guard’s purse didn’t count as a pickpocket,
although he never saw me coming. At this point I had already listened in on
the conversation in the ivory hall. There was a hard-to-find goblet behind a
window curtain in the southwest hall also (see image). That was all before I
went for my gear.
Disabling the Cameras
On my personal agenda (as in not stated in the official objectives) was
receiving the promotion to agent Glass in the post-mission briefing. Several
extra tasks were then required. One was to finish the first chosen objective
before Steel. I found that to be a lot easier if choosing to shut down the
cameras. It involved less planning and a stealthier course of action.
Shutting down the power necessitated blowing the generator with a bad fuse,
directly alerting many of the guards. I don’t think that is a bust, due to
the explicit instructions given in the task list, but it certainly felt like
the noisier option of the two. The cameras it was.
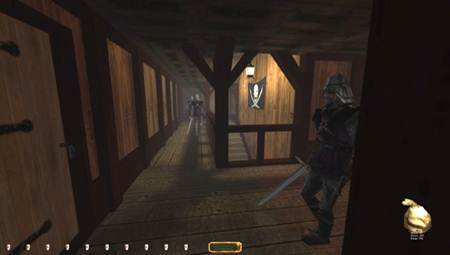
I took the route through the halls east of the front lobby. Picked the service
key off the maid and grabbed a few loot items on the way. Supreme rules
require keys to be replaced, though with the keychain that wasn’t possible.
Due to the varieties of keys available, it was tough to survey which locks
each one worked. I therefore deemed it necessary to pick up one of each copy.
I left the remaining ones alone. I also kept a tab on which locks I had
picked, in case subsequently discovered keys would relock them, another
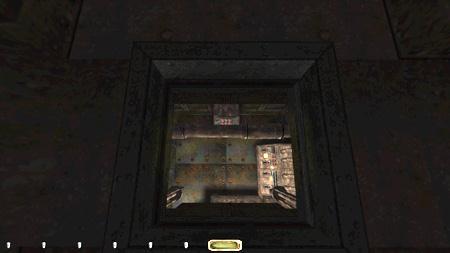
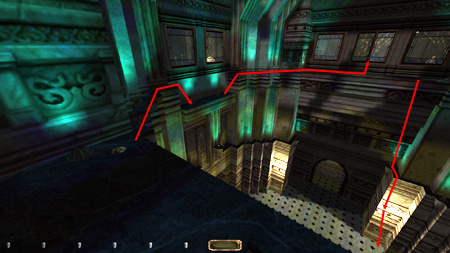
Supreme Ghost requirement. Made my way to the second floor through the
exchange lobby. Found the vent key in the utility room and snuck down the
hall toward the public bath. Accessed the shaft system through the
northernmost locker (see image).
For me, the ventilation system made this mission perfect. It provided
alternate routes between every floor and made Ghosting a lot easier. I read
somewhere about a vent map left by one of your teammates, but I never found
it. I familiarized myself with the routes fairly quickly though. Reached the
camera room in time to disable the security system before Steel (see image
below). I actually had to wait for a good 10 minutes before he finally blew
the generator. This put most of the guards on high alert, but at least the
lights were out. I snuck around the basement, grabbing the various pieces of
loot. I skipped the basement key altogether and left back through the camera
room vent. I even vine arrowed over the wall into the wine cellar, in order
to avoid the lockpick count. I know the rules don’t
say anything about minimizing those, but I feel it goes along with the
“spirit” of Supreme.
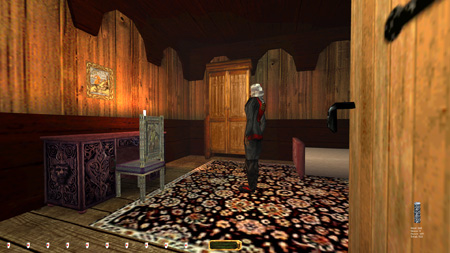
Returning Cloud’s Key
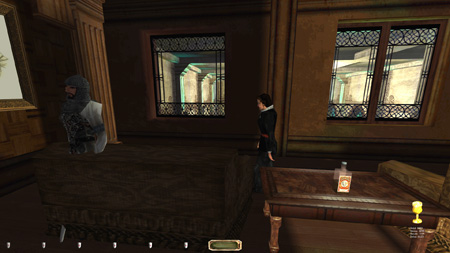
Entered the first floor storeroom and found some loot under one of the desks
there. I had to read the barely visible note before the desk would even
highlight. Stole the copy kit from the foreman’s office while the woman faced
away (see image). Luckily she pivoted in all directions. Waited until the
Rubber-situation arose. Got the objective to return Cloud’s key and chose to
accept finishing Rubber’s chores. This spawned several essential keys at the
front desk. Opting out of this objective doesn’t go against any Supreme rule;
only tasks visible in the objective list (optional or not) are required for
that mode.
Got the loot from the dining room before reentering the vents. Exited to the
third floor men’s room. Remembered to close and relock every vent after use.
I didn’t want to have to backtrack and double-check all the panels later. One
of the stalls in the ladies’ room had a hard-to-see ring on the floor (see
image). Grabbed the list of chores from the hall closet. This made all items
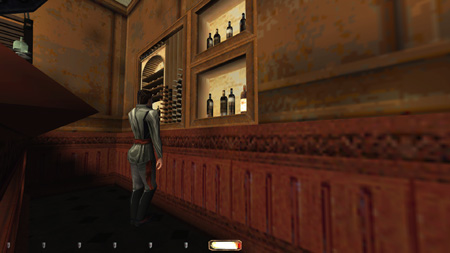
pertaining to those objectives accessible for pickup. Passed through the fine
lounge on my way southward. Guards frequently entered here, so I used the
carpets to grab the loot quickly. Leaned around the bar corner to grab the
bottle behind on the shelf (see image below).
Cloud’s key could be found in one of two locations. I’ve only seen it in the
theatre, on top of the curtains (see image), but know it can be located near
the elevator on the same floor. I think it depends on Dante’s location when
receiving the objective, but I’m not entirely sure. One patroller passed
through the dressing room to the stage and back. I exploited his route to
avoid picking the doors. Plenty of loot in the dressing room by the way.
Common non-value items like combs and mirrors were even worth something. I
ascended the balcony by flinging a vine into the ceiling. It could be reached
from the table and retrieved from the balcony railing. I quickly got in the
habit of double-checking for guards through glass doors. They could easily
spot you through several sets of doors. It was the case in the theatre, but
especially on the fourth floor. Passing through any of the interior rooms
could spawn easily missed comments from hall patrollers. Found a single coin
on one of the bookshelves in the records room.
I discovered the immediate need to access the fourth floor ventilation
system. I found the easiest point of entry being the vent above the rafters
in the mahogany stairhall. I could access it by
using a vine arrow from the inner balcony. Guards constantly patrolled the
top floor halls in overlapping fashion. I found a gap in their routes
eventually. Even from atop the rafter I got caught a few times and had to
reload. Especially dangerous was the guard halting by the double doors
leading to the balcony. He pivoted and could see activity going on in the stairhall. Found a hidden coin up there as well.
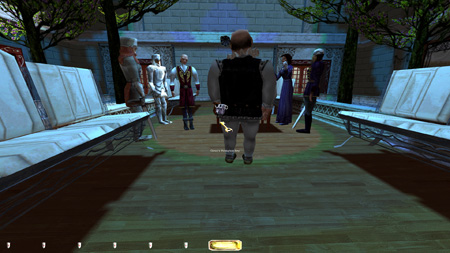
Took the shafts to the garden in the west. Rubber and Steel had already left
the casino, so I needed to return Cloud’s key to his belt to have any chance
of getting the promotion. I could drop to the floor and hang out by the walls
in safety. There was one circling guard, but she was fairly inattentive.
Cloud was positioned to the west, so coming from the windows directly behind
him was my best bet. The only enemies to worry about were Raputo’s
bodyguards to the north. The others were either involved in the neverending conversation or unresponsive. Neither guard
first alerted, but they still gave settling remarks like “I’m getting too
jumpy.” I consider this a regular first alert, despite no triggering remarks
such as “Hey, what’s going on?” The way I see it, any remark
indicates I’ve crossed the threshold for a first alert, regardless of
what kind of remark it is. Some enemies are programmed not
to say anything, but instead go straight to attack mode. That’s different.
Anyway, back to my situation. I had to stay permanently crouched. If I stood
up, I got a settling remark as soon as I returned to the shade. I think it
was the guard in white that most often commented. The worst thing you can do
in those situations is quicksave before being 100%
sure you are not seen. On several occasions I reloaded only to find a comment
arriving two seconds later. Good old hardsaves are
your best bet. There was a patch of darkness extending from the windows up to
the nearest end of the two couches. I snuck to the end of that patch
unbothered. From here, I had to inch by tapping creep-walk until Cloud’s belt
highlighted. I couldn’t lean in to place the key, that affected the light gem
enough to give me a settling remark from said guard once I got back to the aforementioned
patch of darkness. Cloud occasionally idled back and forth, especially when
taking part in the conversation. This shifted his belt in and out of reach,
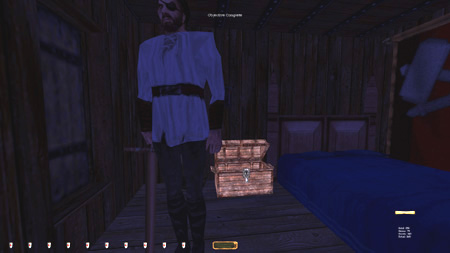
and with some good timing I could successfully replace the strongbox key (see
image below). Grabbed his money purse in the same manner.
Circled the room counterclockwise and grabbed the offices key from the guard
outside the double doors. Made sure not to alert anyone in the hall to the
sounds. My next challenge was stealing the monarch suite key from Raputo’s guard. This had to be done from the east, but
didn’t prove as difficult as the Cloud situation. Here I could lean in
without any first alerts, as long as I wasn’t too close. The image below
shows the sweet spot.
I had trouble reaching the two offices in the northern part of the garden.
The problem was Antoinette and her personal servant, the only individuals
facing north directly. Both office entries were well-lit and brought my light
gem to red. If either of them saw me, the mission failed instantly, as it
busted one of the mandatory objectives. I could sneak into civil litigation
and steal the magnifying glass. To get back out I had to pan left, back into
the shadows. Then after the guard passed I quickly dashed across the
brightest portion and continued by sneaking along the wall. The northwest
office had a pipe on the desk. I had to make it back out and into the far
northeast corner before the female guard started heading east. There was also
a guard outside the double doors that positioned himself in the hall at this
point. Finding the proper timing and speed, I managed to reach the corner
undetected.
Rubber’s Trouble
Reentered the ventilation system and started cleaning the rest of this floor.
Got the scroll-case from the procurement office via the ceiling panel there.
Couldn’t enter the adjacent accounting office. One of the desk jockeys was
facing the entry. He first alerted as soon as I entered the doorway. There
were two other entries, but they were even brighter. Remember, lights can’t
be turned off for Supreme. That meant I had to skip the copy kit in there. So
I couldn’t get all the bonus objectives for that mode. [Bonus objectives
are ones that don’t show up in your list until completed. They are not
required for Supreme because the player doesn’t necessarily know they exist.] After
each of the first three copied documents, that document gets added to the
task list and the optional objective saying “Copy any other important
documents you run across” remains. That means finding a fourth document is
required, since optional objectives are required for Supreme Ghost. After you
find the fourth document, however, the optional objective to find another one
disappears. You still trigger a bonus objective upon finding a fifth (which
is the max by the way), but it isn’t required since it doesn’t’ appear until
you find it. I hope all that made sense. In short, as long as you copy any
four out of the existing five documents for Supreme, you are good. Sadly,
this meant I wouldn’t be able to get the Agent Glass promotion for Supreme.
I used my current copy kit on the ledger in the head accountant’s office (see
image). His safe key was hidden behind the wall painting. Entered Cloud’s
office from the north side. Couldn’t copy his letter as I was out of kits.
This would probably be the one to skip for Supreme. Snuck through the hallway
further south to reach Cloud’s suite. There was a guard patrolling outside
that had to be timed rather accurately (see image). The suite itself was
devoid of people.
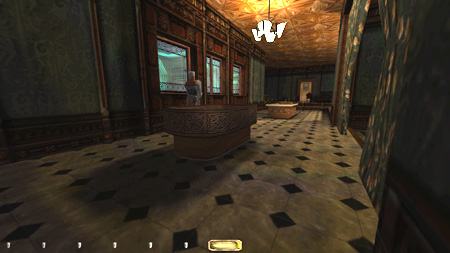
Made my way back to the ground floor and cleaned out the money exchange
office (see image). I needed the copy kit there also. I could stay in the
shadows going through the lobby. Despite the two guards and civilians, I
didn’t have a hard time avoiding alerts. The biggest problem was not getting
seen through the windows from inside the office.
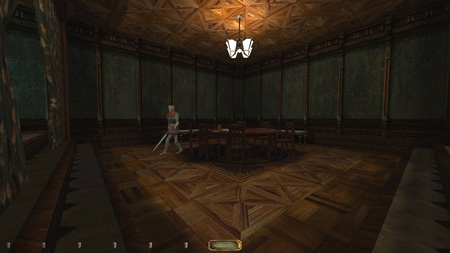
Moved on to the second floor and made my way counterclockwise. Had few
problems looting the various guest rooms. The biggest problem on this floor
came in the observation lounge overlooking the gambling hall. A wandering
nobleman is supposed to be the only one in there. However,
he was joined by a guard stuck in the couch (see image below). The guard
spotted me the instant I rounded the corner to grab the goblet. Regular Ghost
can circumvent it by rushing past the corner and take a first alert, or by
flipping the light switch. Supreme Ghost doesn’t allow either. I didn’t want
to take the bust, as I saw Perfect Supreme truly within reach at this point.
I realized I had to backtrack about 1 hour worth of playtime in order to fix
this issue. I did so, following exactly the same path as before. Tedious, but
it avoided the bust.
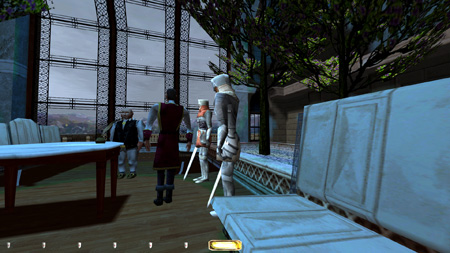
Next up was the second floor clubhouse. All entries were locked except the
balcony doors. A nicely placed vine arrow from the main entrance courtyard
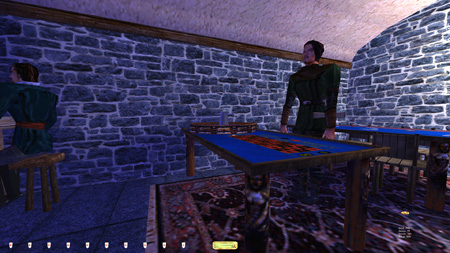
took me up there. Two patrollers covered the inside, each carrying snaggable keys. The only difficult spot was getting the
goblet from one of the bar tables (see image below). The barwoman pivoted
west and north. The best entry point was through the windows in the northeast
corner. There was a perfect shadow on the couch outside, where I hid from the
nearby patroller. Timing the other swordsman I dropped to the floor inside.
The woman did not comment if she was facing west. I leaned over and grabbed
the loot, then planned my escape. It was impossible to jump straight back onto
the windowsill, at least without multiple first alerts. However, by use of a
vine, I could swing far enough into the window frame to be able to land onto
the sill when retrieving the arrow (see image). The outside patroller alerted
to the vine, so I had to time him as well. Plus the woman had to face west
the entire time. I got the hang of the moves after a while and managed to get
in and out with no alerts. The jump onto the vine itself had to be a
walk-jump, otherwise the barwoman spotted me in her periphery. Overall, this
piece of loot proved easier than first anticipated, as soon as I figured out
the right method. Afterwards I locked the balcony doors (another task off
Rubber’s list) and escaped through the living room vent.
The last of Rubber’s chores was to move the guard passed out in the first
floor bar. There were a few ways to go about it, but the easiest way involved
Raputo’s personal guard, Sergeant Dendrington, patrolling the hall outside the monarch
suite. Coming from the upper mahogany stairhall, I
placed the empty lockbox on the table by the monarch suite door. While Dendrington picked it up and headed upstairs, I rushed
back to the vents and once more snuck a peek at the conversation in the
fourth floor garden (see image). This time Raputo
had a letter ready. Upon the arrival of Dendrington,
he delivered the letter and sent the sergeant back downstairs. I headed to
the third floor men’s room, where Dendrington was
soon to arrive. Before doing his deed, he left the lockbox on the bathroom
table. His nature’s calling left me with enough time to pick the lock and
copy Raputo’s letter. This ticked off another bonus
objective. Dendrington didn’t alert to the lockpicks or the northernmost stall door. However, he did
alert to the lockbox being left open. “Hey, this isn’t right!” Only a first
alert, but still a Supreme bust. At first I didn’t think the box could be
closed, as it never highlighted once the letter was visible. Apparently, the
letter and the box has different proximity values, but only slightly so. If
both could highlight, the letter took priority. I found the right distance
and managed to close it up in time for Dendrington
to emerge. He didn’t alert this time. Home free.
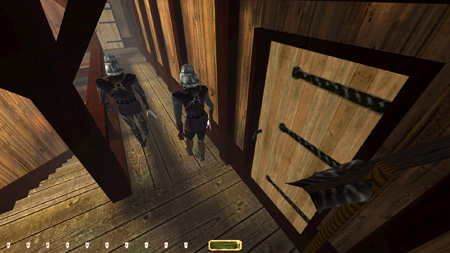
As his letter instructed, Dendrington fetched Raputo’s guards in the first floor bar and left. That
cleared the coast for me to grab the drunk guard behind the counter. I had to
dodge the roaming servant and the two guests in the west end. Sneaking from
the southeast door did the trick. I brought the guard with me through the
ventilation system (see image). The physics of the engine didn’t make it easy
to navigate through the shafts carrying a body. I eventually landed in the
guard captain’s office. I ended up taking his key, although I guess it can be
circumvented. You can easily carry the guard through the secret shaft here
and safely drop to the outside courtyard from the roof. I used the hall exit,
so for me it was necessary, but if you are into absolute miminum pickups (like I usually am), you should skip it.
I quicksaved before realizing, and my last real
save was too far back to bother with the reload.
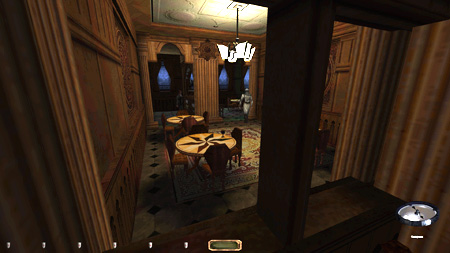
The Monarch Suite
I decided to save the best for last. Every objective was done and all I had
left was loot. I entered through the side door coming from the theatre (see
image). Three guards plus a female bartender Two of the guards were
patrolling, with the one in white being extremely jumpy. He spotted the
slightest flicker in the light gem at abnormally high distances. He had a
longer route down the south side, but walked faster than normal guards. The
second patroller did counterclockwise circles in the bar area. The third
guard was stationed between the bar and the bedroom, pivoting north, south
and west. Initially, I had planned on hitting the gambling tables by crossing
the marbled area by the windows when he swung south, but there were too many
variables needing to go my way for it to be a viable option. The noisy floor
and the frequently pivoting woman by the bar posed the greatest challenges.
Then you had the two patrollers that had to be timed to perfection. I found
it easier to head south. The bedroom had a few comfortable spots where I was
totally out of harm’s way (see image). Timing the fast patroller I slipped
further south, grabbing more loot along the way. I had to be swift picking
the hall cabinets, but made it to the closet in time. Found a hidden coin
atop the hat shelf here.
To reach the gambling area, I decided to balance the ledges in the Ivory Hall
Overlook (see image above). There certainly wasn’t much room to maneuver
around the corners. The toughest part, however, was dodging the jumpy
patroller’s view. It was hard to hear through the windows, so I cranked up
the volume and went step by step. The ledge at the halfway point was lower. I
could save there and take a breather. The trickiest portion was getting into
the window by the crap tables. I was bright red, so the white guard could
spot me through the windows from way over in the south hall. It wasn’t more
than a first alert, but enough to spoil Supreme. The safest thing was to wait
for him to patrol out of sight and use hardcover as a guarantee. Of course I
had to time the red guard’s patrol also, plus the barlady
needed to be turned towards the back wall. Once that occurred, I slid inside
and hid in the corner southeast of the nearest table. This spot was safe from
the white guard soon to come along the wall to the far west. Once he passed
north I could sneak over to the northeast corner and wait for the red guard
to pass (see image below). Still no alerts.
The poker room had tons of loot. Luckily, the southwest corner provided
hardcover from the white guard that would eventually return. He would alert
as long as there was a clear line of sight between him and me, regardless of
my light gem. I pilfered as much loot as I could before he returned, and
waited in said corner for the red guard to come by again (see image below).
Once he left I stole the rest and exited towards the crap tables. Getting
back out through the window took more good timing between all the guards. I
eventually found the right moment and leapt onto the sill. The best way from
here was straight down onto the ledge below (right image above). With a
little luck I took no damage in the fall and could drop onto the light
fixture further down.
Realized at this point I had forgotten two pieces of loot; a ring in room 207
and a porcelain mug in the minister’s suite. That wrapped it up and I could
leave for Supreme. Didn’t get the Agent Steel promotion, as this requires all
five documents to be copied. For regular Ghost I went up to the fourth floor
and grabbed the last copy kit from the accounting office. This spawned a
comment from the office worker, but that is allowed for that mode. I could
now copy Cloud’s office letter and leave from there. This gave me the remark
from my team members indicating a perfectly conducted mission, including the
agent status upgrade. The stats below are from the Supreme run.
Notes
- The guard captain’s key is strictly speaking an unnecessary pickup. I
didn’t count this as a Supreme bust as I ended up using it. I thought of the
alternate route after the fact.
- Though not required, you can’t get all five copy kits without taking a
first alert from the desk clerk in the top floor accounting office. You need
all five kits in order to get the Agent Glass promotion at the end. I skipped
it for Supreme, but got it for regular Ghost.
__________________
Klatremus' Supreme Thief Site - Walkthroughs,
Loot Lists & Ghost Reports
|