- 02-01-2010, 03:53 PM by Hexameron #176
![]()
Hexameron
- View Profile
- View Forum Posts
![]() Gamer
Gamer
Join Date
Oct 2007
Posts
330
![]()
FM: A Nice Stroll
File: ANiceStroll.zip
Ghost - Success / N/A and aborted
Time - 00:5:31
Loot - 0/0
Pockets Picked - 0/7
Backstabs - 0 Knockouts - 0
Damage dealt - 0 Damage taken - 0
Healing taken - 0 Kills - 0
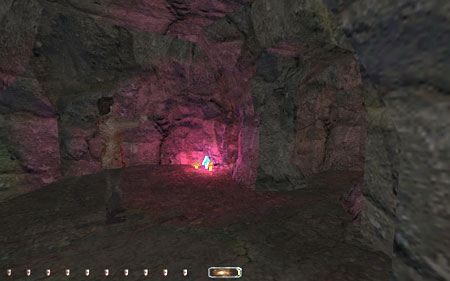
Comments - This is not a real mission - there are no objectives and one
(Normal) difficulty. The FM is just an underground cavern with catwalks and
waterfalls with nothing to do, so I aborted.
- 02-01-2010, 04:03 PM by
Hexameron #177
![]()
Hexameron
- View Profile
- View Forum Posts
![]() Gamer
Gamer
Join Date
Oct 2007
Posts
330
![]()
FM: Borrington's Castle
File: borringtonscastlev4.zip
Perfect Thief - Success
Time - 00:19:54
Loot - 2328/2328
Pockets Picked - 3/5
Backstabs - 0 Knockouts - 0
Damage dealt - 0 Damage taken - 0
Healing taken - 0 Kills - 0
Secrets Found - 2/2
Comments - A small straightforward mission. I needed to turn off the
lights in the main hall so I could sneak by the guard next to the staircase.
Ambient lighting in this mission is set low, so turning off lights makes things
pitch black, requiring you to move around blindly, or as Vanguard would say,
play in "Blind Thief mode." At least the darkness is appropriate for
a castle and there's enough light in other areas that I never felt disoriented
feeling my way around. Additionally, only two lights must be shut off to ghost
the castle.
-The 1000 loot objective is incorrect. I collected 1600 and it still wouldn't
check off. It's only after finding the hidden compartment behind the stables (frob torch and remove crates) with the LC jars and
artifacts that my loot objective was satisfied.
-I was able to pick the safe behind the banner and frob
all loot inside without slashing the banner. I just leaned forward and frobbed until I had everything; I slashed the banner to
check and then reloaded if I missed something.
Hard-to-find loot:
-Servants barracks adjacent to kitchen: loose coin on top of middle bunkbed. To
get there, I needed to go around to the side door by the stables; I couldn't sneak directly in there from the kitchen because the
servant faces the door frame.
-Unfinished baby room: gold coin on bed and statue under bed.
- 02-02-2010, 10:20 PM by
Peter Smith #178
![]()
Peter Smith
- View Profile
- View Forum Posts
![]() Moderator
Moderator ![]()
Join Date
Feb 2000
Location
Land of Enchantment
Posts
2,698
![]() The
WaterWay Tunnel Part 1
The
WaterWay Tunnel Part 1
FM: The WaterWay Tunnel Part 1
File: ftb-thetunnel1-2.zip
Ghost - Success / Perfect Thief (cheating with a loot list)
Time - 00:21:36
Loot - 1524/1524
Pockets Picked - 0/2 (there were none)
Backstabs - 0 Knockouts - 0
Damage dealt - 0 Damage taken - 0
Healing taken - 0 Kills - 0
Comments
As Hexameron reported above, this is a difficult
and frustrating mission. I checked at the TTLG forum and found no record of
anyone completing it. The reaction at TTLG was basically outrage. The author Yohny C. Liar (Jan Hladík)
apologized for the difficulty but insisted that it could be done. So, I took
that as a challenge and decided to give it another try. I had previously given
up on it when it came out about 5 years ago.
There are two challenges with this mission. The main challenge is difficult
underwater exploration. The terrain is an elaborate 3-D set of underwater tubes
with a few air bubbles, a few open areas, and three breath potions that I could
find. The exploration consists mainly of swimming fruitlessly through the
underwater maze and drowning. Needless to say, this puts off almost all players
except some truly dedicated and, ahem, dare I say masochistic types.
The second challenge is loot. Some of it, in particular two rings described
later, is quite difficult to find. Combined with the underwater aspect, this
makes you want to run screaming into the night.
It is a short mission and can be completed in 20 minutes. I spent three days on
it initially and came up 81 short of the 1400 loot needed to fulfill the loot
objective in Expert. So, I started a new thread to ask for help.
Hexameron came to the rescue. He kindly came up with
a Dromed loot list which immediately disclosed what I
was missing: two rings and a coin. I found one ring and the coin fairly easily
using the coordinates in the list. I don't do Dromed,
but I used the loot I had already found (and in my own list) to establish
locations and coordinate directions, which I used to form an intuitive map. The
one ring and the coin fulfilled the Expert loot objective. I could have quit
there, but I wanted it all.
One ring, called the Ramirez signet, was nearly impossible to find. My rough
direction and map system failed me - it was actually on the other side of a
barrier or wall from where I thought it should be. Hexameron
came to the rescue again, saying he had found it (presumably in Dromed), giving me directions. Even with those directions,
the signet ring was nearly impossible to see even when I was right on top of
it.
Well, obviously, using a loot list such as this is cheating according to the
Official Ghost Rules. I don't mind. This mission is so difficult that cheating
is almost mandatory. There is no honor at stake. Finishing it is enough to
redeem myself. I am not aware of anyone else who has completed the mission.
The Route (SPOILER ALERT)
I think it is necessary to follow exactly the right route, in an overall sense,
to complete the mission. I think that if you deviate from the right route, you
do not have enough breath potions to complete it. Below is the way I did it. I
did not just stumble on this by accident. I worked my way around using all my
breath potions, trying this and that, drowning and reloading, finding different
places, figuring out some relationships between places and passages, and
restarting the mission three times to get the right sequence.
From the start, go to a nearby room with a bubble. Find two breath potions.
Taking the right passage, travel from the start bubble to the log cabin, using
1 breath potion (left with 1)
From the log cabin, go some distance to a bubble at the end of a passage, near
the frogbeast / gas plant area, using 1 breath potion
(left with 0).
Go a short distance to the frogbeast / gas plant
area. Find another breath potion on the thief (leaving 1).
Go back to the bubble near the frogs.
From that frog bubble, swim back to bubble near the start (a long and difficult
swim) without using any breath potions. Much practice and reloading is needed.
The breath potion is needed in the next step.
Take the left passage from the starting bubble room to the ending area, using 1
breath potion (leaving 0). There are two possible bubbles in the ending area
you might find. One with a visible side passage and one without.
The ending area includes: (1) a room with three bubbles, a helmet, and a
pillar; (2) a secret tomb (frob lever behind pillar);
(3) the tunnel administrator's office, and (4) the emergency exit. All of these
are within swimming distance, and no breath potions are needed or available
once in this area. So, you can't go back to the beginning if you have already
visited the cabin and the frogs.
Difficult Loot
A gold ring under a stool in the log cabin. It cannot be seen without being
right on top of it, and looking there is close to alerting the ghost at the
table.
A stash under a tree that is moved by pressing a button behind a bed in the log
cabin. It is not easy to tell what has moved.
In the three-bubble room, a gold nugget under a rock. It cannot be seen except
from just the right angle, and you must then go around to the other side and
blind frob it.
Items in a secret tomb, opened by a lever on a pillar. Then you must hunt for
the room, which is some distance away.
Ramirez signet ring, almost impossible to find and almost impossible to see,
even when you are on top of it. It is in the ending area, not far from a bubble
in which you can see a side passage that goes to the right (to the tunnel
administrator's office).
A strange objective
There is one objective, to find a way to Lord Exechiel,
which cannot be completed without property damage and alerting a priest. If you
blast open a locked door in the tunnel adminstrator's
office with a fire arrow, you can find a handkerchief on the floor. This
satisfied the objective. Fortunately, that objective can be bypassed by finding
a book near the three-bubble room, which says that the passage has been
blocked. It is kind of strange, but that is the way to ghost it.
Ghosting
Is this supposed to be a ghost report? It isn't, really. There is only one
ghosting challenge apart from the above objective, which is to start the mission.
You drop into the water from some height, and you fall past a guard who almost
always alerts by the sight of you (but not the splash). It may require 20
restarts to avoid it. It's blind luck.
All other AI contact, a priest and a ghost, is easy to avoid.
Last edited by Peter Smith; 02-02-2010 at 11:20 PM.
"What we've got here is a failure to communicate", the warden (Strother Martin), Cool Hand Luke
- 02-02-2010, 10:53 PM by
Hexameron #179
![]()
Hexameron
- View Profile
- View Forum Posts
![]() Gamer
Gamer
Join Date
Oct 2007
Posts
330
![]()

I applaud your efforts here, Peter. I'm amazed that you not only legitimately
completed this impossibly difficult mission, but achieved a perfect thief as
well. I couldn't even bring myself to play the mission again, which is why I
decided to look in dromed in order to help you. It's
something I normally shun from doing, but I don't see how anyone could have
found that signet ring without scouring those wireframe brushes in dromed.
- 02-03-2010, 12:29 AM by
Tannar #180
Tannar
- View Profile
- View Forum Posts
![]() Gamer
Gamer
Join Date
Sep 2008
Posts
56
![]()
Nice reports, Hex! Enjoyed reading them all. And congrats, Peter. Very
impressive work on The Waterway Tunnel. ![]()
- 02-04-2010, 02:25 AM by
Hexameron #181
![]()
Hexameron
- View Profile
- View Forum Posts
![]() Gamer
Gamer
Join Date
Oct 2007
Posts
330
![]()
FM: Children of the Future SE
File: ChildrenoftheFutureSEv2.zip
Ghost - Success
Perfect Thief - Failed
Time - 02:05:59
Loot - 4970/5987
Pockets Picked - 4/11
Backstabs - 0 Knockouts - 0
Damage dealt - 0 Damage taken - 0
Healing taken - 0 Kills - 0
Comments - The SE part of the title means second edition. Apparently, this
is a revamped version of the original Children of the Future FM, which I did
not play. It seems this SE version is not at all popular and was mentioned in
TTLG's "Least Favorite Missions" thread. I don't know why - the only
major negatives I noted are its bizarre plot, incomprehensible and immature readables, wacky interior architecture/design, and a few
tasteless oddities like the custom painting with a photo of a nude playboy
model. Other than that, it felt like an epic TDP mission. This may be a T2 FM,
but it plays like T1; it even seems to employ only T1 textures and objects.
There is only one difficulty (Normal), but you can still select the other two
difficulties and play the mission. In other words, Hard and Expert are retitled
N/A, but you can select the last N/A (substitute for Expert) and play the
mission. I did this so I would have the Expert number of health shields.
While sneaking is generally not that tough, there are four significant
challenges, all of which could be construed as potential ghost busts. These
four sticky situations and several other rooms with unforgiving AI patrols make
it clear the author did not have ghosting in mind. Owing to the non-ghosting
environment of the mission, I avoided triggering new objectives. The only one I
had to accept was the objective to find a sample of tunnel dust; this occurs
when you complete a core objective to "find and read information"
about the secret place Garrett discovers. If I had triggered the new objective
to collect Salvador's dice, I would have inevitably encountered a ghost bust
for reasons I'll explain later. I don't know if I can say the same about the
purse objective or any others I missed. Suffice it to say, I maintained the
core objectives only: find information, 4500 loot, tunnel dust, and leave.
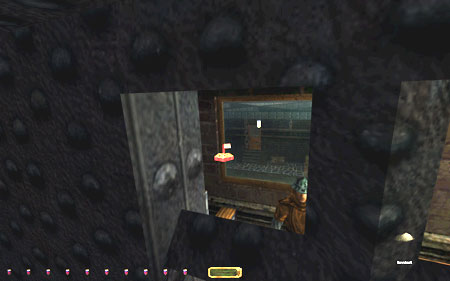
Ghost Challenge No. 1: Watcher and Patrolling Thief in Basement Corridor
Once in the basement of this secret place, there is a difficult obstacle I had
to deal with: sneaking by the patrolling thief in the corridor with the
watcher. You know, I thought this would be a bust as soon as I observed the
corridor. There are two AI who patrol this corridor - a thief and a keeper. The
keeper has an extensive patrol throughout the entire length of the corridor,
but the thief has a shorter back-and-forth patrol. There are no shadows in the
corridor and a watcher that pivots to observe both directions:
In the above screenshot, I'm standing as close I can to the watcher (which is
facing away) without being seen. The thief is one second from turning around.
There is no place to hide and bypass the patrolling thief whose patrol is very
short. I came up with the solution of running behind him and circling around
his left flank as he turns. All of this needed to be done while the watcher was
facing away and the patrolling keeper was elsewhere. When I had all of these
variables on my side, I ran up and hugged the left wall as the thief turned:
I got a 1st alert and then immediately darted under the watcher just in the
nick of time. I was lucky to pull off this maneuver...
Ghost Challenge No. 2: Archer Watching Staircase to Basement
Reaching the top of the staircase a few meters away from the aforementioned
watcher, I came across this daunting sight:
In this screenshot, I was standing at the very edge of shadow, but clearly that
large spot of light on tile screams potential bust. If there were any moss
arrows about, I wouldn't have to discuss this situation because I could just
dart quietly across the light with only a 1st alert. Without moss, what could I
do? I did try conventional sneaking and running quickly, but the archer saw me
and the idle guard to the left heard me. It seems the sound propagation is
slightly off because I was able to make substantial noise on the tile with a
1st alert from the archer, but the idle guard who was further away could hear
me with his keen ears.
I thought if I could just soften my footsteps somehow, maybe I could get by
without causing alerts. For some reason, I thought of the spiders and the
footlocker in TDP's "Bafford's Manor." In
order to achieve a perfect thief, RiCh C came up with
the idea to arrange a row of crates against the wall so he could remain
elevated and not alert the spiders. I employed the same tactic but for different
reasons. I had to run into the light while crouched and drop each crate. I
could only place two of them on the floor because I couldn't move farther into
the light without being seen or heard:
What I did was run and jump over the two crates and then land on the tip of the
last crate. That way I would have the speed of a running jump without the loud
foot noise. After landing on the edge of the crate, my momentum was just enough
that I sank gently down to the floor and into darkness. It took several
reloads, but I managed to pull this off with only a 1st alert from the archer
and the idle guard didn't hear a thing.
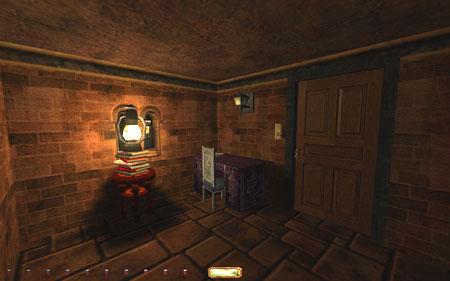
Ghost Challenge No. 3: Entering the Red Light District
Gaining entry to the Red Light District is not required, although there is a
ton of loot inside, and finding loot in this mission is hard enough. The real
problem is the barkeep or hand mage watching the entrance. The interior is
bright, especially with the two fires roaring by the counter. I only had four
water arrows, so I was taking a risk using half of my supply just for this
room, but it was necessary. I doused both fires and then ran into the room and
hid behind the doubledoors against the wall. There
was just the right amount of shadow that I could stay hidden and not alert the
mage (nobleman is standing in front of him):
Running or sneaking anywhere from my position typically resulted in a bust, as
the room is bright and the mage is close enough to alert. Through trial and
error, I realized that I could jump on the edge of the couch against the wall
and immediately crouch after landing and not alert the mage. He would be on a
sustained 1st alert if I stayed still and crouched after jumping onto the arm
rest of the couch:
I found that if I CCCed very slowly, I could move
across the couch and along the wall without the mage alerting. I did this until
I was far enough away to move safely and collect all loot in the room. It's
worth reporting now that a perfect thief is impossible because there are silver
coin stacks on the counter right under the mage's nose. I wasn't able to get
close to that counter since the nobleman faced the mage. The mage also has
Salvador's room key, which is needed to complete the "Salvador's
dice" objective; no chance of picking his key, so it's a good thing I
reloaded and avoided triggering that new objective!
Further trouble awaited me in the next room of the district. Here's what I see
after opening the doubledoors at the back of the bar:
There is roughly 300 loot in the rooms beyond these two ladies, so I had no
choice but to douse that fire. That left me with one water arrow remaining...
This was early in the game and I started wondering if I was making a mistake;
ultimately I didn't and had no use for the remaining water arrow.
Prelude to Ghost Challenge No. 4: Picking the Locked Cell Block Door in the
Basement
Just to the right of the basement staircase (the one I mentioned earlier with
the watcher) is a door that can be picked. I would have to expose myself by
running up to it and picking the lock for one second at a time. With the
patrolling thief (that I danced around earlier) walking through the corridor
and close to the door, I couldn't be at the door when he approached the
watcher. And I obviously couldn't be at the door when the watcher faced it.
Unlocking that door took a long and repeated process of running out, picking
the door for one second, running back, waiting for the patrolling thief and
watcher to face away, and running back to pick the door again.
Ghost Challenge No. 4: Pivotting Archer in Basement
Cell Block
Here is perhaps the hardest challenge of them all. It is essential to enter the
cell block in the basement (after finding the appropriate keys) and go through
the blueish-tinted hall. At the end of this hall is a room with another key
that facilitates access to the garden with tunnel dust. The problem is dealing
with a patrolling thief and an archer who thankfully pivots randomly, but
mainly in diagonal directions:
There are no shadows in the vicinity that would help me sneak beyond the archer
- there is a dark and safe corridor to the right, and I did
hide there whenever the patrolling thief came by. He
patrols through the left corridor and turns around where the archer is
standing. How would I get into the blue hall without at least one of these guys
seeing? It seemed hopeless and I almost called it a sure bust and gave up. The
archer pivots in three directions. At times he'll face diagonally to the right,
to the left, and then squarely faces the door to the blue hall. There is
only one direction that worked in my favor for sneaking to the
door. I was busted when running to the room while he faces the left corridor -
he must be facing to the right:

Here's where things get even more difficult. Could I run through the door and
down the blue hall safely? No. If I bolted into the blue hall, he would see me
because the hall is bright with that blueish unnatural light. Fortunately,
there is just barely enough shadow in the small slit of the door frame, and I
mean the kind of shadow that produces a medium yellow light gem, that I could
run to the blue hall door frame and crouch safely:
Do things get easier now? Not yet... I have that annoying patrolling thief to
worry about because at this point he is approaching the archer. His patrol is
such that he literally walks into the blue hall door frame after turning
around, so he would bump into me eventually. I found that out the hard way and
had to reload. With all the moves I came up with so far, I had only a few
seconds to get down the blue hall safely. Running down the left portion of the
hall alerts the archer since he would be on a sustained 1st alert from seeing
me dash to the door frame earlier. There was no chance of him returning to zero
when I was so close and slightly visible to him in the door frame. It took many
many reloads until I figured out that running down
the right-side portion of the hall is dark enough to remain unseen:
Of course, I had to leave the blue hall once I found a vital
key, and it was not fun doing all of this over again. Nevertheless, I was able
to run out of the door frame and behind the archer. Again, the archer must be
facing to his right - that's the only direction that affords the player any
chances of sneaking in or out of the blue hall. And there's still a slim chance
of success because he's still on 1st alert and doesn't really face 90 degrees
right - more like 45 degrees.
-A note about the last objective to escape to the train station: I was able to
return to the mission start to complete this objective and end the mission. I
did find a train station after exploring another city section. Since both areas
check off the last objective, I didn't care to sneak through the entire mission
again just to get to the train station. Once I had the tunnel dust and was
already close to the mission start, I opted to end the mission there.
Last edited by Hexameron; 02-04-2010 at 02:41
AM.
- 02-06-2010, 12:49 AM by
Peter Smith #182
![]()
Peter Smith
- View Profile
- View Forum Posts
![]() Moderator
Moderator ![]()
Join Date
Feb 2000
Location
Land of Enchantment
Posts
2,698
![]()
Good work, Hexameron. ![]() Interesting
report.
Interesting
report.
"What we've got here is a failure to communicate", the warden (Strother Martin), Cool Hand Luke
- 02-07-2010, 10:35 PM by
Peter Smith #183
![]()
Peter Smith
- View Profile
- View Forum Posts
![]() Moderator
Moderator ![]()
Join Date
Feb 2000
Location
Land of Enchantment
Posts
2,698
![]() The
WaterWay Tunnel Part 2
The
WaterWay Tunnel Part 2
FM: The WaterWay Tunnel Part 2: Ground
Guest
File: ftb-thetunnel2.zip
Perfect Thief - Success
Time - 00:54:55
Loot - 1/201 (all of loot, per author)
Pockets Picked - 1/2
Backstabs - 0 Knockouts - 0
Damage dealt - 0 Damage taken - 0
Healing taken - 0 Kills - 0
Comments
I could not give up after completing Waterway Tunnel Part 1, now could I?
Hexameron has previously described the mission, so
I'll be brief in the description.
There are three one-way, can't-go-back aspects to the mission that I found a
little objectionable. So, when I, too, failed to get into the armory I had to
replay it. A check at TTLG disclosed where the armory key was hidden. I guess
that is cheating, but I had already looked fairly hard and did not have the
patience to keep looking. Another funny thing was that even if you have the key
there is a chance the weapons objective won't check off. It depends on the
order of picking weapons. I was lucky and took a broadhead
first thing.
I, too, thought that taking damage from going down the chimney was pretty
silly. I guess it was just a joke.
I did not take damage by going down the sewer. I did the first time, but on
reload I did not. I saved and reloaded again. Again no damage. The deal is that
there is a slanted ladder there, and if you stick on it you are OK.
Two parts that I found challenging were jumping over to the balcony and getting
the sewer key and getting past the zombie with the lantern. They are both
doable (obviously) with good timing.
As for the splash in the well alerting zombies, I tried taking an object with
me hoping that it would reduce the noise. I took a skull. I have had that trick
help me before, using a boulder. Maybe it did help or maybe not - I don't really
know. I jumped into the well maybe a dozen times. On two occasions I heard no
complaint after I had sunk in the water. I agree that the sound is muffled and
hard to make out. But, I did hear muffled complaints most of the time and,
rarely, I heard nothing. You cannot hear anything at the surface of the water
owing to a sound design problem, so that is not a fair test. Anyway, I think
that the two times I heard nothing I was successful.
When I had missed the armory key, I spent a lot of time at the end of the
mission (the waterway tunnel) thinking that there must be a way to get through
that locked door. I even hauled every rock to the other end and stacked them on
shelves, thinking maybe if I cleaned out the rocks I could find the key in a
niche or find a switch or something. Nope. The reason I could not get through
the locked door is that the mission is supposed to end before you get to the
door. The fact that you can get there and be totally stuck is bad design.
Finally, regarding the loot, Yohny made a post at
TTLG where he said that he had made a mistake. The mission he had uploaded
reported incorrectly 201 loot, but all the loot that was actually in the
mission was a single coin (worth 1) behind some barrels in a wine cellar. You
need to flip a switch to move the barrels.
Last edited by Peter Smith; 02-07-2010 at 10:43 PM.
"What we've got here is a failure to communicate", the warden (Strother Martin), Cool Hand Luke
- 02-07-2010, 10:58 PM by
Hexameron #184
![]()
Hexameron
- View Profile
- View Forum Posts
![]() Gamer
Gamer
Join Date
Oct 2007
Posts
330
![]()
You've done it again, Peter! A perfect thief for a mission I thought was
a sure fail. If you've taken an interest in Yohny's
missions, try "Old Bad Fellows," which is the prequel to the WaterWay Tunnel series. I think I ghosted it and there are
a number of interesting situations for the ghoster,
but I don't have access to my notes because I played it on someone elses PC. "Meeting" is another weird one by Yohny with objectives that must be completed in the right
order. I'd be curious to see how you would go about ghosting this one - I
finished it in 2 minutes only after playing for an hour and realizing it
couldn't be ghosted the way the author intended...
- 02-14-2010, 08:38 PM by
Klatremus #185
Klatremus
- View Profile
- View Forum Posts
- Visit Homepage
![]() Gamer
Gamer
Join Date
Dec 2003
Location
Phoenix, AZ
Posts
203
![]()
FM: The Tower [Thief Anniversary Contest]
Ghost - Success
Perfect Thief - Success
Supreme Ghost - Failed
Perfect Supreme - Failed
Time - 1:02:21
Loot - 3844 out of 3844
Pockets Picked - 4/6
Locks Picked - 16
Backstabs - 0, Knockouts - 0
Damage dealt - 0, Damage taken - 0
Healing taken - 0, Kills - 0, Bodies Discovered - 0
Secrets Found - 4/4
Consumables - None
See the entire report with screenshots here (FMs).
Loot list here.
Comments:
My time had come to ‘The Tower’ by Lady Rowena. A very talented Italian author,
with former creations of epic proportions such as ‘Rowena’s Curse’ and ‘The
Seven Sisters’. Despite this being a smaller entry, I knew I was in for a
treat. Lady Rowena rarely disappoints.
Lord Witherdale’s jewel collection was my main target
of the night. Along the way I needed to pick up the golden skull of Lord Balakin and 3,200 in loot.
Right off the bat it sounded like all hell was loose. Doors being bashed in and
guards complaining. I didn’t find anyone searching or acting funny, so it has
to be a sequence of scripts. I didn’t find any broken doors or bodies laying around either.
The initial streets had four enemies to look out for. Two of the patrollers
were a normal swordsman and a thief. The thief covered the staircase to the
central tower. Another stationary thief was positioned just inside the tower
entry, doing random pivots. Then you had a maid doing a short loop on the south
side. I later learned her name to be Melina. There was a convenient ledge
circling the base of the tower that helped dodging the guards. From the back I
accessed the main floor through a sliding metal panel. There were quite a few
of those in various locations around the map; seemingly a common way to control
the town’s airflow. I desperately needed Alf’s key to progress. I tried getting
to the upper balconies with a single rope arrow from a multitude of angles, but
alas they were all unreachable from the streets. I found his key was snaggable from the shade just inside the grate (see image
below). I was already worried about how to replace it for Supreme. Normally you
need something soft to cushion the drop, like a carpet or a grassy surface, or
even a healing vial can do the trick. The rules don’t say how close is close
enough, but I figure keys off someone’s belt should be put back by the person’s
feet.
I could reach Witherdale’s sitting room by the
mentioned tower ledge. I had to mantle the balcony on the far left side to get
up. Entered Alf’s apartment by dodging Melina’s rounds. Found a basement key in
there and a couple of hints to a missing ring among the readables.
Witherdale’s basement was just across the alley, and
sure enough the ring was on the floor of the ceiling deck. I replaced the
basement key at Alf’s and uncovered his hidden stash of loot from a small
switch in the air shaft (see image).
There were three routes from inside the air vents. The first took me through
Blaine’s apartment, the husband of cheating Melina. The floors of his house
were tiled, but one of the hallways had some dark corners. I waited by the
bedroom door until he emerged, blocked the door and rushed in to grab the loot.
Getting out was the worst part (see image). He needed to pivot to his right,
otherwise he’d spot me. He had a small stop but then exited. I followed and
leaped out the window to the adjacent building. I monitored the thief and guard
in the streets below not to get caught.
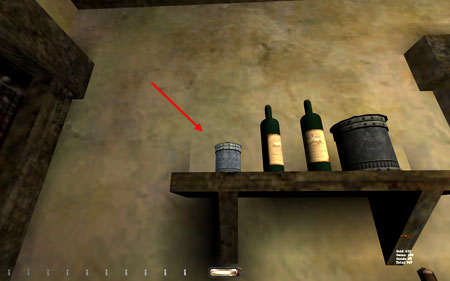
This was Amos’ mech shop. Not much to report except
for some hidden loot in a canister on the shelf (see image below). Kind of a
sneaky place to put it. I wish there was more of that in other missions also.
Found a key for a mechanist hideout downstairs. Brought it along for later. The
cellar had a half-secret switch on the pillar opening a nearby gate yielding
some coin stacks.
I could now reach the balcony of the tower’s second floor. Not much going on in
there, except I could reach another building on the north side. From there I
got to the roof. Dodging the patrolling archer by the control tower and the
guards below was a little tricky, but highly doable. I snagged his purse and
ran into the tower as he left. He had a short wait outside before returning,
enough for me to rope arrow up the rafters. There I found his secret stash of
life savings (see image). Not so secret anymore...
Traversed a pipe in the northwest corner to reach the notary’s. From here I
could reach Witherdale’s roof with a mantle-hop
across the streets 50 feet below. No way in hell you’d get me to do that in
real life! Found a goblet and some coins on the ground. His patio door was unfrobbable, but the window downstairs was open, and there
was a wooden rafter conveniently sticking out from the adjacent building. After
cleaning his jewels I made my way back to the notary. I needed the elevator key
to access the downstairs office. Both this and the cabinet key from the middle
floor disappeared upon use, thus no possibility of putting them back for
Supreme. I couldn’t relock the elevator door either, for the same reason. Could
the elevator key be considered an “unnecessary pickup”, and therefore break
Supreme rule #13? No, because without it I couldn’t have accessed the secret
crawlspace at the bottom of the elevator shaft (see image below). I needed the
key to enter the shaft after sending the lift up. If there hadn’t been loot
down there to justify it, I guess I would have had to pick the lock on the
outside door to get to the office. I know I’m nitpicking, but get over it.
Made my way back to the archer’s roof and jumped the gap to the central tower’s
third floor balcony. Got some new objectives to save and protect a noblewoman
named Leonora from the underground dungeon. Couldn’t enter her cell just yet,
but found a key to the top floor throne room where the perpetrator (Balakin) was located. There was a central light source that
pulsed on and off regularly. I timed it and ran to the corner with the golden
skull without any alerts. It seemed like it was just Balakin’s
body in the chair, while his spirit would appear on a first alert. It gave the
howling noise typical of a haunt’s comment, so I interprated
that to be an alert and hence a Supreme bust. I managed to grab the cells key,
the rings, the skull and leave down the hatch without the spirit showing itself
(see image below).
I was now free to fetch Leonora and leave the tower from the second floor
balcony. I returned the shaft key, but had to hang on to the cells key from the
throne room. There was no way to replace it without stirring Balakin’s attention. In fact, I couldn’t even avoid
alerting him to hunt mode. I had hopes of the carpet being silent enough, but
it clunked like it was made of wood. I also couldn’t close the access hatch.
The spirit appeared the second I frobbed it. Strange
how it didn’t alert to me unlocking it...
After leaving Leonora in the alley I ascended the air shaft above Alf’s
apartment. There was a mechanist hideout with the last two pieces of loot at
the very top. The entire mechanist loot stash was found in one of the chests
here, but it was locked and the only key was carried by a guard patrolling a
metal walkway above. The sloped ramp was also metal and the guard was facing it
for more than half of his route. There were a couple of spots close to the ramp
with shade, so I monitored the situation from there for a while. I knew a moss
arrow would have easily solved the problem, but I hate leaving such clear
evidence of a thief’s passing. Instead I tried a different approach. This
upcoming trick is extremely difficult and most players might be unaware of this
chink in the dark engine’s otherwise impenetrable armor. Every ledge in Thief
has an invisible outer edge, only noticeable if you slowly inch yourself
towards the rim. If lucky, you might land on this narrow tip and find that you
can actually traverse it along the line of the ledge. This hidden edge is 100%
silent. As long as you manage to stay within its boundaries, you won’t make a
sound. I’ve practiced the use of this technique many times, so I’ve gotten to
know its possibilities. As the guard passed the ramp on the walkway above, I
made a gentle leap towards the slope. After quite a few reloads I finally found
the speed and angle needed to land safely onto the silent edge. I then quickly
inched up the ramp to the shade at the top. From there I crouched into the far
corner where I could snag the key as he came by (see image below). Dropping to
ground level was no problem, comparatively speaking. The key luckily
disappeared upon use.
The last thing to take care of was a bonus objective in Louise’s place, a
recently widowed pregnant woman next to the mech
shop. It was accessible through the air shaft system mentioned earlier. One of
the readables mentioned her being in danger of losing
her house, much due to that scum of a notary. Leaving his title deed on her
table would spawn the new objective. However, I couldn’t close either of the
hatches in the air duct without waking the nearby worker. I left them open
instead; more Supreme busts. On another note, I had to lean in and drop the
deed onto the table from the air duct opening. If not, I would’ve had to exit
through her main door which meant taking her key, replacing it and relocking
the door. To much hassle, so I took the easier
option.
Alf’s key also couldn’t be returned, as previously indicated. I tried putting
it in various locations, but to no avail. A potion would muffle the drop, but
when removed still left too much noise for either of the thieves. I kept the
key for myself instead.
Notes & Busts:
- Couldn’t return the cells key to Balakin’s throne
room. His spirit alerted to second level hunt mode. This was a bust to Supreme
Ghost.
- Couldn’t close the hatch to Balakin’s throne room.
The spirit appeared indicating a first alert. Another Supreme bust.
- Couldn’t close the two hatches by the sleeping air duct worker. The noise
woke him up indicating a first alert. The choice is yours whether you want to
leave them open or skip the bonus objective with the pregrant
woman. Since Supreme was already busted, I gave Louise her title deed.
- Couldn’t return Alf’s key to the central tower’s main floor. There was
nothing to cushion the drop, so I hung on to it. Another Supreme bust.
Last edited by Klatremus; 02-15-2010 at 04:32
PM.
Klatremus' Supreme Thief Site -
Walkthroughs, Loot Lists & Ghost Reports
- 03-09-2010, 12:04 PM by
Klatremus #186
Klatremus
- View Profile
- View Forum Posts
- Visit Homepage
![]() Gamer
Gamer
Join Date
Dec 2003
Location
Phoenix, AZ
Posts
203
![]()
FM: Vampire Skull [Thief Anniversary Contest]
Ghost - Success
Perfect Thief - Success
Supreme Ghost - Failed
Perfect Supreme - Failed
Time - 16:19
Loot - 245 out of 245
Pockets Picked - 0/1
Locks Picked - 2
Backstabs - 0, Knockouts - 0
Damage dealt - 0, Damage taken - 0
Healing taken - 0, Kills - 0, Bodies Discovered - 0
Secrets - None
Consumables - None
See the entire report with screenshots here (FMs).
Loot list here.
Comments:
The hammerites had gotten hold of a vampiric skull worth quite a bit of dough. I needed to cut
their sermon short by stealing it, then make it back to the streeets.
Soon after start I realized some thieves had beaten me to it. The key accessing
their lair lay on the chapel floor.
Not much to report. A short, straight-forward sneak job is all. One tricky spot
in the sewers had a stationary thief guarding the cave entrance. I passed along
the side slope as he did his pivot. The two patrolling thieves further below
posed no threats.
Fetched the loot and the key from the boss’ bedroom (see image). The tomb
entrance was a little tricky to spot. It was located along one of the darker
walls in the sewers. Since taking the skull spawned several haunts around the
thieves’ lair, I returned the key to the bedroom before venturing into the
tomb. That way I didn’t have to deal with the thieves’ heightened senses. I
simply pulled the old lock-‘n-block trick with the tomb door. They key couldn’t
be returned to the alcove though, it made too much of a noise and woke the boss
to hunt mode. I put it on the corner of his bed instead. I guess this is a
small Supreme bust. Some players would say as long as you return it to the same
room you’re good. I don’t say that.
One haunt spawned right by the tomb entrance, staring down the tunnel with the
two thieves. To begin with they all gave some first alerts, but quickly blew it
off. I think what made them fight were sounds from swordplay below. The haunt
slayed the sentry before getting downed by the patrolling thief (see image). I
could now close and lock the tomb door without spawning a first alert, which is
what would have happened before the undeads arrived.
I replaced the sewer hatch key on my way back to the initial streets.
Notes & Busts:
- Couldn’t return the tomb key to the alcove in the thief’s bedroom. Had to put
it on the bed instead. Supreme bust.
Klatremus' Supreme Thief Site -
Walkthroughs, Loot Lists & Ghost Reports
- 03-09-2010, 12:12 PM by
Klatremus #187
Klatremus
- View Profile
- View Forum Posts
- Visit Homepage
![]() Gamer
Gamer
Join Date
Dec 2003
Location
Phoenix, AZ
Posts
203
![]()
FM: Weak Links [Thief Anniversary Contest]
Ghost - Success
Perfect Thief - Success ![]()
Supreme Ghost - Success
Perfect Supreme - Success ![]()
Time - 39:06
Loot - 3224 out of 3224
Pockets Picked - 1/4
Locks Picked - 4
Backstabs - 0, Knockouts - 0
Damage dealt - 0, Damage taken - 0
Healing taken - 0, Kills - 0, Bodies Discovered - 0
Secrets - 3/4
Consumables - None
See the entire report with screenshots here (FMs).
Loot list here.
Comments:
‘Weak Links’ was my next to last anniversary mission. It had been a nice
journey through the contestants’ creations, but I still had a couple of gems
left. This was the 5th place entry, made by Ghost in the Shell. I had to steal
Lord Victor’s exhibition valuables, 1,250 in loot and figure out what happened
to my contact, honest Timmy. An optional objective to break into Victor’s safe
was also included. The hardest difficulty was called ‘Noiseless’, due to the
built in Ghosting requirement.
There were several ways into Victor’s manor. I started by way of the armory.
Multiple patrollers covered the near vicinity, but gaining entrance wasn’t too
hard. Both armory doors were pickable. I found the
secret vault early on by frobbing an unlit torch, but
I needed to return to complete that objective later. Unlocking it required a
4-digit code that I was sure could be picked up somewhere.
Made my way to the basement instead. Here, the kitchen was the biggest deal.
Sporadic patches of light and two patrolling servants made it a fair bit
troublesome. Flipping the light switch behind the crates would have helped, but
Supreme doesn’t allow removal of light sources. Cleaned the barracks and found
Timmy dead in the dungeon. That objective ticked off and a new one appeared. I
was to avenge Timmy’s death, which ultimately meant killing Victor. Soon after
I found some rat poison on the kitchen shelf. It didn’t take long to put two
and two together. The kitchen counter had a couple of dark spots where I was
safe from both servants (see image). From there I could calmly steal the
various pieces of loot off the shelves.
The two patrolling guards at the top of the basement tended to get stuck.
Either that or they really liked each other. Luckily they always untangled
themselves after a while. I snuck upstairs between their patrols.
The dining hall at the top was rather intimidating at first. On the top floor
was a plateau with a camera staring in my direction. From this distance it was
tough to tell whether it gave alerts, so I skipped crossing the room from the
west side. I knew of a different way around anyway. Instead I cleaned Hannah’s
and Victor’s rooms. The Lord’s wine sat on the nightstand ready to be poisoned
(see image below). Just beside it was a button uncovering an alcove with a
diary, some loot and the armory key. I also found a dungeon key on the dresser.
Seeing as I had recently picked open those doors, I figured these keys were
needed to relock them. Supreme requires relocking doors even if they’re pickable. The readable also proved Victor’s involvement in
Timmy’s murder.
I got to the east side of the second floor by ascending the northern balcony.
Stole the valuables from the dining hall fairly easily from this side (see
image). The upper guard seemed oblivious to all activity below. I had a hard
time even getting a first alert out of him. Sometimes he gave settling remarks,
but overall he didn’t pose much of a threat. Perhaps the fence beam blocked his
view or something.
My biggest problem upstairs was retrieving Victor’s artifact collection without
alerting the security camera. The upper guard had a key that turned it off, but
that isn’t allowed. I felt this was the last bump in the road towards a rare
Perfect Supreme, so I wanted to experiment. I quickly realized the stairs to
the gallery couldn’t be climbed normally. The camera had a fairly short swing
to the south, so coming up around the railing was out of the question.
Fortunately, I had 3 rope arrows in my possession, and the ceiling was
deliciously wooden. I fastened two ropes as shown below and clutched on to the
nearest while timing the camera. As it swung away, I climbed up and leaped
forward. I could grab hold of the second rope and drop below the camera off the
marbled table without any alerts. From here I could snag all the artifacts.
Occasionally the patrolling guard below gave a grumble, but the sentry across
the dining hall remained silent. I even repeated all the moves with the
security system off just to listen for alerts, but he kept utterly quiet
through everything. Returning to the stairs required a well-angled jump over
the railing. With a little luck I got a soft landing. I ascended the ropes
again to retrieve the arrows, but all in all I was home free.
I found the vault code in one of the library books. The vault itself contained
the rest of my loot. Relocked the armory and the dungeon before returning both
keys to Victor’s bedroom. I even returned the rat poison to the kitchen shelf
alert free!
Klatremus' Supreme Thief Site -
Walkthroughs, Loot Lists & Ghost Reports
- 03-09-2010, 12:24 PM by
Klatremus #188
Klatremus
- View Profile
- View Forum Posts
- Visit Homepage
![]() Gamer
Gamer
Join Date
Dec 2003
Location
Phoenix, AZ
Posts
203
![]()
FM: A Weekend Getaway [Thief Anniversary Contest]
See the entire report with screenshots here (FMs).
Loot list here.
Part 1
Ghost - Success
Perfect Thief - N/A
Supreme Ghost - Success
Perfect Supreme - N/A
Time - 22:14
Loot - None
Pockets Picked - None
Locks Picked - None
Backstabs - 0, Knockouts - 0
Damage dealt - 0, Damage taken - 0
Healing taken - 0, Kills - 0, Bodies Discovered - 0
Secrets - None
Consumables - None
Comments:
Jenivere and Basso had taken in at The Wishing Well
Inn for the weekend. I started as Basso, hearing Jenivere’s
cry in the distance. Following the objectives, I needed to shut out the lights,
find a rosary and gather some info on what was happening. I also needed access
to the attic.
The hotel interior was stunning. The second floor lobby I found especially
appealing (see image). The hallways posed no real threats in terms of sneaking,
except for the occasional lightning bolt. Frequent quicksaves
helped considerably. The staircase was unaccessable
while the lights were on, so I utilized the dumbwaiter for general movement
between floors. Downstairs had two patrollers, which made life a little harder
(no pun intended). Probably because both the rosary and the attic key was
located here, in addition to the required readables.
They provided insight on the background of a hammerite
cult in the area. I guessed they were the reason for this mess.
The attic key unlocked any of the five access points on the second floor. I
chose the southwest bedroom, as it didn’t have any patrollers stopping by (see
image above). The only thing of interest in the ceiling crawlspace was a metal
screwdriver in a toolbox. I brought it all the way to the basement and used it
to vandalize the breaker box. That killed the lights, so I returned the
screwdriver to the attic immediately. The dumbwaiter sometimes alerted the
patrolling haunt, although I couldn’t find any reason for it. It was hard to
hear over the engine noise, but I reloaded if I had the faintest idea of an
alert.
I feared the main entrance gate would alert the hammer priest outside, but he
didn’t make a peep. Lucky, since all I had to do was ascend the rope in the
alley to end the mission.
Part 2
Ghost - Success
Perfect Thief - N/A
Supreme Ghost - Failed
Perfect Supreme - N/A
Time - 11:53
Loot - None
Pockets Picked - None
Locks Picked - None
Backstabs - 0, Knockouts - 0
Damage dealt - 0, Damage taken - 0
Healing taken - 0, Kills - 0, Bodies Discovered - 0
Secrets - None
Consumables - None
Comments:
Part one was short but entertaining and the next chapter offered much of the
same. The lights were out, so I needed to get them back on (for some odd
reason). Required pickups were a holy book and something wet to bless. Also
required was more background information on the current situation.
I knew my way around quite well by now, so maneuvering the hallways was easy.
The first floor had added enemies, with a patrolling hammer mage and two lobby
sentries. I saw that area being difficult with the lights on later. Found the
holy book in the lobby upstairs and a sponge in the nearby bathroom. For some
reason the bathroom ceiling hatch was already open, and I could easily fetch
the repair crank from the toolbox in the attic.
When I was sure everything else was completed, I entered the basement by way of
the stairs. The two patrolling hammers were unproblematic as long as the lights
were off. Once having repaired the breaker box it was a different story. I only
had to reach the dumbwaiter to be safe, but it took a couple of tries to get it
right. The zombie turned around right as I leaped onto the ledge. I waited till
they both cleared and rode to the top floor.
All I had to do before ending was return the repair crank to the attic toolbox.
I then sent the dumbwaiter back to its original position and descended the
second floor stairs. My last problem was passing the area between the lobby and
the entrance gates (see image above). The light fixture lit up everythig but the corners. The patrolling mage did a side
trip down the lobby as a part of his route. I waited in the staircase for my
chance. I could reach any of the corners with only a gasp from the haunt,
indicating a first alerts, but going for the end hallway would make him chase
me. I figured the initial alert heightened his senses, so I had to go for the
cross in one move. Run-jumping onto the far end of the carpet then sprinting
out of sight did the trick. I needed 5-6 tries to get the speed right. As you
can see from the image below, the haunt is in place and unbothered. I think I
spawned a grunt from the stationary zombie as well.
Supreme was busted, but to be honest, I was happy plain Ghost was still intact.
I entered the cultist’s room and the mission ended.
Notes & Busts
- Spawned at least one first alert when crossing the main lobby to reach the
cultist’s room. Inevitable, as the lights were on at this point. Supreme Ghost
bust.
Part 3
Ghost - Failed
Perfect Thief - N/A
Supreme Ghost - Failed
Perfect Supreme - N/A
Time - 7:52
Loot - None
Pockets Picked - None
Locks Picked - None
Backstabs - 2, Knockouts - 0
Damage dealt - 30, Damage taken - 0
Healing taken - 0, Kills - 1, Bodies Discovered - 0
Secrets - None
Consumables - None
Comments:
The third and final act was a little different. I had to find and rescue Jenivere by breaking the cult’s seal. First though I had to
find a holy weapon, and the last set of information regarding tonight’s bizarre
events. I started in the cultist’s room where I left off before.
Right off the bat I had to find a hiding spot. A haunt would enter the room
within 10 seconds. The corner by the couch worked well. Two patrollers on this
floor had to be dodged to reach the lobby. No big deal. Found the sword on top
of the pigeonholes in the reception. Blessed it with the holy book and the
rosary first. Nothing else to do so I headed for the caves beneath the
basement.
On the way I encountered a patrolling mage and a stationary zombie. The zombie
was staring down the path I needed to go (see image above), but the glowing ‘shrooms were just dim enough to avoid his gaze. I had to
creep-crouch to his right to stay hidden. And I had to do it fast, because the
mage would soon return and catch me in the cave tunnel.
The seal could be broken by the blessed sword, but upon breaking it a haunt
would appear and come chasing. I realized that lowering the sword immediately
after the swing would spawn the haunt but keep him unalerted
(see image below). I could therefore sneak in and take him out with an overhead
blow. This kill was necessary to avoid face-to-face combat when breaking the
skulls surrounding the portal. It was still a bust toward Ghost, as nothing in
the objectives told me to kill anyone. The skulls needed to be broken with the
sword, NOT with the blackjack, broadheads or similar
weapons. First time around I thought there was a bug and started over, only to
find it didn’t work the second time around either. I used the blackjack
initially not to alert the patrolling mage. Turns out using the blackjack is
just as loud, and the mage alerts regardless. I went to check a couple of times
and he was always in hunt mode, even when located way up by the zombie. I guess
turning undead boosts your sense of hearing.
After destroying the portal all the enemies were dead. I brought Jenivere to our room and ended the night there.
Notes & Busts
- Had to kill the haunt in the final cave to destroy the portal. It was
inevitable, but not instructed in the objectives, so a clear Ghost bust.
- Alerted the patrolling mage when breaking the 10 skulls surrounding the
portal. No matter how far away he was, he always alerted to hunt mode.
- The damage dealt and others killed are from backstabbing the haunt. The
second backstab took me by surprise. I don’t know why this shows up in the
stats. Perhaps the 10 skulls are considered an AI in Dromed,
but I really couldn’t tell you. I only caused the one.
Last edited by Klatremus; 04-23-2010 at 09:02
PM.
Klatremus' Supreme Thief Site -
Walkthroughs, Loot Lists & Ghost Reports
- 03-28-2010, 10:24 AM by
Klatremus #189
Klatremus
- View Profile
- View Forum Posts
- Visit Homepage
![]() Gamer
Gamer
Join Date
Dec 2003
Location
Phoenix, AZ
Posts
203
![]()
FM: Broken Triad, Part 1: Arkford
Ghost - Success
Perfect Thief - Success
Supreme Ghost - Debatable, but I say success ![]() (see
bottom notes)
(see
bottom notes)
Perfect Supreme - Failed
Time - 3:23:53
Loot - 2010/2010 (Supreme: 1850)
Pockets Picked - 3/4
Locks Picked - 25
Backstabs - 0, Knockouts - 0
Damage dealt - 0, Damage taken - 0
Healing taken - 0, Kills - 0, Bodies Discovered - 2
Secrets - 7/8
Consumables - None
See the entire report with screenshots here (FMs).
Loot list here.
Comments:
I had been looking forward to this one for a long time. The sequel to perhaps
the best single-mission release ever, Ominous Bequest. And a two-mission sequel
to boot! If they were anywhere near the quality of the orginial,
I was in for a treat.
I was in Arkford to steal a museum item called ‘the
Sleeper’. Even if ugly, it was gonna bring me some
dough. Looks don’t matter they say, it’s what’s inside that counts. Apparently
the museum’s security system was tougher than usual, so I had a replica made to
exchange for the original. In short, I needed to pick up whatever keys from
Sheila Jennings, swap the sculpture and head back home. An additional objective
was to “...reactivate the security measures around the sculpture exactly as [I]
found them”. Supreme rule #8 says: “No turning off of watchers, or other
security systems.” Does this objective imply turning off the security system?
Here is my breakdown: First, even though it didn’t say so directly, it seemed
explicitly necessary following the wording. How can you reactivate something
without deactivating it first? Second, Supreme rule #8 is mainly there to
prevent systems that observe you, the way a human AI does, from being
incapacitated, much the same way a knockout blow would. Normally this means
security cameras, or watchers. Third, I had a feeling the security system was
an integral part of the mission’s story; it would be a shame to bust simply by
following the author’s intended and inevitable route, especially given my first
two arguments.
Two optional objectives were also given up front: steal the museum inspector’s
security report, and avoid triggering any alarms. Recently discussed at Eidos’ Thief Forum, optional objectives provided in the
loadout screen are not required for plain Ghost, only for Supreme. Contrastly, hidden bonus objectives discovered throughout the
mission are not required for either mode. With all that in mind, I was ready to
take on the world...ahem... Arkford.
Early Roamings
After some initial visions (see image), things went back to normalcy. Having
already done a blackjack run, I was familiar with loot locations and other
necessary pickups. I had a pretty good idea of what route to take through the
city. The northwest region was scattered with smaller establishments. Most of
the street guards had long patrols and the shadows were plentiful. Civilians
didn’t alert, but they still made me jump on occasion. A hidden purse was
located inside an open window in the far west (see image). Why anybody would
want to leave windows open on a night like this is beyond me. I couldn’t enter
the building, but the loot was snaggable from
outside. A convenient set of icy ledges enabled me to reach it fairly easy.
A couple of tricky secrets were found furter east.
One behind a pillar in a mechanist office (see image); the other on the statue
of St. Bernard close to Sheila’s house (see image). Both revealed nearby loot.
The latter required a high rope arrow, but it was retrievable without taking
damage. Miss Jennings was decapitated, but I found the museum backdoor key
under her desk.
Next door to Sheila was the entrance to the museum courtyard. It was blocked by
a stationary archer though (see image), so I had to circle the museum and
approach from the east. This gave me an excuse to roam the northeastern parts
of the city. I had some more items to pick up before heading for the museum
anyway.
Found a single coin on a ledge across the canal at Mill Square. Had to mantle
by way of the water wheel to reach it. This was near Stone Avenue, a tight set
of alleys with a single patrolling guard. A control room here granted access to
the sewer maintenance room, where I found the precious manhole key. It stuck to
my inventory, so no way to return it later.
Several establishments in this area were unaccessible
until getting Yarwick’s skeleton key. A single
apartment northwest of Verain Plaza was available
though. The owner inside had a simple route between the living room and his
office, stopping for about 30 seconds at each location. I needed objects from
both rooms. The hallway was marbled, with a runner down the middle. The office
was carpeted as well. If it hadn’t been for a small dark patch near the coat
rack (see image below), this house might have been unghostable.
I waited for him to enter the living room, then rushed out to pick the lock on
the office safe. I got it halfway, but then had to return to my hiding spot
before the owner returned. To save time, I leaped from one rug to the next
through the doorway. During the second round I had time to finish picking the
lock and steal all the office loot. I also stole the bellows from next to the
fireplace while the gentleman was away.
Getting Down to Business
Next up was the Bathing Burrick Inn. My target was
the security inspector upstairs, whose room was well-guarded. The only way to
enter his den was by cranking up the radiator, making the guard leave for the
bar. The steam valve was in the cellar, which meant I needed the key from the
innkeeper. Neither him nor the guests reacted to my presence, but all civilians
alert when getting their pockets picked, if they have spotted you first. Coming
from the basement would circumvent this. The basement entrance was heavily
guarded by an archer and several patrolling swordsmen (see image), but nothing
that’d keep a taffer like me away. After turning the
valve I returned the key and entered the second floor by way of the open window
on the north side. It was accessible from the wall separating the museum’s
eastern and western side. A total of five enemies were located in the near
vicinity, but traversing the wall kept me dark for the majority of the stretch.
The inspector’s guard left his post as I ascended the staircase and I could
concentrate on my real target.
The inspector did a double-loop before stopping by the bed staring in the
direction of the desk (see image above). He stayed there for about 10 seconds,
then resumed his patrol. More often than not he didn’t alert to the door
opening. There were two items of interest: the security report and a vase on
the side dresser. The only time to enter his room without spawning a grumble
was when he turned around and headed back towards the bed. For about 3-4
seconds the room was “available”. Both items were attainable by taking two
steps into the doorway and leaning towards the dresser and the desk,
respectively. The report was the hardest to retrieve, as it was a little
further away and the inspector occasionally heard me stepping on the wooden
floor. I closed the door and left, entirely alert-free.
Nothing further to report until reaching Hewitt & Sons Transports. It was
located in a blocked off alley accessible by way of the sewers. I needed a key
from the upper office to operate the wood chipper machine. It was placed on a
bookshelf on the back wall. The traditional means of entry involved knocking
out the guard by smacking him in the back of the head with a window, obviously
against Ghosting rules. The alternate way in was through a metal ventilation
shaft behind one of the larger crates (see image). I could inch up the shaft
and steal the key through the grate. I was real worried about being able to
replace it for Supreme though, as the guard was only a few feet away. I tried a
variety of angled leaning techniques, before finally stumbling upon what seemed
to make the key float in mid-air (see image below). Somehow the book stack’s
physical space seemed to extend above its apparent height. This was the closest
and most logical place to put it, and the only spot where the guard didn’t
alert. It was impossible under any circumstance to put the key back to its
exact location. Another tough challenge passed with flying colors!
I had to pass a couple of smaller tests to continue through the sewers. Propped
a grate open with a boulder at one point; returned the boulder afterwards.
Would later have to return to put the grates to their original configuration.
The part where I had to fill the compartment with water to reach the upper
passage couldn’t be undone, and the lower access door was permanently shut.
Found a nifty secret among the catacomb sarcophagi. One of the light fixtures
was frobbable, revealing the Tomb of the Nameless Riddler (see image). It contained various puzzles,
rewarding me with the Staff of Far Reach, probably my favorite addition of this
campaign. It could flip any switch from a distance. The shot had a straight
trajectory as well, which was nice. Unfortunately, the shot would alert anyone
in the near vicinity to hunt mode. Back through the catacombs I emerged in the
museum cemetery.
The Museum, First Time Around
I headed straight for Sheila’s office. Knew I’d have to come back later with
the skeleton key, so I’d loot everything else then. As a part of signaling Ned,
I needed to switch off the electric light (see image above). Strictly speaking,
this is a Supreme bust. Rule #6 says: “Turning off electric lights, snuffing
candles, or removing any light source including mushrooms is [...] not
allowed.” However, the rule is obviously meant to disallow the removal of light
sources that prevent movement through enemy territory. In this case, it was
done as a part of a puzzle. No consumables were used, the lights were put back
to their original state, no enemies were around at any point during the event,
and no traces were left of any kind. Rules aren’t made for the rules’ sake,
they all create a purposeful limitation, and I don’t feel this situation breaks
anything the rules were meant to prevent. But I don’t want to make it seem like
I’m excusing my way out of a bust. I am an honest player and want to report my
thoughts on it; hopefully it can spawn some replies from other players.
I could now make my way through the city watch station. The tricky spot was
getting down the end hallway to the cells. I had Ned plus two other guards to
deal with (see image); a pivoting stationary guard by the fireplace and a
patroller covering the entire stretch from the break room to the end of the
cells. There was a small spot behind the pillar where I could get ready. I had
to wait for the patroller to come around, then follow him down the tunnel. I
hid in one of the cells as he returned. The secret exit was easy to find, based
on Ned’s description in his readable.
Only one problem in the catacombs, in a room with a randomly patrolling green
spider. The exit was controlled by a big lever in the corner past the spider.
The room was more or less dark, except for shiny windows on either side. I
found I could reach the lever without ever passing the window, simply leaning
in from close to the wall and frob it like that (see
image below). It depended on the spider staying away from that side of the room
long enough for me to do my deed. Not too big of a deal in the end.
The Elusive Skeleton Key
Cleaned Yarwick’s and Alarius’
with ease. There was a nifty switch on the back of the counter at the
jeweler’s. Not the one that opened the glass cover, but a smaller switch in a
tiny alcove very close by (see image). It opened a hidden cellar with loot. I
actually made my way back through the catacombs and the city watch station
afterwards. That way I could close all the gates, panels and doors for Supreme.
On my way back to the museum I also put the sewer grates back to the original
configuration. One section got filled with water earlier and there was no way
to empty it. Nothing to report from Boleston’s tower
either. I knew the code for the punch card machine, so I now had access to all
parts of the museum.
The most difficult area in the museum was the main lobby by far. Two patrolling
guards and a roaming civilian made sneaking tough. In addition, one piece of
loot was located inside a locked safe in the reception. Luckily, I found a dark
spot outside the counter, within reach of my lockpicks
(see image below). The patrolling woman went by unbothered most of the time. It
didn’t seem like there was much shade, but it kept me completely dark for the
duration of my picking. When leaning I sometimes shifted position into the
light, and the dark spot was hard to regain. It was a grueling couple of
minutes, but I got away with Supreme intact.
The rest of the museum compound was fairly straightforward. The main gallery
was only occupied by a single female patroller covering both floors. No problem
to steal the objects while she was elsewhere. She had a small pitstop by the downstairs control room, enough for me to
blow the horn with the bellows and grab the Solar Core without anybody
noticing. A good example of Eshaktaar’s consideration
for the Ghost mode. I fiddled some with the order of reactivating the red and
blue security measures, but got there in the end. There was a single coin on
the carpet in the upper west wing. It was under one of the couches, so kinda hard to spot. Nothing else to report really.
The Tables are Turning
Headed for my apartment and got news from Keeper Lennard on this Nyarsal demon. Received information on the nightshade juice
and left for the cathedral. Picked up the chalice there and headed back for the
catacombs. On my way I dropped off the Horn of Quintus, which actually was a
fake, in a hidden workshop across the canal. A frobbable
tile opened a panel accessing an underground stock of horns. Triggering the
mechanism on the altar left me with only the real horn (see image), which
spawned a new bonus objective.
I put together the potion in the catacombs and drank it in the cathedral.
Realized I was played by Lennard and that Nyarsal now
was free to roam wherever. In the visions you actually foreshadow the location
of Tempest Isle, the target for mission two (see image). Don’t know how many
picked up on that.
I ended up in the crematorium, with further instructions by Keeper Aleph. I had
a real hard time with the ash spirits, not because they were tough to Ghost,
but because I couldn’t distinguish between first alert gasps and idle noises.
To be honest I don’t even know if they had first alerts. I did several tests to
check their response level, but was unable to find any consistent alert sounds.
Does a falling tree make a sound if nobody is around to hear it? I don’t know,
it all depends on how you define ‘sound’ I guess. In the end I decided to play
it safe. If I was even the slightest in doubt of being detected, I reloaded.
The first ash spirit spawned from an urn in the middle of the first chamber. It
took around 10 seconds before he materialized, so I had some time to pick the
lock on the next door before he’d start to patrol. He heard the lockpics unless he was close to the opposite end, so I kept
my tools still for a few moments before resuming.
The next tricky spot came further down the hallway. The third spirit was the
only stationary one, by the foot of a ramp close to a gurney lift (see image
above). I could stay dark most of the way but rounding that corner exposed me
too much. If I went slow he’d start hunting; if I rushed into the corner by the
lift he gave a clear gasp every time. I figured this as a clear alert, so I
needed to think of something else. Supreme was only holding up like a house of
cards from before, so this was no good. My only chance was to reach the upper
walkway by means of mantling. I had noticed earlier the door in the southwest
guard station was possible to mantle. I used it to reach the loot on the upper
ledges. Once I realized the crematorium doors were no different, I saw my
opportunity. I could mantle the metal door by the first ash spirit as shown in
the image below. Leaping for the walkway I had to jump and shut the door
simultaneously (required for Supreme). Looking down, running forward, frobbing the door and jumping at the same time, ensuring no
enemies were around to hear the door slam, and finally mantling the edge. I gotta say this was one of the toughest set of moves I’ve
ever had to put together. But it also felt greatly rewarding once I got out of
it clean. Every rose has its thorn I guess.
Sweeping the Remains
The city streets were deader than a doornail, Nyarsal
had made sure of that. This meant a lot of the tough spots from before would
have been a walk in part had I waited. Ah well, you live and learn. Anyway, I
was free to pick up some remaining pieces of loot and return some of the stuff
I didn’t need anymore for Supreme: the bellows, the
museum backdoor key and the skeleton key. The hammer quarters key left by
Keeper Aleph also needed to be returned to the crematorium. I could drop it
from the walkway above when the spirits were absent. When dropping objects from
higher ground, it seems you need to look down to lower the impact. If I looked
straight, the key would make an extra clunk when landing and alert the
stationary spirit nearby. If leaning and looking down the key made a single,
light clunk and the spirit was left unbothered. Returned to the surface
afterwards. The last object to replace was the white cathedral key.
I was pleasantly surprised to see a fair portion of the casino loot was
actually obtainable for Supreme. Initially I had thought about skipping the
entire building for that mode, but luckily I gave it a shot. I descended by
attaching a rope to the wooden beam close to the circling ledge in the
northeast corner (see image above). The reception lady was my main concern for
reaching the floor. She gave me no trouble as I swung close to the dark eastern
wall (where the doors were). From here I could get the stack of dollars from
the reception table and the coin pile from the closest slot machine. To
traverse the room as shown in the red path below, the girl had to be facing
east. She shifted randomly between east and north angles, and the length of
time she spent in each direction varied. I could crouch-walk through the entire
move and with a little luck she wouldn’t turn north until I was safe. The
gamblers were too far away to alert. The other slot machine and the coin behind
the craps table were now reachable. The single coin could be taken from the
south side in the corner. That was it for Supreme, so I left with what I had,
1850 in total.

Believe me, when playing Supreme, switching to plain Ghost many times becomes
nothing of a challenge. I am not trying to slap those devoted to regular
ghosting. Plenty of times I have had to revert to that mode and gotten my ass
kicked, but as for the casino, the rest of the loot was fairly simple. I could
basically sneak wherever there were some amounts of shade and steal the
remaining four piece of loot.
The ring in Mrs. Wigglesworth’s apartment south of Boleston’s
tower was my final target. Opening the door made her grumble, so I had to say
no to this loot for Supreme. I got more comments when entering the room, so I
didn’t think twice about skipping it. Made my way to the museum afterwards and
entered the portal.
Notes & Busts
- I had to switch off the electric lights in Sheila Jenning’s
office in the museum in order to signal Ned and gain access to the city watch
station. Techinnically this is against Supreme rules,
but I doubt this is a situation rule #6 was meant for. I switched the lights
back on before any guards came around and left no possible traces behind. This
situation is up for debate, but my vote is ‘no bust’.
- Turning off the museum’s security system is allowed in my mind for two
reasons. 1) Its requirement is heavily implied in the objective that directs
you to “reactivate the security measures”. 2) Supreme rule #8 was made with
watchers, or other systems that alert and behave similar to live enemies, in
mind. Discussion on this topic is encouraged.
- Had to skip four pieces of loot in the casino for Supreme: the coins in the
safe (100), the purse on the female gambler (25), and the two single coins on
the gambling table (10).
- Also had to skip the ring (25) in Mrs. Wigglesworth’s apartment south of Boleston’s tower for Supreme. She alerted with a comment
when opening her door.
Last edited by Klatremus; 03-28-2010 at 02:47
PM.
Klatremus' Supreme Thief Site -
Walkthroughs, Loot Lists & Ghost Reports
- 04-09-2010, 11:58 AM by
Peter Smith #190
![]()
Peter Smith
- View Profile
- View Forum Posts
![]() Moderator
Moderator ![]()
Join Date
Feb 2000
Location
Land of Enchantment
Posts
2,698
![]() Dyer's
Eve
Dyer's
Eve
FM: Dyer's Eve
File: DyersEve1.0.zip
Ghost - Failed
Time - 02:37:23
Loot - 1805/1805
Pockets Picked - 1/3
Backstabs - 0 Knockouts - 0
Damage dealt - 0 Damage taken - 0
Healing taken - 0 Kills - 0
Secrets 2/2
Comments
I was inspired to re-play this oldie-but-goodie when Manzanita stopped by the
forum and asked a question about it. As has been reported by Vanguard,
Dyer's Eve is impossible to ghost, but I didn't know that when I started. I
first played it 9 years ago. I remembered that I ghosted most of it, and I
remembered killing all the AI and making a nice pile of bodies (see picture),
but I did not remember what tripped me up.
First, it is a very nice undead mission. The AI are really freaky, making
custom sounds. The best are the female zombies, who "make a pass" at
Garrett, with lines and voice acting by Wynne. It is worth playing the mission
just for that. ![]()
The general character of the mission is that there are a lot of undead AI in
the house / monastery, they are quite accute, and
getting past them is a real challenge. The author has left a way around the problem
and the limited supplies by providing several magic statues that automatically
kill the AI when you lure them in front of the statues. That is a huge amount
of fun. The ghosting is also fun because it is challenging.
I ghosted it up to the time when you enter the keep, which requires four
talismans to unlock the door.
That mask thingy is an evil, goosey AI with its own light source. I am about to
be killed by it. Not only that, if you kill one of the swordsman zombies (on
the right), it spawns another one of those mask things.![]()
Getting the talismans caused two small ghosting exceptions. One is that to find
the earth talisman you have to find some explosive flour and blow up a rock
pile to open a cave. That might be counted as property damage (whose
property?), but I am not sure. Anyway, I timed it, and I did the explosion
without alerting any AI. The explosive flour is a nice ghosting feature,
because it does not go into inventory, so you have to keep dropping it while maneuvering.
The second problem is that to find the air talisman you have to cut yourself
with a knife. It results in the loss of one health shield, but that was not
counted as damage in the ending stats. I don't think the rules are clear on
that, either.
Anyway, I got into the keep, but I could not get past two female zombies in the
first room. So I alerted them and hid under the stairs. From that point, I
tried to ghost when possible. I succeeded in getting all the way up to the
transporter room in ghost mode.
The transporter must be opened by four arrows, one of which is a fire arrow. As
you see it above, only one of four barriers remains in front of the portal. I
have used the other three arrows, keeping the fire arrow for last because it
causes a big commotion. So now I can use the fire arrow, alert the female
zombies in that room, and exit through the portal. Right? Not quite....
There is one problem here. If you are ghosting, you get to this point with one
unsatisfied objective, which is to find information about the brotherhood. Then
when you go through the transporter, you fall to your death. The only way to
complete the mission is to either complete that objective or cancel it before
going through the transporter.
I searched high and low, and I could not find that information. However, when
you start killing zombies using the statue in the chapel, the objective becomes
canceled. How to do this without killing AI was my main problem. I spent a fair
amount of time in the chapel trying to find either the information or a switch
that canceled the objective. In the end, I discovered that if you shoot a fire
arrow at the statue in the chapel, the objective is canceled, so now you can
complete the mission with zero damage. But the fire arrow alerts some AI, too.
Another problem is that you don't have any fire arrows to do the above when you
first enter the chapel. You have already used the only one available to blow up
the rocks in front of the cave. And, if you don't use the fire arrow for that
purpose, you are locked out of the keep and unable to proceed. So, I had to go
far up into the keep to get more fire arrows and then go back down to use one
in the chapel, in a non-intuitive manner. Pretty tricky.
Anyway, this procedure canceled the information objective. Then I went back up,
shot my fire arrow at the remaining portal block, went through the portal, and
this time I fell down the same pit, but the mission ended properly. ![]()
So, I achieved no damage to AI with some effort, but ghosting seems to be
impossible.
One final thing. There is a nice secret in the graveyard. I won't explain it in
detail, but remember that this mission was released on October 18, 2001,
shortly after 9/11.
Last edited by Peter Smith; 04-09-2010 at 02:27 PM.
"What we've got here is a failure to communicate", the warden (Strother Martin), Cool Hand Luke
- 05-22-2010, 06:30 PM by
Hexameron #191
![]()
Hexameron
- View Profile
- View Forum Posts
![]() Gamer
Gamer
Join Date
Oct 2007
Posts
330
![]()
FM: Meeting
File: fbt-meeting4.zip
Ghost - Success
Perfect Thief - Failed
Time - 00:07:26
Loot - 0/215
Pockets Picked - 1/4
Backstabs - 0 Knockouts - 0
Damage dealt - 0 Damage taken - 0
Healing taken - 0 Kills - 0
Comments - This FM is by the same author who gave us the infamous "WaterWay Tunnel" series ![]() . My
ghost success here was only possible by resorting to cheating. I avoided all
new objectives, which I don't think the author intended. Right at the mission
starting point is a keeper journal. Reading this triggers a new objective to
find all of the notes in a specific order that are strewn about the mission.
For example, one note might hint that you need to go to the pub; there you'll
find another note that says "now go to the garden" etc. Each time you
read a note, a new objective occurs to find the next one. You can find them out
of order, but once you find and read one note, you need to read all others.
. My
ghost success here was only possible by resorting to cheating. I avoided all
new objectives, which I don't think the author intended. Right at the mission
starting point is a keeper journal. Reading this triggers a new objective to
find all of the notes in a specific order that are strewn about the mission.
For example, one note might hint that you need to go to the pub; there you'll
find another note that says "now go to the garden" etc. Each time you
read a note, a new objective occurs to find the next one. You can find them out
of order, but once you find and read one note, you need to read all others.
If I had triggered this series of objectives to read notes, I would have to
accept at least one ghost bust at the pub. The interior of the pub is well-lit
by torches and inhabited by a barkeep and bluecoat. They are sensitive to
torch-dousing and invariably become 2nd alerted to any splashes of water
arrows. I could not sneak in and up the stairs unless the torches were doused,
so this would have definitely busted me.
To avoid this dead-end bust, I restarted the mission and did not read the
keeper journal or any notes. Instead, I went to the post office and frobbed the "??? Key" from behind the locked mail
box. All I had to do now was go to the power supply building, frob the key from behind the upper wall pipe, and descend
down the sewer hatch to meet the "man who knocked on my door". He's a
mechanist who greets Garrett with a scripted monologue. After the conversation
is over, the mission ends. Although I avoided twenty minutes of game time by
not reading the keeper journal and going on the note hunt, I still completed
the mission legitimately, albeit with the cheating clairvoyance of knowing
where the "??? Key" was and being able to frob
it without opening the mail box.
- 05-22-2010, 06:39 PM by
Hexameron #192
![]()
Hexameron
- View Profile
- View Forum Posts
![]() Gamer
Gamer
Join Date
Oct 2007
Posts
330
![]()
FM: The Cloister of St. Lazarius
File: StLazarius.zip
Ghost - Success or N/A and aborted
Time - 00:07:55
Loot - 312/2137
Pockets Picked - 0/1
Backstabs - 0 Knockouts - 0
Damage dealt - 0 Damage taken - 0
Healing taken - 0 Kills - 0
Comments - This is an entry for the Beauty Contest. The objective directs
the player to "dance around the cathedral," so I explored every
corner and nothing happened. There are no AI or areas of particular interest,
although the architecture and textures are impressive to behold.
- 05-22-2010, 06:44 PM by
Hexameron #193
![]()
Hexameron
- View Profile
- View Forum Posts
![]() Gamer
Gamer
Join Date
Oct 2007
Posts
330
![]()
FM: Ride the Butterfly
File: RideButterfly.zip
Ghost - Success or N/A and aborted
Time - 00:02:31
Loot - 0/0
Pockets Picked - 0/1
Backstabs - 0 Knockouts - 0
Damage dealt - 0 Damage taken - 0
Healing taken - 0 Kills - 0
Comments - Another Beauty Contest mission, this time outside in an earthly
paradise reminiscent of TES' Oblivion. The pastures are active with frogbeasts and bunnies that don't alert to the player. I
did what the author wanted and hopped on the butterfly and then proceeded to
the cave where the mission ended.
- 05-22-2010, 06:48 PM by
Hexameron #194
![]()
Hexameron
- View Profile
- View Forum Posts
![]() Gamer
Gamer
Join Date
Oct 2007
Posts
330
![]()
FM: Hazelshade Cemetery
File: Graveyard.zip
Ghost - Success or N/A and aborted
Time - 00:03:53
Loot - 0/0
Pockets Picked - 0/1
Backstabs - 0 Knockouts - 0
Damage dealt - 0 Damage taken - 0
Healing taken - 0 Kills - 0
Comments - Another gorgeous entry for the Beauty Contest - this time it's
a moody and darkly beautiful cemetery. Like the other missions in this contest,
there's nothing to do except explore and then abort.
- 05-22-2010, 06:54 PM by
Hexameron #195
![]()
Hexameron
- View Profile
- View Forum Posts
![]() Gamer
Gamer
Join Date
Oct 2007
Posts
330
![]()
FM: Surrounded by the Metal Age
File: Surrounded.zip
Ghost - Success or N/A and aborted
Time - 00:01:37
Loot - 0/0
Pockets Picked - 0/1
Backstabs - 0 Knockouts - 0
Damage dealt - 0 Damage taken - 0
Healing taken - 0 Kills - 0
Comments - Another Beauty Contest FM - a little gem that emphasizes the
steampunk atmosphere of the mechanized city. Once again, the player can only
explore before deciding to quit.
- 05-22-2010, 07:01 PM by
Hexameron #196
![]()
Hexameron
- View Profile
- View Forum Posts
![]() Gamer
Gamer
Join Date
Oct 2007
Posts
330
![]()
FM: The Clocktower
File: TheClocktower.zip
Ghost - Success or N/A and aborted
Time - 00:03:24
Loot - 0/400
Pockets Picked - 0/1
Backstabs - 0 Knockouts - 0
Damage dealt - 0 Damage taken - 0
Healing taken - 0 Kills - 0
Comments - This is the final and perhaps most impressive Beauty Contest
FM. This Clocktower is a magnificent building and the
amount of detail in the interiors, the furnishings, objects, and textures all
rival TDM. I just have to say that all of these Beauty Contest FMs have proven
not only how many talented and creative mission builders there are in the Thief
community, but how versatile dromed is.
- 05-22-2010, 07:15 PM by
Hexameron #197
![]()
Hexameron
- View Profile
- View Forum Posts
![]() Gamer
Gamer
Join Date
Oct 2007
Posts
330
![]()
FM: A Bank Job
File: ABankJob.zip
Ghost - Failed
Time - 00:44:59
Loot - 15573/15650
Pockets Picked - 7/11
Backstabs - 0 Knockouts - 15
Damage dealt - 15 Damage taken - 0
Healing taken - 0 Kills - 0
Secrets Found - 2/2
Causes of Failure:
1. Cannot sneak into the art gallery without alerting nearby guard.
2. Cannot sneak into bank or down one of the main streets without being seen by
at least one of the three guards.
Comments - Much of the mission is ghostable. I
did have to douse both torches near the mechanist at the beginning, but I had
no problems moving about until I got to the other side of the portcullis. The
loot objective for this mission is 15550 (maximum available loot is 15650), so
virtually every loot item must be found. That means I would have to enter the
art gallery, but doing so unseen is impossible - a guard observes the door and
the outside of the entrance is too bright.
Then there is the task of getting into the bank, but an idle guard stands in
front of the door:
There is no other way that I could see to get inside the bank except through
the front door. In addition, I would also need to venture down this street so I
could get loot from other houses. That wasn't possible: the guard always saw me
as I tried to get by. Even if I doused the nearby gas light, I still didn't
have a chance of slipping past or nudging the guard away from the door:
I gave up and knocked out just about everyone in the mission since I would have
to spend most of my time in this game searching for loot.
- 05-22-2010, 07:31 PM by
Hexameron #198
![]()
Hexameron
- View Profile
- View Forum Posts
![]() Gamer
Gamer
Join Date
Oct 2007
Posts
330
![]()
FM: The Bar
File: c4TheBar.zip
Ghost - Failed
Time - 00:2:59
Loot - 0/0
Pockets Picked - 0/7
Backstabs - 0 Knockouts - 0
Damage dealt - 0 Damage taken - 0
Healing taken - 0 Kills - 0
Causes of Failure:
1. Must destroy glass window to pick up key that opens the house door.
2. Cannot sneak anywhere as there are invisible AI in most rooms that always
see the player.
Comments - This is a small and rather weird FM. To gain entry into the
only building the player sees, I had to break a glass pane blocking access to
the one key that opens the building. Once inside, I encountered invisible AI
that might have been male thieves. I could hear hastened footsteps chasing me.
I reloaded and tried various ways of sneaking, but I always ended up being
discovered. It's not a pleasant thing to be sneaking quietly and meticulously
and then all of a sudden I get slashed by an invisible entity. I could not tell
if I was seen by technically alerted AI or if the whole thing was scripted.
Nevertheless, I could not stop running once I was seen or I would take damage
from these invisible assailants. Some areas were too bright for sneaking, so I
probably was actually seen by invisible AI. I ended up alerting everyone
including other visible servants in my search for the scepter (obj). The mission ends once the scepter is picked up.
- 05-22-2010, 08:31 PM by
Hexameron #199
![]()
Hexameron
- View Profile
- View Forum Posts
![]() Gamer
Gamer
Join Date
Oct 2007
Posts
330
![]()
FM: A Friend in Need
File: AFIN_V1.zip
Perfect Thief - Success (Chemical)
Time - 01:24:35
Loot - 1544/1544
Pockets Picked - 18/26
Backstabs - 0 Knockouts - 0
Damage dealt - 0 Damage taken - 0
Healing taken - 0 Kills - 0
Comments - This mission could probably be ghosted without having to use an
invis potion, but I was unfortunate in having to do
so for reasons I'll get to later.
-The necessary "information" (obj) is in
the law office. There is a small niche embedded in the bookshelf of the large
room with a patrolling nobleman. I was able to run up and get the information
from the bookshelf before the nobleman turned around to see me.
-To gain entry to the prison via the gallows area, I had to rope up to one of
the wooden structures and scale the stone wall of the perimeter. This was the
only safe way to move around the idle archer without being seen. This may not
be what the author had in mind because it looks like the stone wall is
unfinished with an untextured blue barrier:
-Once in the prison, there is a guard watching the lift from behind a little
window. Moving around in front of the window puts him on a sustained 1st alert:
However, since I would eventually be carrying Basso out of the prison, I
wouldn't have enough running speed to get by without putting this guard on 2nd
alert. So I had to nudge him away from his peep hole:
Down in the bowels of the prison cell block, a patrolling guard occasionally
utters a 1st alert after seeing one zombie in a cell. I counted at least three
1st alerts during his patrol. But then as I was carrying Basso and opened the
only door that leads back to the upper cell block, I saw him standing in an
aggressive attack mode. He had finally seen the zombie and stayed in a 3rd
alert state:
I reloaded and waited to see if it would happen again - it did. The guard
blocked my path and even if I could eventually wedge my way through, he would
immediately see me. I was fortunate that the author left an invis
potion in Garrett's apartment because I absolutely needed it here. I had to
wait until the guard made an evasive sidestep (most AI do this when in a frustrated
3rd alert mode), quaff my only invis potion, pick up
Basso again, and slip through the door.
-With Basso in hand, I decided to douse all torches in the vicinity of the
balcony where two archers overlook the barrel and crate-littered streets. That
way I could drop Basso down there safely and quietly hop down myself without
having to make a difficult exit via the gallows - I didn't think I would be
able to get onto the stone wall again.
-I had to douse the torches outside of Rothchild's
cabin so I could move close enough to the fountain and lean forward to get all
the coins without being seen by the lady.
Getting back up to the suicide girl's apartment requires some careful rope
arrow placement. First I had to shoot a rope arrow at the horizontal wood beam
above the open window. But this meant that the rope would not reach all the way
down to the water surface and thus the player cannot possibly get onto it. So I
had to shoot another rope arrow right under the open window (thank God it had a
wood texture!).
Now I had a rope that reached the water and another rope that gave me enough
room to jump through the open window. Here's how it all looked from afar:
The matter of getting into the canal with Basso is a delicate one. I left Basso
on the street and moved into the water (the splash has the potential of
alerting the guard by the toll booth). Then I picked him up and swam as quickly
as possible to the rope so he wouldn't drown while I was in the water.
Hard-to-find loot
-Near front gate leading to prison: gold coin in small water hole under sewer
grate
-Sewers: purse behind three spiders in an upper area; need rope arrow to get
to.
-Outside of Rothchild's cabin: gold coins in
fountain.
-Grocer store at starting point: moneybox on top
shelf
-Apartment building: moneybox on top of dresser in one apartment.
- 05-23-2010, 08:21 PM by
Peter Smith #200
![]()
Peter Smith
- View Profile
- View Forum Posts
![]() Moderator
Moderator ![]()
Join Date
Feb 2000
Location
Land of Enchantment
Posts
2,698
![]()
Wow, Hexameron. I thought you were lost for a
few months, and then a virtual torrent of Ghost reports. Thanks!
"What we've got here is a failure to communicate", the warden (Strother Martin), Cool Hand Luke