|
GEMS OF PROVENANCE - The Valley of the Burned As
the winner of the Thief Ambience Competition, Skacky chose the first mission
in this campaign as my next endeavor. Classic Dark Project vibes make this a
huge hit among fans of the first game, myself included. Although simplistic
in appearance, the gameplay is clever and unorthodox. Its linearity prevents
it from getting the highest marks, but still a very solid mission overall. My
ultimate goal was to steal a gemstone named The Widow’s Ire. In this mission,
however, my task was to find Lady Gullus’ mansion entrance beyond a pump
station. On my way there, Limlun also wanted me to pick up the mask of high
priest Callone from some underground catacombs. Pump Station Marbleman
already has a very nice report written for this campaign, so I won’t be as
thorough as usual. Upon entering the pump station, two guards interacted to
get the elevator going. A patrolling swordsman called for his friend who
operated the button. I rode the lift up with him behind his back. The first
time I tried it, the swordsman ended up facing north, leaving me with no
opportunity to reach the pump station unseen. But every other attempt after
that he stayed facing southwest towards his friend (left image below).
Apparently, he was supposed to continue patrolling into the pump station, but
I never saw him do this. Regardless, no bust of any kind.
Cleaned
the barracks without issues. Marbleman reported not being able to enter the
captain’s quarters without waking him up. I’m not sure why, but he stayed
asleep every time for me. This was good, because I needed the hatch key to
get two extra loot pieces. I tested if it could be returned also, and sure
enough, the captain stayed asleep. The hatch by the main entrance provided
access to an underground machine room. The setup down here was odd. A
semi-hidden lever started an alarm of sorts, triggering an upstairs guard to
come down to check. This was a scripted response, so it shouldn’t be a bust.
The other patrolling swordsman never said a word and didn’t alert to the
other guard running past him, so it was clear that nobody was actually
alerted. I had to do this in order to get back upstairs. There was no way I
could get back up the hatch from the flooded cave, and the guard that came
down to check the machines was staring straight at the lit up staircase
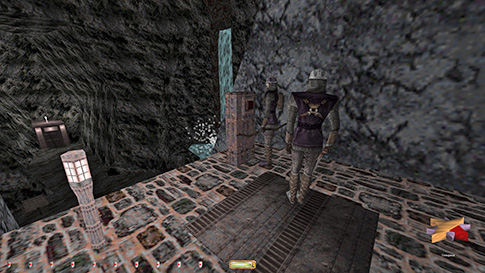
before triggering this event. The
other problem was getting back into the main foyer safely. If I timed the
alarm perfectly, I could run upstairs just as the normal patroller came down,
maximizing the time I had upstairs before he returned. I could now grab the
purse from the footlocker by the stationary guard up above and focus my
attention on getting out through the door (right image above). If creeping
close to the north end of the doorway, the swordsman sometimes gave a first
alert and sometimes not. If I crept too slowly, he usually commented, so I
had to give it a bit more speed than anticipated. The archer in the cage had
to face north until I got out the doorway and could hide behind the door
itself. This was the only place that kept me concealed from the patrolling
guard who came back and left again. Now I could sneak over the metal fence
and return the hatch key to the barracks. Then I headed north, behind the
pivoting archer’s back. I could creep-crouch along the western wall unnoticed
as long as the aforesaid archer faced east (left image below).
The
next room was easy; just waiting for the guards having a chat to finish. I
couldn’t use the water tank to leave, as the stationary guard heard the splash.
I wouldn’t have been able to make the swim without taking damage or using a
potion either. Went through the burrick cave instead, picking up a rope arrow
along the way. I could drop onto the edge of a stony fence below in the
southwest corner (right image above). Had to time another archer below to do
it alert free. Garden & Caves With
the rope arrow, the garden wasn’t that difficult. I went straight for the
storage room and got the loot there. The only tough part was dropping from
the stack of crates down to the ground without the small spider on the other
side seeing me. If I inched off the egde slowly, it didn’t give any remark.
Used the secret passage on the plateau with the patrolling archer to get to
the Moon Tier Garden (left image below). Couldn’t pass the stationary guard
here without a first alert. Ended up using a rope arrow to his right and drop
down from above. Funny to read that marbleman had exactly the same solution.
From this corner I could time the other patrolling guard and rush up the
stairs (right image below).
The
seminary and the first set of caves posed no problems whatsoever. When I got
to the coal mines, I encountered an unexpected problem. In a few areas,
mining carts would start rolling through the cave as I passed an invisible
trigger. I’m not sure if these would be counted as traps or not. All of them
could be avoided except for one, if I wanted a silver nugget down the end of
a long stretch of rail (left image below). It was strange because once I
entered this tunnel, the mining cart started rolling on the track below,
without the possibility of hurting me. It stopped almost directly underneath
the path I was on. I could trigger this cart in a different area as well,
where it could hit me if I didn’t get out of the way. I counted this as just
a scripted event and not a trap like the ones the rule prevents. It compares
more to falling debris from a cave ceiling, which I would always want to
avoid triggering, but wouldn’t count as a bust. I think the traps the rules
are referring to are those created by someone intelligent and involves a
mechanical or magical contraption.
These carts just added environmental ambience more than antyhing else. If you
disagree, the nugget here is an easy skip. In
order to avoid a second cart from triggering, I had to use a rope into the
wooden frame of a tunnel on a higher level (right image below). It was on the
south wall of the largest cave in this area. I could just reach the base of
the rope from the bottom track.
Heretic’s Hollow Once
I reached the “arena”, I needed the survivors of the burrick-spirit fight to
face away from the southern exit. Both the flaming spirits won and they ended
up in the burrick cave staring in the opposite direction (left image below).
I guess I got lucky. Getting through the lowering door panel to the tomb with
all the urns required some hopping, but I went back and checked if the
flaming spirits had alerted. They were completely at rest, so this was a safe
method. In
the crematorium the major annoyance was that the patrolling zombies would
alert to the outside fire elemental. A few times they got into a massive
fight, with one of the zombies blowing up, putting the other zombies on high
alert. It was highly beneficial if they only kept to first alert growls. At
the end of this house I had to dodge an apparition patrolling a tiled set of
stairs. I found a tiny spot along the left side that gave me perfect cover
(right image below).
Now
I entered what was actually called The Valley of the Burned. I had no issues
until I got to an open column with a bunch of statue inside. Some of the
statues would move across the room if I got too close or crossed an invisible
trigger line. At first I thought these were traps, but soon realized that
they don’t hurt you. At least I wasn’t able to take damage from them, even if
I tried. A prerequisite of something being considered a trap would be causing
harm, and since that wasn’t the case here, I deemed these just like a sliding
door or panel from entering a room. I’d actually argue the aforementioned
mining carts to be more of a trap than these statues. I thus climbed the
central column and got some loot on the top floor. However, I couldn’t leave
through the sliding doors here, as a patrolling hammerite zombie first
alerted to them on the outside. Even at the point of his route farthest away
from the doors, he alerted. Luckily, I could go back down and ascend to the
top floor from the outside, using a rope into the ceiling beam (left image
below).
The
last room held the mask of Callone and the crypt exit key. No issues there. I
reappeared in the garden, right by the keep entrance. However, Supreme
requires you to return the key, so I lock-blocked the keep door and went back
through the compound and the caves exactly like before to return it. I could
have returned back through the caves before reaching Heretic’s Hollow, but
that required using an arrow to ascend an elevator, and I don’t like using
consumables unnecessarily. Instead I took the loop all the way around a
second time and emerged yet again at the keep entrance. Now I could return
the crypt key and the compound key, before finally entering the keep and
locking the door behind me. The Keep Dodged
the haunt heading up the stairs, but was not able to avoid triggering the
traps in the hallways (right image above). I saw there was a gap on top of
the wall above the trap holes, but there wasn’t enough room to mantle over.
I’d have to stack objects to get up there anyway, and then those items would
have to be returned for Supreme. I managed to time the haunt’s patrol route
so it didn’t alert to the arrow sounds at least. From there, finishing the
mission was straight forward. Really looking forward to the rest of this
campaign! Statistics: Time: 1:05:45 Loot: 2765 out of 2765 Pickpockets: None Locks Picked: None Damage Dealt: 0 Damage Taken: 0 Consumables: None Ghost: Success! Perfect Thief: Success! Supreme Thief: Failed! Perfect Supreme Thief: Failed! Notes: -
Got a first alert from the stationary swordsman in the
Moon Tier Garden when running up the stairs. Supreme bust. -
Triggered 5 arrow traps and 1 fireball trap in the top
floor hallways of the keep. Unavoidable and Supreme busts. |
|
|