|
GEMS OF PROVENANCE 4 - Mercenaries This
is my favorite mission of the campaign by quite some distance. The first three
maps were all enjoyable, but this is on a different level. The design of the
thieves’ compound is very unique and highly challenging. The underground
puzzles are among the best I’ve ever seen. StinkyKitty
really outdid himself with this series finale and gets cemented as one of the
best mission authors our community has seen. I
had to break into the old keeper compound and obtain four keys from a group
of mercenaries. These keys gained entry to a set of keeper vaults, which I
had to access. I also had to grab 1,000 worth of loot, before leaving across
the property walls. Getting Keys Two
of the keys were on the ground floor, and the only feasible way in there was
plunging into the cistern. Nobody heard the drop and the first key was right
there. The fire key was in the foyer fireplace. Two stationary archers were
in lookouts on the floor above, but neither of them covered the middle of the
room if I stayed crouched (left image below). Two other thieves patrolled
through this room, but they both went the same direction. The archer
patrolled faster than the swordsman, so I could wait until he had almost
caught up and make my move. I listened for the door to close so I knew they
were outside, then I had to douse the flames for the fire key to spawn. I know
this technically was a Supreme bust, but I think it should be excused. After
all, it’s not like I doused the torch in order not to get seen stealing the
key. Instead, by design the key doesn’t even exist in the game until the
flames are out. The objective also explicitly says to get the key. Doesn’t
that imply to first make it appear in game? I compare to the objective of
kidnapping Cavador in Kidnap. The ghosting
community very easily agreed that since the engine doesn’t even make this
possible without first blackjacking him, the knockout and damage dealt were
both excused. I argue the same thing to be the case here. Objectives should
prevail, to me that’s the spirit of all modes.
Realized
I couldn’t climb to the upper floors from here. I could grab some loot and
pick a few pockets, but I was stopped by three thieves in a conversation in a
foyer two floors up. Two of them left, but the third kept standing, covering
the well-lit room comprehensively. So I backtracked and left via the northern
main entrance and reentered in the back. I
deliberately waited with triggering the aforementioned conversation, as it
altered the location of two of the involved thieves. I thus cleaned the
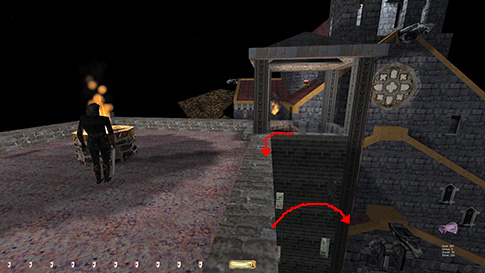
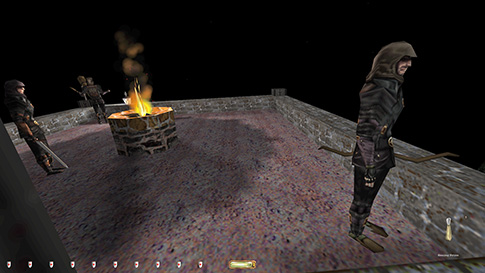
southeastern barracks and tower first. No problem until I got to the roof. A
purse on a thief by a telescope was hard to reach without an alert from a
second thief nearby. I had to slowly creep along the ledge to his right to
avoid the comment (right image above). It can be tough getting onto the
silent edge without a speed enhancement, but using crouch-creep did the
trick. In order to get to the roof from here, I fastened a rope in the
northeast corner of the tower ceiling. Then I could safely jump onto the rope
from behind the thief alert free. The tower’s roof was nice and dark. Got
the air key using a moss arrow easily enough, then dropped into the eastern
attic. Had to skip three pieces of loot behind a banner here (left image
below). I didn’t find a way to obtain them from either side or without
cutting the banner. They simply wouldn’t highlight unless the banner was
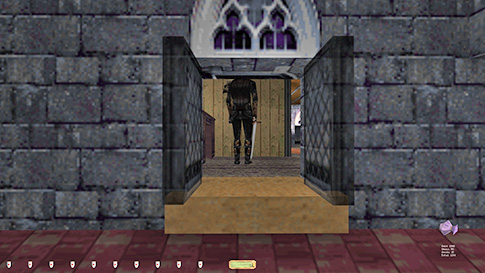
gone. I dropped further into the leader’s chambers and got the last keeper
key.
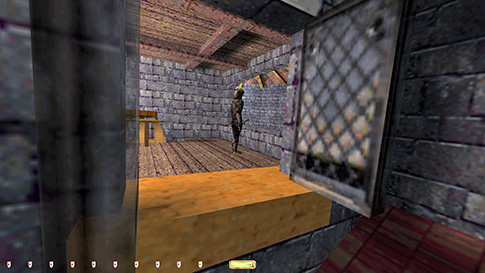
I
couldn’t leave this room through the door, so I had to use a nearby window
into the adjacent lookout (right image above). I absolutely loved that so
many of the windows could be opened and quietly utilized. This is one of the
best missions I have ever seen designed for stealth, while clearly not being
made with the Ghost rules in mind. Brilliant. On
a floor below this I thought there was another loot item I’d have to skip
behind a banner. This would’ve put me below the loot goal of 1,000, so I’m
happy I found I could grab it from the staircase, almost directly from the
side (left image below). Keeper Vaults No
further issues until entering the vaults. I could only close two of the four
doors at the elevator chute. Unfortunately, one of the two that couldn’t be
closed was right by a transparent window, and any patrolling guard passing by
outside would first alert to it being open. I suspect these door not being
closeable is an oversight from the author, as they both highlighted like
normal, but still didn’t close. The
elemental chambers were ingeniously designed. Depending on which door I used
in order to take the elevator down, a different chamber would open up first.
Then I had to pass each chamber in succession. The fire chamber forced traps
to be triggered, which was a Supreme bust. But I could pass it without
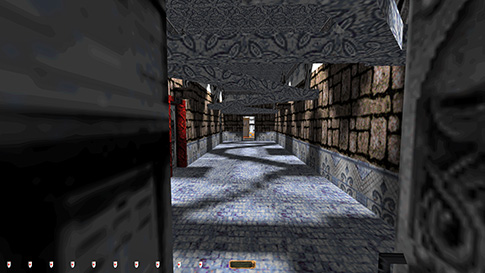
getting hurt and without alerting anybody else. The air chamber had statues
that acted like normal AI. They didn’t have first alerts, but they could both
see and hear me. Luckily, there were shadow lines laid out on the floor
(right image below). I wanted this chamber to be the last one, otherwise it
would lead to a statue spotting me as I entered the fire chamber. That’s why
I instead had started with the fire chamber, in order to end here. The riddle
room also gave different clues depending on which chamber I had started with.
Amazing!
After
this I reached what I call the sanctuary. I had to remove large vases from
atop pedestals in order to open the doors. The vases could be returned, but
they didn’t push back down the pedestals. I could, however, lock the doors
manually. Another trap caused another Supreme bust here. I
didn’t count the spring loaded ramps as traps. One of the keeper journals
even talked about them being the intended way of traversing the maze. In one
room a door opened, sending a statue towards me. This wasn’t a live statue,
but it could be counted as a trap. I could instead jump over the gap in a
different location to avoid this whole scenario. Towards the end of this
section, however, I unfortunately had to break a window. I could get up on
the ledge without it breaking, but I couldn’t push through without applying
force. This was property damage and a forced Ghost bust. Sad, but true. The
fourth and final glyph was behind a live statue in the staff room (left image
below). I could slowly sneak up and frob it unseen.
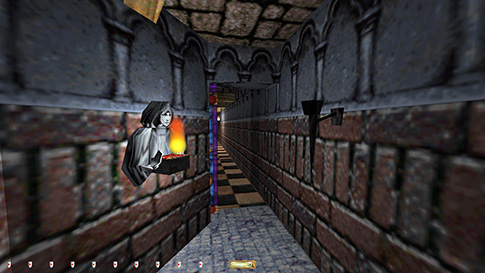
Then snuck out quietly after grabbing the staff. Had to remove a light source
in order to open the door back into the abbey. However, this also lit up the
nearby torch and interestingly, if I put this back out (required for
Supreme), the keeper statue reignited (right image below). The door was left
open though, but I wish it could’ve been locked up manually like the
sanctuary doors below.
Back In the Abbey A
bunch more thieves had spawned throughout the compound. Most importantly, the
leader had returned and was in his chambers on the fourth floor. He had a
purse worth 120. This was necessary to take to reach the loot goal. It couldn’t
be taken from inside his quarters, so I had to grab it from outside the
window. It was difficult to find a reliable method to do so, as the roof was
slick tile. I found if I crouch-ran up about halfway, sometimes I didn’t make
noise, and I could quickly lean in and steal the loot (left image below). I
wasn’t able to get all the pickpockets for Supreme. The newly spawned archer
on the roof was tough, but his potion was possible to reach (right image
below). The one I had to skip was a guard by the southern entrance. He heard
the door opening, and nobody used that entry. I could enter through the top
floor window and descend the stairs like before, but I couldn’t get back out
of the window unseen. The aforementioned rooftop archer saw me. For regular
Ghost, it was no problem to get them all.
Statistics: Time: 1:03:25 Loot: 1073 out of 1293 Pickpockets: 16 out of 16 Locks Picked: None Damage Dealt: 0 Damage Taken: 0 Consumables: 2 Water Arrows & 1 Moss Arrow Ghost: Failed! Perfect Thief: Failed! Supreme Thief: Failed! Perfect Supreme Thief: Failed! Notes: -
Had to douse the fireplace in the ground floor foyer in
order to spawn the required Fire Key. Supreme bust, although I think it
should be excused due to the objective. -
Had to skip three pieces of loot worth 220 behind a
banner in the eastern attic. Slashing the banner is property damage and not
allowed for any mode. -
Got first alerts from outside guards leaving the water
door open when entering the keeper vaults. Supreme busts. -
Triggered traps in the fire chamber in the vaults. More
Supreme busts. -
Triggered fireball traps when entering the keeper
sanctuary. More Supreme busts. -
Had to break a window in order to reach the staff
chamber in the inner vaults. Inevitable Ghost bust. -
Had to remove a light source in order to reenter the
abbey. This was a Supreme bust, although the flame was reignited. |
|
|