|
The Black Parade - Mission 3: Trials of Iron This
is the best mission so far in the campaign for me. It feels very much like a nod
to ‘Undercover’, especially due to the readable talking about the Talisman of
Air. It is perfectly sized and complex, with tight, yet balanced patrols both
inside and outside the compound. Lots of entertaining texts and conversations
make this campaign really come to life, truly expanding on the lore of the
original game. Great stuff. I
had to break into the abbey and steal St. Graimal’s
chalice, a book called The Tale of the Stone, the contents of the treasury,
and 1,500 worth of valuables. The chalice was protected by an alarm which
would have to be turned off to avoid a ghost bust. That would bust Supreme,
but it was an easy violation to accept up front. I also needed the treasury
key and the alarm room key, in addition to opening the vault door from the
cardinal’s chambers. That set the stage for my route. Entry It
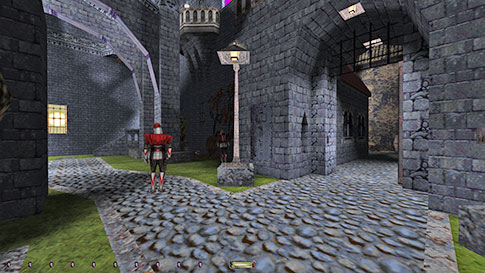
was possible to avoid picking the door to the sewers by following the hammerite involved in the gate conversation. He had a scripted
conversation with the gate guard, but occasionally it didn’t trigger properly
and they both ended up stationary northwest of the gate (left image below). I
still had to creep crouch south to avoid a first alert and I had to be lucky
with the other patrollers. Grabbed the coin stacks from the south guard
station and headed in through the main doors.
Abbey Cleaned
the southern part of the ground floor and went upstairs. The western balcony
guard was too hard to pass, so I had to enter the council chambers some other
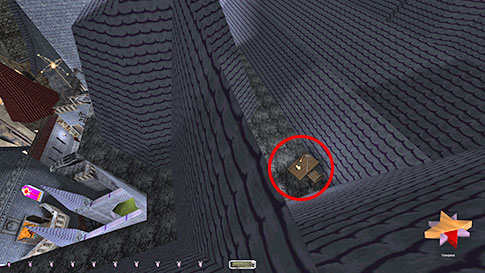
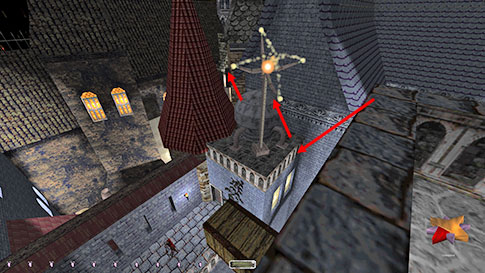
way. Visited the bell tower first and found the secret coin on the roof from
there (right image above). I could ascend along the roof corner by
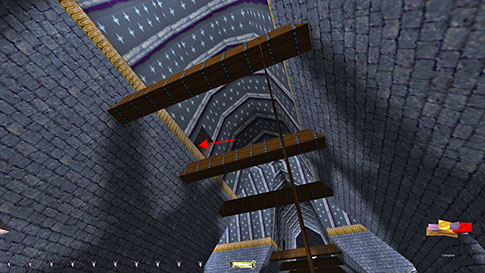
strafe-running. I accessed the cardinal’s bedroom by climbing the rafter
above the second floor east balcony (left image below). This was my favorite
part of the mission.
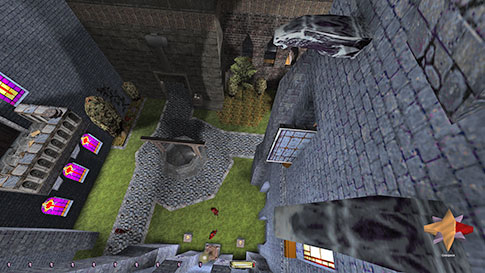
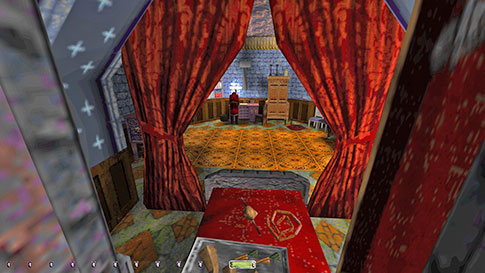
I
could now sneak west via a ventilation shaft and steal the loot from the
council chambers and the balcony guard. I also managed to reach master copist Richal’s bedroom from
the third floor western balcony (right image above). This meant I could get
the loot in there without needing to pick the lock on the entry door. There
was nothing else of interest in that wing of the third floor, so it was a
detour to approach from above like this, but definitely worth it for Supreme. Surrounding Compound The
northeast engine room on the second floor provided access to the priests’
quarters from above. This access also circumvented having to pick the lock on
either of the ground floor doors leading to this part of the compound. The
roof hatch into Cruciger’s bedroom provided
admission to the entire priests’ quarters, except for Fabricius’
chamber. Instead, I could climb back up said roof hatch and access his room
via the balcony. I think maybe Fabricius’ himself
was stuck in my playthrough, as he was only
stationed by his desk, pivoting in two directions. The last time I played I
definitely saw him venture in and out of the balcony. He didn’t seem to be
embedded in any objects though, so it was strange that he wouldn’t move. I
needed his alarm control room key, but this also needed to be returned. Since
Fabricius wasn’t moving, I tested whether the key
could be returned to the dresser. He alerted to me dropping it onto the wood,
but the plant on the dresser was silent. I figured that would be acceptable
for Supreme later, especially due to Fabricius’
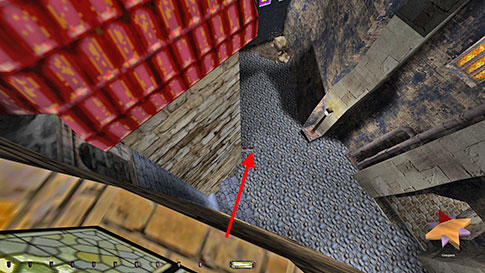
abnormal behavior. To
proceed from here, I had to jump from the balcony south towards the scriptorium.
I had to jump when the guard on the cobblestone below was facing south. Even
then, it was tough to make this jump without a first alert. I found I had to
make a slow hop and land in a mantle to the far west (left image below). This
section of the wall was dark and that seemed to be enough to avoid his
peripheral gaze.
The
scriptorium, astronomy building and the warehouse were all easy. Went from
the latter directly into the factory, which was a whole different ballgame.
The most difficult pieces of loot to get here were the nuggets in the coal
heaps on the ground floor. I chose to wait out the factory workers and mantle
up the wall in the station to the west (right image above). The worker in the
next cubicle couldn’t see me from there, and the other patrollers had routes
that went outside. It was possible to get the nuggets coming from above also,
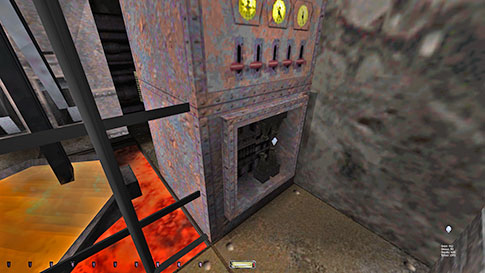
but this was very tough to execute. On the floor above I had to skip my first
piece of loot for Supreme. The smelting forge was run by two diamonds, each
valued at 25 gold. Taking both turned off the lights, which isn’t allowed for
Supreme; so I took one and left for that mode (left image below). Taking both
also caused the worker to start checking all the nearby equipment, to his
utmost frustration. Entered the master forger’s office via the outside vent.
The downstairs worker could hear the vent open and close, so it had to be
timed correctly.
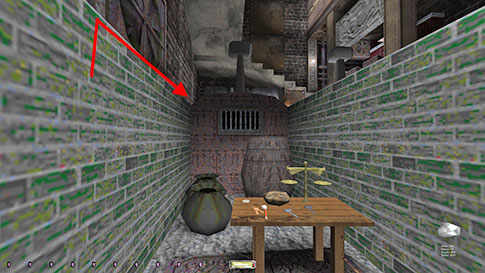
Back In Abbey Reentered
the abbey in the empty refectory. Could now loot the barracks more or less
unbothered. There were a few patrolling hammerites,
but also plenty of useful shade. I needed the treasurer’s key and I could
avoid picking his front door by using the vent shaft from the adjacent
barracks bedroom (right image above). The rest of this compound was easy. Headed
downstairs and cleaned both the basement and the sewers without issues.
Turned off the alarm for the chalice so I could go back upstairs and steal
it. This of course is against the Supreme rules and would prove to be my only
bust. Although the alarm could be switched back on, this would trigger
instantly now that the chalice was gone, so I left it off. Returned the
treasurer’s key and the alarm control room key afterwards, along with closing
the treasury gate by reflipping the lever in the
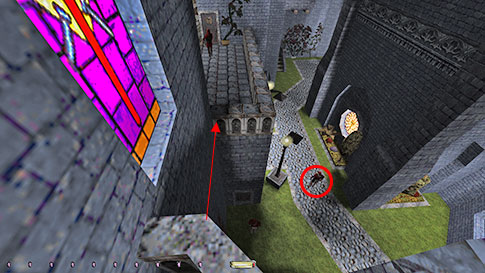
cardinal’s bedroom. Leaving
the premises Supreme clean, however, would prove to be more difficult than
first anticipated. The guard closest to the eastern gate was only facing
south and east now, thus covering the exit too well for me to sneak out. The
south gate still had the guard present in the watch station, and turning off
the lights wasn’t allowed for Supreme. There was also no way of jumping over
this gate’s fence on the roof walkway. My only hope was crossing the eastern
gate over the roof above the scriptorium. There was a dark plateau with what
I assumed to be a water tank. This was within mantling distance of the bell
tower balcony just northwest of here (left image below). East of the water
tank, between two steep sloping roofs, was a small metal vent possible to
mantle. From atop this vent facing the wall, I could back up and slide down
the red roof. Dropping to the street like this would kill me, so I instead
mantled up the mosaic windowsill here (right image below). This was a tough
move, but vital in order to reach the streets unscathed. Once fully on the
sill, I could drop and mantle up the fishmonger sign below. This was the only
way I found back to the streets unharmed and thus completing the final
objective, besides of course trekking back through the sewers and picking the
lock on the door that I put so much effort into avoiding at the start of the
mission. I’d love to see anyone find a better way to leave the premises for
Supreme.
Statistics: Time: 1:44:22 Loot: 2652 out of 2652 (Supreme: 2627) Pickpockets: 9 out of 9 Locks Picked: 4 Damage Dealt: 0 Damage Taken: 0 Consumables: None Ghost: Success! Perfect Thief: Success! Supreme Thief: Failed! Perfect Supreme Thief: Failed! |
|
|
Notes:
- Had to turn off the alarm system in order to take the chalice. The alarm also wasn’t turned back on, as it would have sounded instantly. Supreme busts.