|
PREVIOUS MISSION THIEF
GOLD NEXT MISSION Mission 2: Break From
Cragscleft Prison [This
walkthrough has recently been updated for TFix
1.23, running NewDark 1.24. Although the original
text for OldDark has been preserved, situations
affected by these patches have been inserted in green. All screenshots have
been updated, and many new ones have been added. Keep in mind that there is a
difference between playing the game in NewDark with
or without TFix. TFix
updates the core mission files, as well as applies .dml
files that tweak the environment in numerous ways. These changes aren’t
supposed to have a significant impact on gameplay, but when ghosting, slight
changes could occur. If wanting as close to the “vanilla” experience as
possible, install just NewDark, without any further
patches. I have ghosted the game 1) in OldDark, 2)
in plain NewDark, and 3) in NewDark
with TFix. This walkthrough will discuss
differences between all varieties.] This is one of my favorite missions in the game. Although it might not be the most complete mission design-wise, it is one I have an immense amount of fun playing. I love the dark and gritty, almost claustrophobic atmosphere, especially when creeping through the mines. The level design is quite linear for a Thief mission, although you are still given clever options for how to move between the floors. Unlike the introductory mission, Cragscleft Prison poses quite a few ghost challenges. While having some barren portions with few to no enemies, it also contains more complex sections with numerous zombies or patrolling hammerites. I’ve been unable to successfully accomplish Supreme or Norwegian Thief. Regular Ghost and Perfect Thief are possible though, but it requires a fair amount of trickery. Hammers, here I come! Overall score:
9.7/10
It has come to my attention that Cutty has been imprisoned by the Hammerites.
The prison is located on top of an abandoned quarry; abandoned because of
flooding and mysterious rumors of dark nature. My plan is to break in through
the mines and bring Cutty back out. I know Basso
the Boxman is in there as well, so I’ll try to kill
two birds with one stone. Also, Issyt the Beggar
has yet to return the lucky Hand of Glory he borrowed a while back, so I’ll
be picking that up on the way. And loot 1000 worth. I start outside the entrance to the lower mines.
Some boulders and mining equipment lie scattered around, but nothing of
particular importance. I also have a clean inventory, except for my compass.
I wade in and dive through the flooded opening. I pick up a diamond (35)
on the bottom, right within the entrance hole. Swimming the only way
possible, past a broken lantern and a pick, I emerge at the start of a
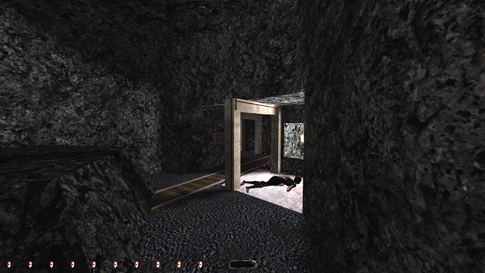
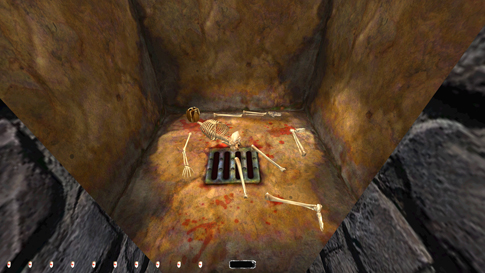
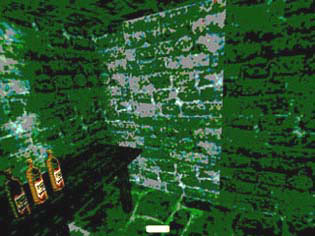
railroad track. Seems I’ve got the address right. Walk past the first stone
and spot a zombie corpse on the ground, mosquitoes buzzing around it (left
image below). This is NOT a sleeping zombie, so no worries. I immediately get
that dark and eerie feeling, probably the reason the hammers don’t venture
down here any longer. No zombies patrol the lower levels, so my pulse holds a
steady beat. I take a right past the corpse, and follow this tunnel a little.
I pick up a gold nugget (135) worth 100 and a silver nugget (185)
worth 50 on the ground up ahead. Continuing along this path I take a left at the next t-junction.
I then take the second tunnel on my right and walk up on the road a bit
further down. Right again, and on to the elevator (quietly). I peer down and
spot a green spider watching the lower level. He seems to be facing the wall
to the right, so I should be safe going down there (remember the spiders’
“butt-vision” from Lord Bafford’s). Press the
button for the bottom floor. Creep-crawling behind him (right image below)
and down the slope ahead, I find a niche in the wall holding 2 moss arrows.
Cc back and onto the elevator again. Press the top button (2 of them are
broken, so I’ll have to find another way up to those levels) and leave the
elevator on the south side. On the north side further down is a sleeping
zombie, and I don’t want to wake him up. I therefore continue back down the
east hall and take a left, then right. Taking the west path from here
leads me to a four-way-junction. In the darkness right ahead is a sleeping
zombie with one more resting to the right. I want to head towards the latter.
Sneak up to him and hug the left wall.
Now, a little something about
zombies. They have 6 states of alertness. 1) Sleeping, with no awareness of
your presence. 2) Sleeping, but making a disgusting grunt, a 1st alert. This
happens when you come too close. Their detection is distance related, not
sound dependent. There seems to be a certain radius where they detect you, no
matter if you’re pitch black or quiet as a mouse. Also, detection is
restricted to their height level, hence you can traverse on top of boulders
(thanks Old Man) and pass close by them without notice. This means you can
practically jump over them without getting noticed. However, they seem to
settle down after a while, going back to deep sleep so to speak. 3) If you
get alerted like in 2) twice, they awake and rise up. If they see you,
they’ll come chasing. But normally, if you’re out of sight, they’ll just
stand there, hanging their head. Now they’re not sleeping corpses anymore,
and can thus see you. They simply haven’t been assigned a patrol route, and
function as a normal stationary guard. Patrolling zombies start in this
state, except they’re moving around of course. 4) 1st alert. A state I seldom
encounter. They seem to allow more than other AIs before giving the remark
that indicates they’ve seen or heard you. There’s a very fine line between
this and the next state of consciousness. 5) Normal 2nd alert. They’ve heard
you, or got a glimpse of you, and are on the lookout. They give up much
quicker than other enemies. 6) Normal 3rd alert (alarm). They see you and are
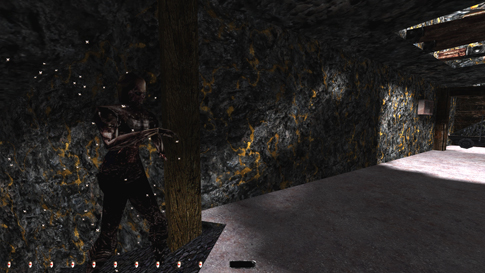
quite angry. As pointed out in the picture below and to the
left, the hole in the wall is my next destination. I jump past the zombie
without attracting attention. I follow this tunnel up to a square room with 3
corpses. One of these is another sleeping zombie. It’s the one farthest away
in the corner. I can tell quite easily, as sleeping zombies don’t lie flush
with the ground. There seems to be a few inches of space between the body and
the floor. Clasping the left wall, I jump into another hole in the SW corner.
I climb a couple of steps and leave through the left opening, landing at a
ledge overlooking a room below. Continuing along this ledge, I jump across to
the other side, where I find a silver nugget (235). Back onto the
first ledge I mantle up to the bridge level. I walk out on the overhang and
jump onto the left rail, being careful not to fall down. From here, I can
mantle further up to the left and enter the 4th level of the mines.
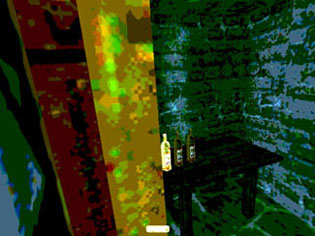
I stop by the top of this steep path (right image
above). Now is when it gets fun! I make sure to check my map frequently up
here, as this level can be quite confusing. This location has: a) 4 roaming
zombies, b) lots of noisy gravel, and c) very few dark spots. All these
factors make this area a nice challenge for any ghoster.
Like I said, 4 zombies: 2 with insects, 2 without. On the map I have
(indicated by dashed lines) tried to point out where they patrol, but within
these routes they seem to have no particular pattern. Although this is an
assumption, the ones without bug swarms rarely seem to venture further east
than the elevator. Somehow they always turn around before that point. The
other two can patrol all over the place, although one of them might be more
attracted to the chapel. What I can guarantee is that they do not venture
beyond the map’s dashed lines (unless they see you). If they do so, please
tell me. Ok, let’s keep what I said about the no-insect ones in mind, and
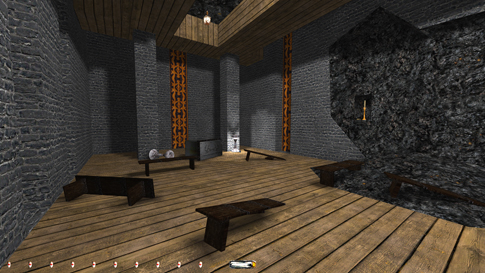
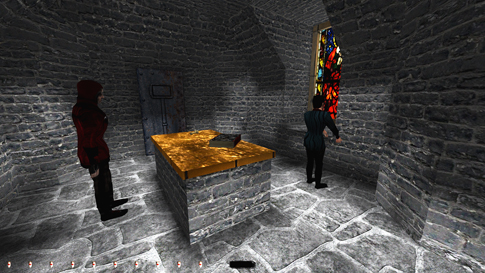
watch the other two for a moment. I wait until both of them are off to the
west (right), sneak across to the other side, take a left and enter the
forsaken chapel (left image below). Safe for now! Beside
the SE, NE and NW pillars I find a healing potion, a water arrow and
2 holy water vials,
respectively. In a niche in the eastern wall lie a golden
hammer (310) and a golden candlestick (360). There’s also a
holy water font in here.
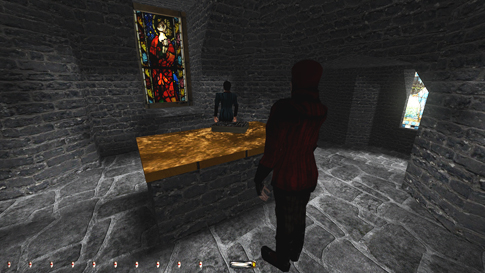
This next part is based mostly on luck and patience.
I stand in the shadow close to the exit and lean out to watch the
church-zombie hopefully walk off to the right. When he does, I sprint out (as
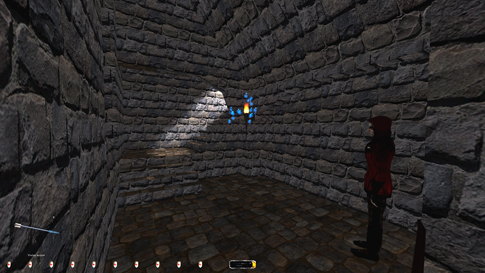
quietly as possible), and take a left down to a somewhat lower level. I find
myself in a location where none of the zombies enter. There’s another
circular area below where some of them end their patrol. When no one is
around, I enter here and walk up the exit on the opposing side. Emerging at
the top, it’s difficult to say whether zombies will be nearby or not. I
mainly have to listen to their footsteps. If they’re lurking about, a
darkened area in the wall directly to the right (underneath some wooden beams
where I have to duck) will keep me hidden. The zombies could be walking by
here, but will not detect me (right image above). When the footsteps
disappear, I creep out and hurry down the hall, turn right, then left and
into the lake ahead. I’m pretty fortunate the first time around, as all the
zombies seem to be lured over towards the elevator. (Instead of going down
the slope to the water, I could continue further on and take the next left,
only to bump into a sitting skeleton shooting his skull at me. This is rather
hilarious and well worth a look!) Once in the lake, the hardest part is done.
There’s only one exit from here, so I dive in. I follow the underwater tunnel
and emerge in another lake area. This place has two exits, one under and one
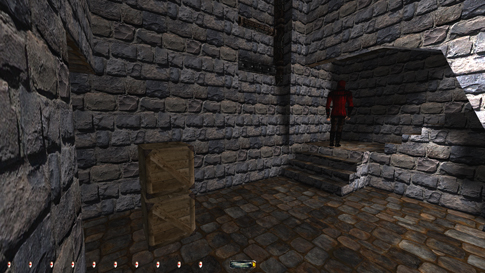
above water. The leftmost hole leads to an area well-guarded by a hammer and
further on to a waterfall (dead end). I take the right doorway on land
instead (left image below).
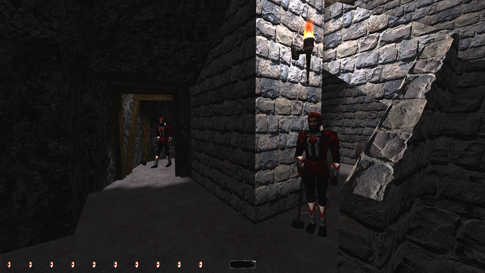
Continue up some steps and follow the path until I
overhear two hammers talking to my left. They’re upset about today’s novices.
Gold and politics are too much on their minds, they feel. One of them starts
his patrol, while the other stays stationary. I’ll get back to them in a
little while. In the meantime I walk on, taking the second opening to my
left, and spot a sleeping zombie up ahead. This pebbled road simply leads to
another entrance to the factory. However, I slip down right and arrive in a
larger room with some mining equipment. Directly to my left is a ladder. I
climb up. The inner cave above holds a golden nugget (460) and a silver
nugget (510). I then work my way back to where I overheard the hammers. I
wait here until the patrolling guard has marched off and slowly creep over to
the stairway. Following the shadows I’m able to stay hidden without any
alerts (right image above). I continue up the stairs to the factory... The only task here is to get to the prison, but it
requires some sneaky activities. I take the first door on my right, into the
power station. I walk slightly into the room, and turn to the right. From
here I can see the patrolling hammer come from the left, turn, and walk back
again. I follow him and hide to the right of the first set of stairs. The guard
will enter the next room, walk right, turn around and patrol left. When he
disappears around the corner, I make a run for it, into the room and up the
stairs ahead. There is another guard in the control room through a gate to
the left, but he’s usually quite oblivious. I continue, ignoring the left
hall, turning right at the corner. The next right (past some stairs down) is
the entrance to the main factory. I enter a wooden walkway above the hammer
production facilities. At every turn there’s a square metal grating that
makes some noise when walked upon, better creep here. Darkness all along so I
walk around to the end, ignoring the stairs down. I then position myself at
an angle towards the fence at the end and jump onto the railing without
falling down just yet. I know I’m completely onto it when Garrett responds to
me pressing the crouch-key. Leaning out I can see the hammers patrolling
below, placing their newly produced hammers in the giant crates (left image
below). When no one seems to be around, I crouch and fall (this should make
no noise). I then hurry around the corner towards the prison.
Follow this path until I bump into two hammers
talking. So Cutty is held in block 4, huh? Well
that is nice to know. One of the guards leaves down the right hall. When he
walks by, I snag the key from his belt [1]. Now,
hugging the north wall and creep-crawling towards the stationary hammer, I’m
able to pick his key [2] also. NewDark
adjusts this guard’s incorrect positioning to now having him permanently face
east (right image above). This means getting the key by hugging the north
wall is now impossible. The only current way to steal the key without a first
alert, is by silently dropping from the divider into the corner by the
locking mechanism during their conversation. This would normally trigger a
comment, but since they’re busy talking, they don’t alert. You can then lean
towards the window and retrieve the key. Keep another inventory item active
so you know when the key is in range, since you can’t see it from where
you’re standing. Leaving this corner without getting spotted is much harder
though. If lucky, you can wait until the other guard leaves and leap to
mantle up the dividing wall again, only spawning a first alert. But there’s
no way you can do this without busting Supreme. The only way to do this
alert-free is to replay the scenario until the guard makes a rare mini-pivot
upon conclusion of the conversation (left image below). He sometimes does a
one second 90-degree turn to the north just as the other guy gets to the top
of the small flight of stairs there. Then he immediately rotates back to face
east, as he’s supposed to. Whether this motion occurs at all is completely
random, and quite rare. For me it happened approximately one in five times.
In the screenshot below, I’ve positioned myself so that I can see whether the
guard turns, while still concealing myself behind the window frame. I took
the capture the instant I saw the turning motion start (notice the other
guard to the far right). About half a second after, I jump and mantle up the
ledge. If you do it too quickly, he will still alert. It seems like even
though his body turns, his vision doesn’t shift until the rotation has fully
completed, so wait a brief moment before making the move. It’s challenging,
but highly repeatable. The biggest challenge is being patient enough to wait
for the turn to occur in the first place, plus you have to listen to the
entire conversation over again every time it doesn’t happen. Cc back and follow the path the patrolling hammer
took. In the T-junction I choose the hall toward block 4, toward Cutty. Soon I come to an open area with a rotating sensor
in the ceiling. I sneak in, up to the right window
and lean in to grab another key [3] from the guard. Cc to the
opposite wall, always watching out for that sensor. From here I can sneak out
the other exit without lighting up enough to get caught. The patrolling guy I snagged a key from earlier has this room as a
part of his route (check the map), so I’m also on the lookout for him. TFix changes the lighting in this room so much that you no
longer can sneak past the flickering light and up the stairs without alerts
from the nearby guard. Instead you have to take the route towards cell blocks
1 and 2 and pass the camera room there. This is not a NewDark
feature, but instead changed by the author(s) of TFix.
I’m not sure if it has been changed back to the original past v1.23.
On to find Cutty then.
Up these stairs, then left. Arriving at the prison cells, I take a right into
the lower level. I notice a hammer peering in my direction from above.
Fortunately, there are lots of shadows down here to hide in while I cross to
the other side. I climb the stairs, while being on the lookout for a hammer
patrolling in this area. At the top I turn left and lean around the left
corner. When the guard in the room ahead is looking away, I sneak over to the
first shadowy area. I continue in this manner until
I can lean over the fence and grab his key [4]. I need to walk
into the shadow past that last prison cell. Then turn 180° and unlock the door with one of my keys
(there’s a locking mechanism on the wall to the right of the door). My goal
is then to frob the lowest lever
in the leftmost column, when the guard’s back is turned. This opens the door
downstairs to Cutty’s cell. I hurry out again,
since the door will lock up by itself. I then work myself down to Cutty; he’s in the first cell to my left (right image
above). Cutty’s weak and has no money for me.
Instead, he informs me of a map from this guy named Felix. Supposedly it will
lead me to the Horn of Quintus down in the bonehoard.
After Cutty’s death I quickly move him to a dark
spot in his cell, to avoid suspicious hammers. In the same manner as
described above, I then put the cell gate back to its original position by
pulling the lever once more. Basso’s next! I walk back past the prison gates on
the 2nd floor in block 4. At the end I turn left and unlock the door to my
right using the bronze key. I’m now entering cellblock 3. I turn right and,
as before, lean around the corner to check which way the guard is facing. All
the cellblocks look the same, so I’ll skip some of the explanations to avoid
repeating myself. Sneak over to the window and lean
in to grab another key [5] from this guard’s belt. Here comes
one of the sneakiest moves in the entire game. Entering the lever-room in the
normal fashion will alert Tarquis, a former goldlender in cell 10, and obviously blow to pieces any
chances of ghosting. I have to jump over the railing onto the fence in front
of that hammer guard instead. To avoid alerting him, wait until he’s facing
away. Notice it’s easy to touch the metal railing with my feet, which makes
too much noise. Press the jump-key as late as possible to prevent this. NewDark makes this move much easier. Due to the new mantling
mechanics, simply crouch right by the balcony and mantle over the metal
railing without making noise. When I reach the fence, I move to the
end and slide down into a shadowy area where I’m completely covered in
darkness (left image below). Nice, eh? This is difficult and took me quite
some time to get right. Somehow the guard seems to stay with his back turned
no more than a few seconds, and that gave me a hard time. Anyway, it’s
possible to lean forward and to the left, and pull the middle lever in the
second row, the lever to Basso’s gate, while staying in full darkness (right
image below). Reading the notebook in here shows that Dikket,
a heretic which provided the hot tip available in the purchase screen, has
been released upon informing. Great follow-up from the mission creators! I
can now slide down to level 1 without taking damage or making noise. Basso is
unconscious in the middle cell to the left. Pick him up and bring him to
level 2. TFix shifts the placement of Latton,
the prisoner in cell #3, forward for some reason. He is now positioned much
closer to the cell gate. This alerts the patrolling hammer in this block
every time he passes by. It’s only a first alert comment, and obviously not a
bust, but still somewhat annoying. There’s a dark portion to the right
and straight-ahead. I drop him here; he’ll be safe (left image further
below). TFix makes bodies much easier to spot than before, so this
corner is no longer dark enough to hide Basso. I drop him around the corner
leading to the barracks from cell block 1 instead. By the same method
as above, I then push Basso’s gate lever back to its former state. This time
it’s a lot easier and takes me only a couple of tries. Drop down to the first
level one last time. Continue straight and take a left. Unlock the door and
go through into the yard.
In front of me now is the entrance to cell block
1. Two hammers are patrolling this way; one of them has a key. I wait for him in the darkness here and snatch it [6].
Once I do, he won’t be able to unlock this door and will stop right in front
of it. The other guard will come by and open the door for him. Sometimes the
other will start patrolling again, but he won’t stop at the next door he
reaches. Instead he’ll try to find other methods on how to reach his
destinations. I’ve seen him all over the prison area, except for inside the
yard, so remember to be on your guard from now on. Anyway, I go through
the other door on this side into cellblock 2. Immediately fly up the stairs
here to level 2, then left. All I need to do in this
cellblock is to pick the key [7] from the guard overlooking the lower
level. Then enter block 1 at the next left, always on the lookout for
the last patrolling hammer. Lean around the left corner, creep, stop, creep,
stop. There’s a wary prisoner (Sennet) in the first
cell to my left who’ll make a remark as long as I don’t creep-crawl. I get a
“Who’s there?” as soon as my indicator goes yellow. I walk to the end and grab the key [8] from the guard through the
window like earlier. Unlock the door and sneak in behind his back to
pull the second lever in the right row. I hear Issyt’s
gate open nearby. I get out, take a left and enter the second cell on the
right. Hmm...Issyt’s fate seems somewhat
unfortunate (right image below). The Hand of Glory is camouflaged as
his left hand, so I pick it up. Need to find the map plus some more loot and
I’m home free, at least in terms of Ghost and Supreme mode. First I close the
gate to Issyt’s cell.
On to the barracks. Go downstairs from here and take
a left, then left again. I see some stairs in front of me, but also hear the
whistling of someone nearby. Peeking around the corner I see a hammer priest
guarding this room. He’s facing the stairs and doesn’t seem to move or turn
at all. The room is well lit also. Could be a real challenge this. I see
Supreme flying out the window here. Trying to sneak up the stairs...nope,
full alarm! Can’t douse that torch either, against Supreme rules. Will leave
him here for a while then, and see which way he fidgets. Bad news...after
about 10 hours he ended up in the northeast corner. Reload. Can I at least
sneak in behind to nudge him forward? Not even close. He sees me as soon as I
round that corner. I can move a little bit into the room before getting
remarked though. What if I found some crates and tried to jump in behind him?
Remember seeing some boxes down in the storerooms when snooping around in the
factory. I work my way down there...yes 4 boxes on the top shelf. I bring two
of them with me back up to the priest. I sneak in as far as I can, then jump
up on the first crate. So far, so good! Trying the second...no...the ceiling
is too low. I bounce out into the middle of the room when I can’t fit on top
of the box. Hmm...guess this means a 1st alert is inevitable. Accepting a
Supreme bust, I can move far enough into the room to fit myself on top of the
second crate also. After a few tries, I can silently slide in behind him. This exact method is no longer possible in TFix, due to the increased proximity of enemies alerting
to dropped crates and other noisy items. The way around this is to cushion
each crate with something soft, like a potion. If playing with just NewDark, but no other updates included in TFix, then it works like normal. Nudging time.
Have to push him up the first set of stairs. Below to the left is an image of
how I placed the crates and how far I had to push the priest to safely
traverse up the stairs. [UPDATE 20/12/07: For normal ghost, dousing the torch
is the correct option, as exploits are only allowed as a last resort (right
image below). Doing this, I can run up the stairs with no further remark.
Coming down I have to accept a 1st alert from the priest.]
Upstairs I enter the opening to the left, but
wait…footsteps behind me. A guard passes, turns and patrols back down the
south hallway. I follow him past a couple of turns, and enter the first door
I see on my right. A chest directly to the left in here holds a purse
(610). Back out and follow the guard some more to
the next door on the same side. Like before a chest rests in here also, but
this one contains 10 broadhead arrows. Exit
this room and continue on, only to enter the doorway on the opposite side.
I’ve entered a dining room, with a loaf on the first table. I quickly
run into the open door to the kitchen in the opposite corner. The guard will
soon return from his route and walk through the dining room, so I’ll keep an
eye out for him (left image below). In the kitchen are more goodies: 4
loaves, 3 cheeses, 3 apples, 2 cucumbers, 2 carrots, 2 deer legs and a
water arrow. That’s about it, so I make my way back to where I
first saw the guard and enter the carpeted area to the right. Another hammer
patrols here in a circular clockwise pattern, walking from right to left on
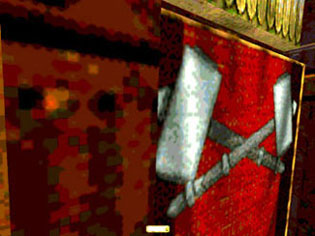
this side of the window. I spot a golden hammer (760) on each of the
two elevated pedestals flanking the entrance to the lighted area up ahead,
worth 150 altogether. Also, in front of the colored window are 2 golden
candlesticks (860). I note a small hole at the base of the window through
which I can see at least one hammer priest. The priest actually gave me a
“Who treads there?” through this hole once.
I take a right (after the guard disappears to the
left) and another right up to the second floor. I follow the only hall
possible, taking a left at the first t-junction. I
then enter the door on the right. Wait...a guard nearby...patrolling on
gravel? No such thing in here. Must be outside then. A safe in here (the
evidence locker?), but my key is no good. Let’s try the other door in here
then. I follow the hall to the end. The guard is very close now; I can hear
him more clearly. There! Outside the window! I saw him stroll by then turn
and head right back to the left. If he carries something, I might be able to
snag it from in here. Nice and dark too! Here he comes... My best chance will
be on his way back, since the pocket is on his left side. Leaning forward
and...yes! He carried a silver key [9]. Back to the study. The key
fits in the safe lock. In it are a diamond (960) and a tiara (1085),
but no map (right image above). Locking the safe. A scroll rests in
the bookcase next to the desk. I read it. This prisoner called Nammon must have stolen the map along with some valuables
from the evidence box. If I want the map, Nammon
must be found first. The paper says he escaped his bonds; I can therefore
rule out the prison cells. One of the hammers heard some commotion to the
west. Will have to check that out on my way down. I put the scroll back as a
Supreme requirement. There’s nothing else of interest here, so I exit through
the western door. Turn left, and then take the next left door,
ignoring the way back to the right. A safe seems to be the only thing of
interest in this room. I unlock it with the silver key. Another diamond (1185),
and a golden necklace (1385). Slashing down the banner next to the
safe however, will reveal a hidden passage containing 3 bottles of fine
wine (1535). The downside is that property damage is considered a bust,
even in plain ghost mode. There is, however, a way past this for ghosters called “keyholing”.
Discovered by Lytha, keyholing
exploits the dark engine in a way that makes you able to grab or frob objects on the other side of doors or banners. This
method I’ll have to use here. Stand up to the banner on the left side, also
hugging the left pillar. Lean left halfway around the pillar, and then face
back towards the banner (but not too much) (left image below). Keep holding down the lean left-key, I
press and hold the lean forward-key
and wriggle the mouse a little (middle
image below). I still can’t reach all the bottles though, but pressing the
lean right-key and turning to the left does the trick. As seen in the right
picture below, I’m able to pick up the valuable alcohol still holding lean
left, lean right and forward. This method is no
longer possible in any version of NewDark. The
Thief 2 engine doesn’t allow penetration through banners without the use of a
rope arrow. Perfect Thief is therefore not achievable. For Supreme,
I’ll skip this loot, as exploits aren’t allowed period. I also drop the
silver key back through the window onto the outside guard’s patrol route. I work my way down to the second floor entrance
again. Waiting for the patrolling guard to stroll by, I go straight and take
a left. Two hammers are chatting about a brother buying his knife at a competing
blacksmith’s. Nothing important. Sneaking around to the left and hiding in
the shadows, I can spot them both, a priest and a novice. Hmm... I could
swear that novice was facing the opposite direction last time I played this
mission. I remember having trouble grabbing that hammer on the table, while
also snatching the priest’s key. That’s really weird! As seen in the pictures
below, I have no trouble creep-crouching up the stairs on the left side, in
behind the priest and pick up both the key [10]
and the golden hammer (1610). I don’t know what decides the
novice’s fate of direction, but he might slowly change body-angle during the
course of time prior to their conversation. I haven’t analyzed this situation
any further, since the situation I arrived to had a quite simple solution,
but if anyone else has some facts about this, please send them to me, and
I’ll post them here. I have heard that the novice fidgets in place quite fast
across the room (when facing the table), ending up in the corner to the priest’s
left after some hours. If so, that method would’ve also solved this
situation, but Supreme would be busted (since waiting is considered an engine
exploit).
OldDark
OldDark ... Ok, I have done some snoopin’
around on TTLG’s and Eidos’ forums, and it seems
like the novice’s turning is a TG bug. Apparently, if one waits some hours
prior to their triggered chat, he may turn around. It happened to me after
about 75 minutes, although I have no idea whether this is longer or shorter
than “usual”. Since this random turning is considered a bug, using it to get
the key and the hammer probably constitutes a bust towards Supreme rule #11.
The only solution then, is to skip this area altogether. It is allowed in
plain ghost though, so that mode is still intact.
I’ve never found the acolyte facing south in NewDark.
The updated pictures above are from an OldDark savegame run through NewDark. …
OldDark
NewDark Decided to reload to a savegame
where the novice faces south and wait overnight, to see if he moves and where
he ends up. As you see (to the left above), my earlier assumptions were
wrong. He slid off the closest side of the table, stopping at the priest’s right hand side. Heard Sneak say these
guys on different occasions went all over the place. I’ve only seen them end
up as in the left picture above. Regardless, I can successfully get both the
silver key and the hammer this way also. In NewDark, the acolyte moved north quite fast, but stopped
once reaching the table (right image above). He never moved from there. I’ve
still never seen him end up to the left of the priest, as in Travis
Whitsitt’s famous (and almost endless) let’s play.
Work my way back downstairs, and bring Basso and the
used crates to the cellblock 1 exit (I bring them with me as I go along now,
unless otherwise stated). Follow this hall and take the first right. Another
circular room with one of those ceiling-sensors. Walk around the left pillars
to the opposite side. Approach the guard from this
side and snag his key [11]. Exit through the other side and
take a right. Drop the stuff in the shadows up ahead. Walk on, ignoring the
left stairs (Supreme Thief also requires the red key to be dropped somewhere
along this path, check the map for the guard’s patrol route), and enter the
next room and take a hard right. I go down the small hole in front of me, and
arrive in some sewer area. I jump into the water and wade to the other end,
then turn left and traverse to the opposite side up a small flight of stairs.
I find a corpse with a key on its belt (left
image above). This is Nammon mentioned earlier.
Beside it are 4 moss arrows, 3 water arrows, 4
stacks of silver coins (1658), a stack of copper coins (1663) and
one stack of gold coins (1688). Some notes also rest here. Aha!
This guy must be Nammon, and as predicted he has
Felix’s map...well not anymore. Back out of the sewers. Time to leave this
place! Bring the crates back to their original position, and carry Basso down
the stairs leading out from the factory area. Sneak past the stationary
hammer, and back exactly the way I came from (don’t worry, Basso can handle
getting wet), all the way to the elevator. I then hide Basso in the dark
steep slope to the north. I sneak up and lean around the box, pressing the
top button. Bring Basso up here and drop him onto the elevator. I then press
the button for level 2 and ride down with him. (If you rather want to bring
Basso out the opening from level 3, which perhaps is what’s intended, you
have to jump off the elevator at the 3rd floor while it’s moving, and let the
machine continue down on its own.) From here on the path out to freedom is
easy (right image above)! Finito! Time: 2:23:57 Loot: 1688 out of 1688 (Supreme: 1463) Pickpockets: 11 out of 11 Damage Dealt: 0 Damage Taken: 0 Consumables: 1 Water Arrow Ghost: Success! Perfect Thief: Success! Supreme Thief: Failed! Perfect Supreme Thief: Failed! Norwegian Thief: Failed! Notes: -
The priest by the stairs leading to the barracks had to be nudged
forward enough for me to sneak up. He also gave a 1st alert during this
process. I chose this alternative for Supreme, despite busts. For Ghost,
dousing the torch is allowed and hence no bust. -
The 3 bottles of fine wine at the top floor of the barracks had to be
picked up by “keyholing” the banner. This cannot be accomplished in NewDark.
A Supreme bust so they were skipped, eliminating all possibility for Perfect
Supreme. -
The novice in the barracks had turned around due to a TG bug. This
made me able to get the hammer on the table to complete Perfect Thief. This
is obviously a Supreme violation, and must be skipped for this mode.
Alternately, waiting 10+ hours will move the novice past the table enough to
grab the hammer. This also cannot be accomplished
in NewDark. He stops once reaching the table. |