|
PREVIOUS MISSION THIEF GOLD NEXT MISSION Mission 3: Down In the Bonehoard [This
walkthrough has recently been updated for TFix
1.23, running NewDark 1.24. Although the original
text for OldDark has been preserved, situations
affected by these patches have been inserted in green. All screenshots have
been updated, and many new ones have been added. Keep in mind that there is a
difference between playing the game in NewDark with
or without TFix. TFix
updates the core mission files, as well as applies .dml
files that tweak the environment in numerous ways. These changes aren’t
supposed to have a significant impact on gameplay, but when ghosting, slight
changes could occur. If wanting as close to the “vanilla” experience as
possible, install just NewDark, without any further
patches. I have ghosted the game 1) in OldDark, 2)
in plain NewDark, and 3) in NewDark
with TFix. This walkthrough will discuss
differences between all varieties.] A rather
different mission than the first two. Poses many problems in terms of
Supreme, and I have yet to successfully accomplish this Overall Score: 8.8/10 The Halls of Echoing Repose, 1st
Floor ---
Entrance & Upper Vaults --- Following
Cutty’s suggestion, I’ll head down in the bonehoard to retrieve the mythic Horn of Quintus. There
is rumored to be lots of valuables, and I should pick up at least 2000 gold.
The sibling stones called the Mystic Soul and the Mystic Heart are also
alleged to exist down there, and I will do my best to procure them. I
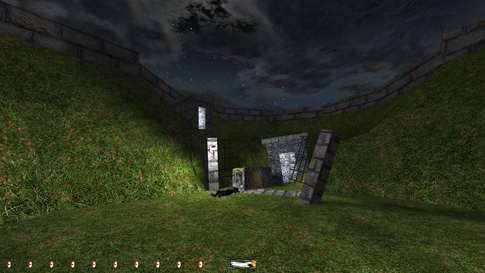
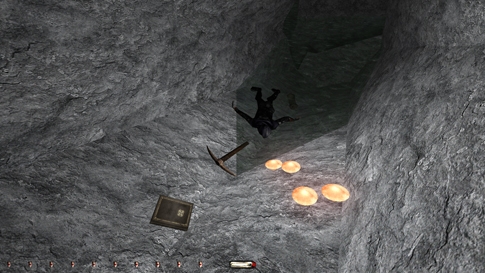
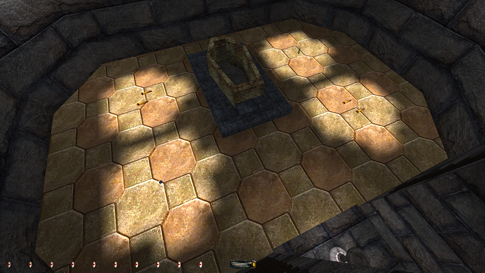
find myself outside the entrance to the vaults (left image below). Enough
rope arrows to start off with, 8 to be exact. Also 3 holy water vials and 3
healing potions for stacking; they might come in handy later. I scour the
area outside first. A sleeping carcass beside the nearest grave, probably the
victim of grave robbers. Felix? This is a sleeping zombie, but I have no
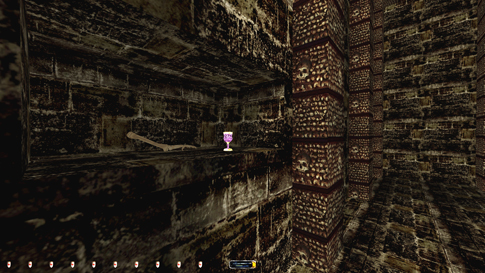
problem working around him. The eastern crypt is empty, but the western one
(up a small hill) has a goblet (15) lying on the floor next to a
grave. I then enter the upper vaults as marked on the map.
I
climb the rope and slide down left into a tunnel. Emerging in the next room,
I can hear a zombie roaming nearby. I’m actually standing on some boards
overlooking the zombie-room below. “It’s a long way down!” A rope hangs from
the ceiling, but torches light up all over the place, so it would be
difficult to avoid the creature beneath. I’ll try the opening ahead. Into a
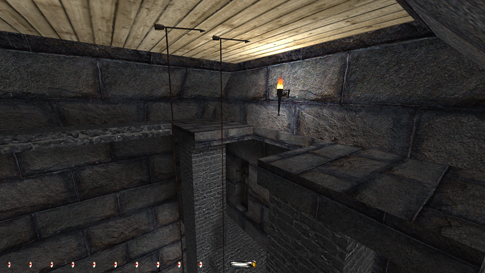
different room now, with wooden ceiling and no AIs. I need 2 rope arrows to
cross undamaged (right image above). I jump down and catch hold of the first,
continue to the second, turn around and grab the first, then pluck the last
and fall down. An
angled running jump will also get me across, but I have to land in a mantle
to avoid taking damage, and that is only possible with new_mantle
enabled. Around the corner to the west is a deceased member of Felix’s
expedition (left image below). His journal says Dranko,
Marcus and Cather are lost. Marcus carried loot, and disappeared near a
chasm. I will be on the lookout for him. Nothing else here except a bedroll.
I go back to where I descended the rope, and take the east exit route. I
ignore the stairs down to the right (it leads to the zombie-room with nothing
else of interest), and instead take a left. I continue further down a ramp
and drop to a larger hall. I turn right and approach
a disturbed grave. The tombstone says ‘ALARUS’, and directly behind it lies a
healing potion. I go back to the hall and walk south into a
room with some huge ugly wall-faces. An opening in
the right wall leads to a plateau overlooking the zombie-room. I get caught
if not crouching. There’s a tiny crack in the wall here. It hides a chest
containing 8 water arrows. I then sneak back to the face-room.
A flight of stairs in the north wall leads to the northern part of the upper
vaults. A holy water font is placed in a small side branch to the west here
(right image below).
More
graves. On a ledge to the right is a golden vase (115). Three pressure
plates triggering arrow traps in the southern wall are placed right in front
of it. Rule #9 of the Supreme directives now say no traps triggered directly
by Garrett are allowed. Anyhow, the vase can be reached from either the front
or the back without setting off any trap. Now, out the other opening and up
some stairs. Another grave-room with a hammer zombie-corpse on marbled floor.
No need to disturb him though. I hop onto the rope to my left and climb down
into a darker hall. The south path leads to a room with one more zombie.
Fortunately he’s asleep. Beside him is a tight doorway to a small room with a
chest (left image below). It’s possible to cc up the left side, then lean
forward and snag the diamond (215) inside. Back to the hallway and
take the north path. I jump into the water and duck under. Swim straight
ahead (ignore the right passage) and mantle up into the next room. I see two chests on pedestals right behind me. The left
contains a speed potion and the other 6 fire arrows. However,
when opened or closed, they trigger arrows flying across the room. Absolutely
no way to avoid this if wanting the goodies (which aren’t needed to complete
the mission), hence 2 Norwegian busts. The only other exit from here
is a ladder down on the opposite side. Climb down and jump off. Ouch!! I got
boulder-crushed! A pressure plate must have set it off! Try again. Yes, I see
it now. I’ll simply have to jump over the plate…hmm not so simple after all…
I can run away fast enough to avoid the boulder, but setting off that trap
busts Supreme. How to jump farther out? To solve
this puzzle, you’ll have to know some ladder tricks. Take a good listen when
climbing down the ladder from the top. No stepping sounds, right? How about
when climbing up again? The stepping sounds suddenly appear! This is the
solution to avoiding the pressure plate. When approaching a ladder from “the
back” (or the top in this case), you climb faster with no sound, but at the
same time it makes you jump a shorter distance. Approaching from “the front”
lets you climb slower with sound, but also allows you to jump farther. But
how does this help me? How can I approach
the ladder from the front? There is a way. That torch is the answer. I
can without getting burned, position myself on top of the flames (right image
below), then fall down and catch the ladder from the front. Climbing down now
makes it easy to jump far enough. Nice! Isn’t Supreme Ghosting fun? I
follow the only possible path to a tunnel with two boulders. Some arrows and Xs have been carved into the tunnel walls in this area.
Probably Felix’s folks hoping to get back out.
I
spot a burrick up ahead; it’s patrolling a short distance
back and forth. Lots of bright mushrooms there too, but when he walks off
right, I can easily sneak out and head the opposite direction. The wooden
board up ahead might make some noise (I can actually hide in darkness at the
top of the board without getting alerts from the burrick).
Anyway, fully down in the grassy tunnel I turn around and follow this passage
until I reach a deep hole in the ground. I can safely drop into the big pool
below. In the corner to my right is an elevated plateau with a wooden
staircase, I mantle up here and dash up the stairs. Hmm…those squares on the
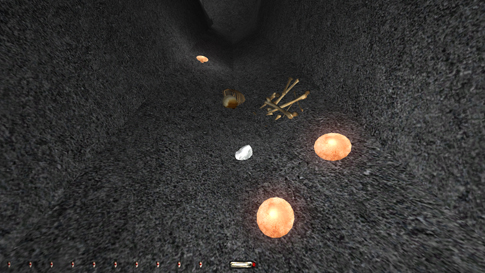
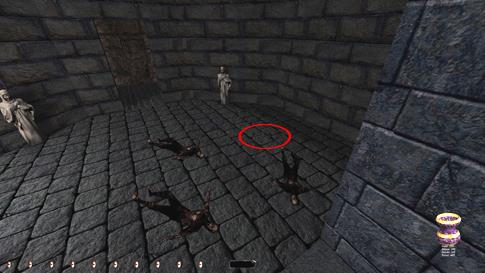
floor look like pressure plates. I suspect more traps here. A dead guy at the
other end too, with some goodies around (left image below). Also the remains
of a cadaver on this side, maybe a zombie the dead thief managed to kill, or
just another victim of the traps. Crouch and make my way past the plates,
sure...no problem. Beside the lifeless robber lie a bread,
2 cheeses, a scroll and a purse (315) worth
one hundred in loot. The scroll tells about how one needs fire arrows for
obtaining the Mystic Soul. If so, that’s a Supreme Ghost violation. We’ll see
about that later. (Supreme requires putting back the papyrus) This thief must
have been looking for these crystals and made it past the first set of
pressure plates, but gotten shot as he was about to grab the arrows. Fortunately, I’m here to collect. 6 fire arrows. Back
into the pool. In the opposite corner is another grassy tunnel. I follow this
steep path a while until I reach a large burrick
cave.
This
is not so far from where I stumbled upon the first burrick.
That hole is over to the left somewhere. 3 burricks
patrol randomly in here. Sometimes one or more of them might get caught up in
a rotting burrick-corpse. The bugs swarming over
the carcass sting the patrolling burrick, and the
other two think some enemy is nearby and get alerted. This has happened to me
on more than one occasion, and I can assure everyone that it’s not a bust.
One must however be careful, as the burricks might
be more on edge after such an event. All the same, my goal is that hole down
to the right. It’s clearly visible from up here and seems nice and dark.
Crouching while falling minimizes the noise. I then tiptoe over to the cave.
It eventually leads to a four-way junction. I go left, ending at another
unfortunate adventurer’s macabre remains. I spot a silver nugget (365)
beside his skull that I pick up (right image above). Make my way back to the
junction. From here I venture down the east hall. I
pass a sloped hall on my left (it leads to a chamber full of dead burricks, and eventually back to the four-way junction),
and carefully slide down a steeper path to my right. I’m entering the
innermost part of the cave system now. I can hear another animal nearby. Yup,
a belching burrick! Leaning out reveals him in a
lit area guarding a rope hanging from a vertical tunnel. The indicator shows
red in the opening, and I get caught. Darn! I’ll fly up and check what’s
there at least. Just some arrows and a scroll. Phew! Supreme is still intact
then. Norwegian Thief will need some creativity though. If I’m fast, rushing
out and hiding down to the left will only cause a 1st alert. Check out the
picture below. Remarks from these creatures in general are quite hard to
distinguish, but an alert like this would resemble a human burp. I have yet
been unable to reduce it to no remark at all, maybe not so strange when my
indicator is red. I can, however, sneak along the left wall past the creature
and climb up the rope without violating normal ghosting rules. I find another
thief lying dead in a room full of statues (right image below). A papyrus
beside him tells about failure in attempting to reach the Mystic Heart. “In a
room full of statues, whose gaze is death,” a bronze tablet supposedly said.
Will keep that in mind. Could this be Dranko, the
thief lost to the belching burricks? Quite
possibly. Whoever he is, he has left 6 water arrows for me. Time to
leave this place. Back down the rope and hug the wall past the burrick like before, I then make my way back to the 4-way
cross. I take the south tunnel back to the 3 burricks.
Emerging from the cave, the creatures could be just about anywhere. My safest
bet would be to sneak left, past the two caves here, and enter the third cave
(with the hanging rope) on the northwest wall. In these situations, I’m not
satisfied unless being absolutely sure no one has seen me. If there’s a
slight possibility for a 1st alert from one of the burricks,
I reload and try again.
Safely out of burrick sight, I focus on this new area. I’ve entered
onto a ledge overlooking a huge chasm (left image below). This could be where
Marcus fell to his death. Venturing down to the bottom of the chasm will
reveal Marcus’ remains (right image below). His diary tells about an explorer
named Adolpho who was after a gemstone deep below
the burrick tunnels. Seems like I’ve already found
him, in the room with all the arrow-traps. Apparently, he came down here some
time before Felix and his crew. The loot Marcus supposedly carried with him,
is nowhere to be seen. Nothing else of interest neither. To get back up I’ll
have to jump across the chasm and follow the tunnels past two more burricks, only to emerge in the middle of the Halls of
Echoing Repose. I rather reload and travel along the ledge above and enter
the Halls from the front.
--- The
Halls of Echoing Repose, 1st Floor --- Zombie
hour! A total of eleven zombies watch the lowest level of the Halls. On one
or two occasions I’ve seen them upstairs, but that has got to be from me making
too much noise. Normally they are seen within set paths (check the map). In
general, zombies are pretty easy to avoid, especially when you have much
space and darkness, and therefore I won’t guide my way around them. And even
if I did, it most probably wouldn’t help anyone. So you’ll have to manage
these zombies on your own. The Halls of Echoing Repose are divided into
octagonal vaults, and the ground floor has ten such chambers. These are
numbered 1-10 on the map, to keep you on track. I
start out in vault number 10. Walk straight and enter another chamber, number
7. The only piece of interest is a sorry-looking golden
bone (leg) that I pick up. It doesn’t add any value to my loot count, but
must have some purpose. From here, I walk north and spot an opening
into vault 8. Four sleeping zombies guard a golden vase. Unable to reach it
without causing commotion. I could drop down from the ramp upstairs, but I
wouldn’t be able to reach the vase all the same, the sides of the
stone-window are too steep. No place to fasten a rope arrow from above
either. I can run through the creatures and grab the vase without arousing
them more than to first alerts, but for Supreme...well you know. I will have
to place something among the zombies to travel upon, like with the Bafford-spiders. Zombies won’t alert to anything
aboveground, but smaller than boulder-height won’t work. Saw some boulders
earlier prior to the burrick caves, but not around
here. Will look for some. Either boulders or crates, but the latter are
highly unlikely to find around the tombs. Everything made of wood seem to
have rotted away ages ago. I’ll come back later. There’s
another golden bone in here that I bring along, an arm to be exact.
Hmm...perhaps the clue is to find the complete set. I leave and take a
right. A bit further down this hall a door appears on my left, it leads into
vault 5. Noisy marble. More sleeping zombies and...wow...boulders falling
from the sky. A trap I guess. Supreme won’t allow that. A vase worth 100
behind a couple of boulders here also. Possible to reach without 2nd alerts,
but what good does that do me?! I’m here to supreme, darn it! At least I
found boulders, but ironically they’re out of reach as long as that door sets
off the trap. Keyholing the door won’t work and
busts Supreme anyway. Hacking it open with my sword still sets off the trap
and alerts five thousand zombies of my presence. Will save this room for last
and see if I can figure something out. Continue north and enter the next left
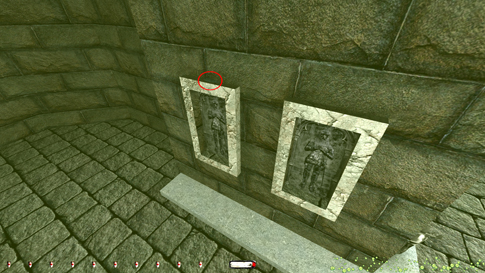
opening. Lots of graves on the walls and a sleeping hammer zombie-corpse.
Can’t be good for his back to lie on the concrete like that. One of the top
graves here holds a golden goblet (390) worth 15 (left image below).
Back out and on to vault 9. “Felix, you don’t look so good!” Seems like I’m
all alone down here; all alone in the bonehoard. Can’t be
that long since he passed away. His food is still good, and the campfire
seems undisturbed (right image below). His diary tells a little about the
other team members and Adolpho. The so-called
coward, Sutter, must be the first member I stumbled upon. Which means I’ve
found everyone except Cather, who got killed by an arrow trap. The book also
mentions that the horn calms the burricks
protecting it. That’s good to know! I pick up the bread.
Ok.
Six vaults done, four to go. I walk back through chamber eight and seven (in
that order), and reach vault number 4. Lots of patrolling zombies here. On a
window-frame on the southern wall lies a silver nugget (440). I enter the white stairway going down in the middle of the
room. At the bottom I take a deep breath and jump into the pool. Following
the underwater halls, I reach an octagonal area with yet another golden
bone, the second arm it seems. Since when did gold float? I can see vault
4 above me. I’ll be there soon. Diving again, I continue north. Still under
water I find 2 water arrows on the second window-frame on my right
side (left image below). I emerge at a dead end. The big hole in the wall
here is the exit from the burrick caves beneath the
huge chasm. With that I return to chamber 4 at the top of the stairs. I
can enter the inner chamber of vault 1 from the southern side. I hear steps
coming from above! A very thin bridge extends to the other side. Walking
across it sends fireballs at me. Reload. The ladder is accessible from either
side while also avoiding any balls of flame. At the top I spot a jar
(490) worth 50 to my right. All done. Back down and out. I take a right and
walk on (past some skeletal remains) into vault 2. I continue around the hole
to vault 3 and the ramp leading up.
To
avoid a groan from the zombie blocking my right, I need to jump onto the
ladder from the left. I climb to the top and arrive at another level. Need a
couple of tries to avoid falling into oblivion when jumping off. A single
opening to the NE leads me to a darkened area with a burrick
in the distance. Two sloped paths show the way around him, and the rightmost
would be my safest bet. Although I light up quite well, I’m able to traverse
securely past the creature and exit out the doorway behind his back (right
image above). With TFix, I have not been able to sneak by this burrick without a first alert. In vanilla NewDark it works just fine, but TFix
changes the alert level of this creature enough to force a grunt. I
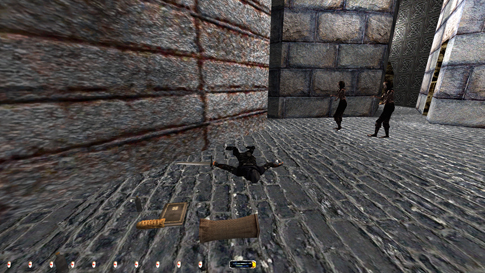
walk on. My goodness! Spitball my arse on fire!!
Focus...I believe that’s the key. I walk out to the middle of the topmost
beam, turn left and fall to the next trying to avoid the purple stuff. I
immediately run to the end of this beam straight ahead and fall yet again
down to the left. Turn around. Safe for now! My next goal will have to be
jumping to the right. I do so, once again timing the shooting spit. Out in
the middle and fall left again. Yet again to the middle and fall left, then
drop safely down to ground level. Phew!
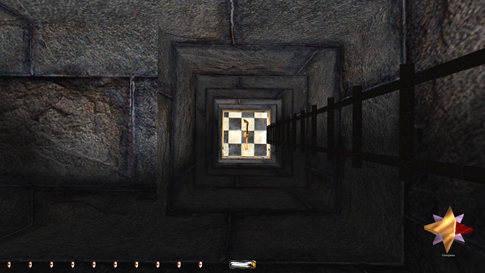
A
tablet in the next doorway says: “He upon whom the gaze of the Guardians
falls, he shall be destroyed.” A marbled room with 7 statues, must be the
guardians. How to avoid their gazes? On the left side of the right pillar.
Then on the right side of the pillar straight ahead. Next on the left, right
and left of the three after that, and out the exit. I’ve plotted the correct
way on the map. Upon entering the next room, a haunt spawns before my eyes
and hacks the crap out of me. Looking more closely, the light setting also
changes. I use this to my advantage. [UPDATE 4/11/17: Discussing this
situation with Saruman38, I realized that entering this room is another bust
to Supreme. The statue lights seen in the picture above turn off and lights
in the middle of the room turn on. They switch back after about a minute or
so. The removal of light sources is not allowed for the Supreme mode, as per
rule #6a.] Sneaking into the room, I notice that the haunt spawns without me
lighting up. I can therefore creep to either side while still in the dark,
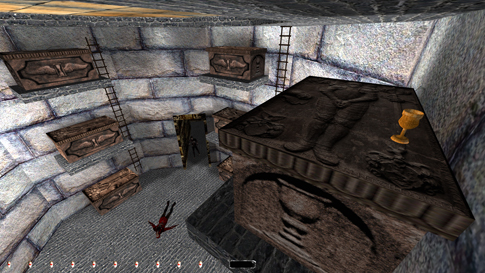
and hug the wall past the ghost. At the end of the room a chest sits on a
pedestal. It holds the Mystic Heart (1490) worth 1000 (left image
above)! I close the chest and walk into the tiny, white chamber behind the
pedestal. It transports me back to the hallway by the burrick.
I sneak back out the way I came and descend down the ladder to the 2nd level.
With TFix, I take another first alert from the burrick going back, same as before. I
walk right (north) past a doorway with spitting flame balls. I enter a
walkway overlooking vault 9. At a somewhat higher level to my left are wooden
planks. I can jump over at an angle (watching out for zombies spotting me
below) and mantle up. Through this doorway rest the graves of the Marad-family. I fall down and pick up a goblet (1505)
in the second grave to the left (right image above). Nothing else in here so
I leave. I jump back over to the stony walkway, still watching out for
roamers below. It’s best to land on the edge of the walkway and mantle up, to
avoid making noise. Left, into the next chamber and up the ramp to the 3rd
floor. Turn south and walk ¼ around the pathway, then up the right incline.
Into the doorway ahead and approach the hole further on. I shoot a rope arrow
into the ceiling, then jump on to lower myself down. “STAY AWAY FROM MY FACE
THIEF, OR YOU’LL BE SORRY !!” Yeah, yeah...whatever. I’ll rather just grab
your eyes...oops! Blown to bits!! The traps spring when highlighting the
diamonds, and cause a bust to Supreme. Simply ignore these pieces of loot and
you’re clear. The next part concerns plain ghosters
only. To be as supreme a possible I put back the bones to their original
positions after the blast. I stand in the corner and take a snapshot. Then
quickly grab the 2 diamonds (1705) and wait until the fireworks
settle. I then consult the screenshot to replace the skeletal remains
correctly. I have put out before- and after-shots below. Can you see which is
which? I also find 4 rope arrows in a chest
behind the opposite pillar. I fly back up and grab the rope arrow as I
jump off, and then make my way back to the 2nd floor.
At
the bottom of the ramp I walk straight, then make a hard left into the
opening in the SE corner. Another hard turn, this time to the right 90°. I work my way around the room and up the small
flight of stairs. Then climb some more steps, turn left and up the ramp.
Poles of spitting ooze stand around this walkway. There are five altogether.
I walk past the first pole on my left and around the next corner to the
right. Following the only route possible, I end up at a huge cave system full
of burricks. They all seem fuzzy from the music and
don’t give a rat’s ass about my sorry presence. Just like Felix foretold. I
find my way to the only exit in the north. Passing a room with graves and
statues I enter another walkway/ladder system. “Good thing I’m not afraid of
heights.” A ladder to the left takes me up the first level. At the quite
opposite side I find the next. I turn around, jump off and walk right a bit to
find the third ladder (hard to see if the gamma is set too low). Saving.
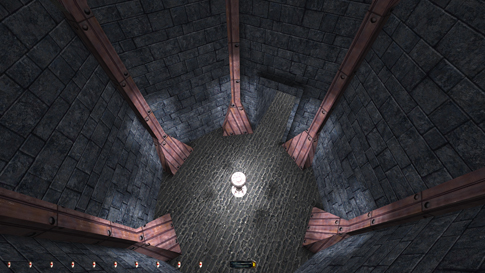
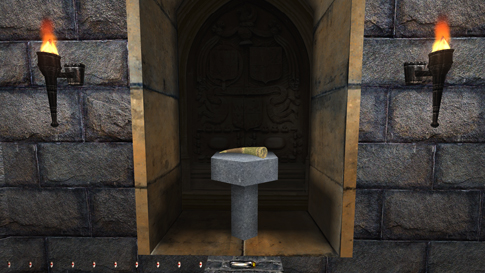
Reaching the final walkway is tricky. Phew...safe! I find the entrance to the
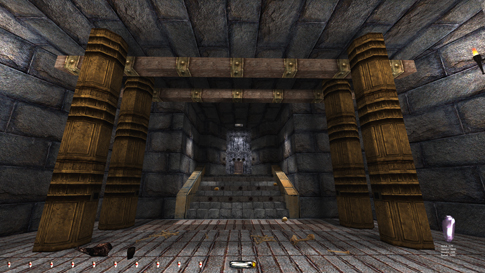
innermost pillar and climb up. The Horn of Quintus... need I say more
(left image below). Back down to the burricks the
same way I arrived. Oh my...their brains are all up’n
runnin’ now, since the music died. I slip right
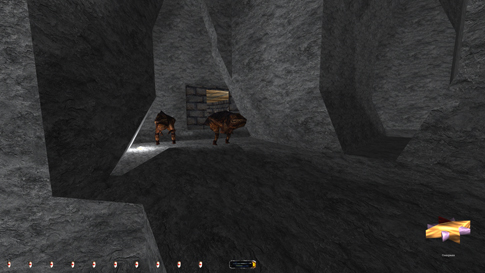
first at least. Around the corner until I reach a t-junction.
Going right would be impossible, will try left. If my calculations are correct,
beyond the left corner two burricks are looking
straight in my direction. I will have to make a small jump there also, to
reach the darker zone ahead (right image below). Ahh
crap...got caught. Try again. Let’s attempt to reach that dark area in one jump.
Hah! It worked! Will try it again just to be certain; after all, ghosting
methods are not valid if they can’t be repeated. Wow, got it once more! Must
be a blind spot in their view then. Good old Garrett here is nothing but
happy. Sneaking out from here on is easy enough. I walk back down the ramp by
the spitting ooze, and past the first flight of stairs. In any version of NewDark, I have not been able to repeat this move to fool
these burricks. I always get first alerts jumping
that ledge.
I
hop over the open space to the right and into the wooden hall. Also here it
would be wise to land in a mantle, to avoid alerting patrolling zombies. At
the end, I continue down the wooden ramp and make a left. Follow this walkway
around the corner and stop at the next doorway. Hammer symbols decorate the
walls of this hall. The floor makes much noise too. The inner chamber has
brightly lit pressure plates shaped as a hammer. When triggered, purple balls
rain from the ceiling. The plates are pretty easy to work around though. 3
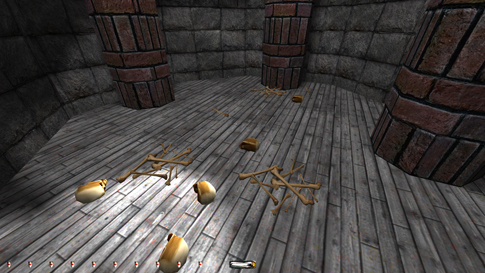
goblets (1750) worth 15 each sit on the three graves in here. Ladders lead down to another marble-floored room. Here I
find 2 more golden bones. Dropping all my collected bones into
the grave spawns 4 fire arrows, a healing potion and 8 water
arrows, as a reward for putting this poor soul to rest (left image
below). I’m in doubt whether dropping the golden bones into the grave is
considered a bust towards Norwegian Thief. I’m not really using the
objects, rather placing them, making them disappear and something else
appear. When in doubt like this, I usually rule against myself, but on this
occasion I’ll make an exception. The four circular lit areas covering the
power-ups are however clear evidence of a thief’s presence and hence a bust.
There’s also a holy water font here for those it might interest. I climb back
up.
Out the doorway I face south and approach the only remaining
area to explore. The stepping sounds I picked up earlier seem even closer
now. Leaning around the doorway corner reveals a flame spirit patrolling in a
brightly lit hall. Observing him for a while uncovers his pattern. Although
walking randomly, he traverses within set boundaries. Back and forth between
this doorway and the rounded portion surrounded by 5 metal doors and pillars
up ahead (check the map). I can
sneak around either side and draw near still covered in darkness. Flame
spirits light up a small radius but can walk close by and even touch you
without getting distressed. Hey, what’s this?! A partly hidden entrance in
the hall ceiling. The ladder is too far up to reach though. I’ll check it out
in a minute. What’s the deal here then? Sounds like zombies all over the
place! The Mystic Soul must be hidden somewhere near, and Adolpho
said something about needing fire arrows to obtain it. I remember thinking
that would ruin Supreme. There are five unlit torches in my view right now.
What if I put those on fire? Yikes!! All hell breaks loose! Monsters pouring
out from all over the place, and as leader of the pack one pissed off burning
spirit. The entryway in the floor has opened up, and this passage eventually
leads to the Mystic Soul. From here an exit leads down the ladder I saw in
the hidden ceiling entrance earlier. Hmm...what if I could get up that way somehow? Then I could obtain the gemstone without ever
having to light up the torches. That would get me by a lot of busts, both for
Supreme and plain old Ghost mode. No surface to attach any rope arrows, so
stacking objects seems to be my only possibility. Supreme ghosters
have access to a fair bit of equipment in terms of stacking. 3 healing
potions, 3 holy water vials and 5 golden bones are either already in my
inventory or easily accessible within reasonably close vicinity. All the
golden bones are marked with a ‘G’ on the various maps. When Spiritus heads on south, I quietly slip out and start
stacking. Alternating between vials and bones stops the metal from making any
noise when dropped. I need 5 vials and 3 bones altogether to reach the ladder
firmly. The flaming guy is still unaware. Up this ladder and down another one
escort me to a huge hall with scattered body parts...a bad omen. Well-hidden
pressure plates lie all over the floor in front of the stairway. The stairs
themselves are also trapped, but I see a blind spot. Jumping from the floor
just in front of the plates and onto the railing makes me able to reach the
topmost plateau without fear of getting hurt. ‘Raiders of the Lost Ark’ anyone?
Ultimately, this is the inevitable bust for Supreme Thief, and what makes
‘Down in the Bonehoard’ an unsupremable
mission. In order to obtain the Mystic Soul sitting on the pedestal, one has
to put an equal amount of weight as a replacement to avoid the final trap
from getting triggered. The object intended is right at our feet, a lost
traveler’s macabre skeletal remains. In
[UPDATE Feb 22nd, 2017: I’ve been able
to reduce the stack to 6 vials and 2 bones (left image above). This means you
can make due with only the bones from the room with the golden casket, plus
your starting gear of 3 healing potions and 3 holy water vials. These bones
are also quieter to return for Supreme (less zombies around) and they’re
right next door. I also found the perfect spot to make the stack for easy
descent from the ladder. You want to place it so you can let go of the crouch
key and fall directly onto the topmost item from the ladder. There is a black
floor tile just below. You want to place the stack on the southern half of
that tile (right image above). When dropping onto the stack, you want to be
able to get to the floor simply by retrieving the items, not by sliding off.] I turn to face the inner chamber now.
It seems possible to get on top of that circular stone-beam. The pillars are
made of wood, and by the use of a rope arrow I could be able to catch the top
edge. Zap! One rope arrow fastened and zero angry zombies. I ascend the line
and mantle to the top. Hah...2 water arrows beside a skeleton (left
image below). I’m unable to slide back onto the rope, so I grab it from up
here. Inching over the edge, I can drop down without receiving damage. Gotta check back with those
two rooms downstairs before I split.
Vault 8 first. I’ve been all over the mission,
and have yet to see accessible boulders within Supreme limits any later than
the burrick caves. I remember seeing two rocks in
the dark red tunnel prior to the first burrick. In
order to reach the golden vase in that window stand, I will have to make use
of a boulder. So I bring one of the stones back to the sleeping-zombie room.
I must throw it in between zombie 1 and 2 from the right (right image above),
then make a running jump and land on top. Perfect! I can lean over and snatch
the vase (2350). I wait until there are no critters around and hop
off. The method of how to get this vase considerably
changes in NewDark. You no longer need to use a
boulder. Instead, you can do an angled running-jump from the southeast and
fully mantle into the alcove with the vase alert-free. I don’t know whether
this was possible in OldDark. I assume it wasn’t, but
I don’t think I ever tried. It is possible in NewDark
even with new_mantle disabled. To get out, the best
method is to do another angled jump towards the southwest. If you place some
vials on the ground first, with a bit of luck you’ll soften the landing to
prevent alerts from the roaming zombies (left image below). TFix also makes the zombies a lot more alert to sounds,
it seems. I have never managed to make this jump without first placing vials
with TFix, but with plain NewDark
I did it on the first try. Of course, this also averts the need for returning
the boulder to the burrick caves. Vault 5 contains the last piece of loot, but it
is unobtainable and must be skipped. The reason is the boulder-trap that sets
off when the door opens. For normal Ghost I can enter and use one or two of
the boulders to traverse the room. Or simply run in on one side, grab the golden
vase (2450), then run back out on the other side (right image below).
This will result in a growl from both the sleeping creatures, but are only
1st alerts and thus allowed. The boulder used
for the sleeping-zombie room must be brought back to its original position,
and from there the easiest way out is back through the upper vaults. Bye bye bonehoard!
--- Special
--- I have made a summary of the different logs found
in the Bonehoard. Main events are listed
chronologically: 1. On a
one-man mission, Adolpho sets out to find the
Mystic Soul. He never returns and gets killed in one of the lower oubliettes
below the burrick caves. In an attempt to obtain
fire arrows, he steps on a pressure plate triggering a trap. His diary tells
about needing them to attain the Soul.
Time: 2:12:56 Loot: 2450 out of 2450 (Supreme: 2150) Pickpockets: 0 out of 0 Damage Dealt: 0 Damage Taken: 0 Bodies Discovered by Enemies: 1 Consumables: None Ghost: Success! Perfect Thief: Success! Supreme Thief: Failed! Perfect Supreme Thief: Failed! Norwegian Thief: Failed! Notes: -
A speed potion and 6 fire arrows in two separate
chests are protected by arrow-traps. 2 Norwegian busts. -
Was unable to pass the burrick
by the rope in the deepest cave without 1st alerts. At least 2 Norwegian
violations. -
Took two first alerts from the burrick guarding the entrance to the Mystic Heart with TFix. Never had any issues in OldDark
or in NewDark without TFix. -
Took a Supreme bust when entering the room
with the Mystic Heart. The lights on the statues turn off as the haunt
spawns, violating rule #6a. (Updated Apr 11th, 2017) -
Must skip grabbing the two diamonds protected by the face-trap
shooting fireballs. Busts Perfect Supreme. (Updated Jan 10th,
2004) -
More first alerts from the two burricks in the cave guarding the Horn of Quintus. They
saw me jumping the small ledge coming from the bright cave to the right.
Supreme busts. Unavoidable in all versions of NewDark. -
After
“using” the golden bones the light settings change and create 4 brightly lit
areas where the power-ups appear. Violates Norwegian Thief. -
Need to stack objects on the flaming spirit’s patrol route to reach
the Mystic Soul area. Violates Supreme rule #9. -
Have to place an object on the pedestal in order to obtain the Mystic
Soul. A Supreme Thief bust. -
Must skip the last piece of loot in vault 5 for Supreme. Opening the
door sets off a boulder-trap. -
The body discovered by enemies has to be the burrick
stung and eventually killed by swarming bugs in the caves. No bust. UPDATE (10/1/04): The final draft of the
ghosting rules is released. Among some of the changes is supreme rule #9
regarding triggering of traps. Whether traps leave traces of a thief’s
presence is no longer an issue. It’s now a bust springing any trap caused directly by Garrett, even by
crossing an invisible trip wire. The two diamonds that set off the face-trap
shooting fireballs are now considered a bust. This means that a sum of 300
gold must be skipped for supreme ghost. I have rewritten the specific
sections. |