|
PREVIOUS MISSION THIEF GOLD NEXT MISSION Mission 7: The Haunted Cathedral [This
walkthrough has recently been updated for TFix,
running NewDark 1.25. Although the original text
for OldDark has been preserved, situations affected
by these patches have been inserted in green. All screenshots have been
updated, and many new ones have been added. Keep in mind that there is a
difference between playing the game in NewDark with
or without TFix. TFix
updates the core mission files, as well as applies .dml
files that tweak the environment in numerous ways. These changes aren’t
supposed to have a significant impact on gameplay, but when ghosting, slight
changes could occur. If wanting as close to the “vanilla” experience as
possible, install just NewDark, without any further
patches. I have ghosted the game 1) in OldDark, 2)
in plain NewDark, and 3) in NewDark
with TFix. This walkthrough will discuss
differences between all varieties.] Although a decent mission, ‘The Haunted Cathedral’ doesn’t quite satisfy my needs. An undead fan like myself should grant it extra marks, but the lack of variation I guess is too immense. I remember having disappointing comments the first time through this mission years ago, and unfortunately the same still applies. It sets up the following quests nicely, but in itself it doesn’t belong among the previous six. The mission seems like a ruin maze to me, and the fact that engine flaws seriously get on a Ghoster’s nerves doesn’t help. This is the first mission I’ve been unable to ghost in any mode. Overall score: 7.0/10 I need to break into an old
cathedral in the abandoned part of the city to retrieve Let’s set things straight
immediately. In order to minimize busts, you need to precisely follow my
order of actions in the beginning. I’ll explain. 5 burricks
patrol between Auldale and
I enter the ruins in the
far southwest corner. I grab the papyrus on
the ground in front of me. It simply explains the fact that the power grid
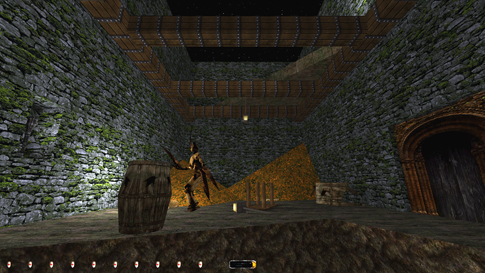
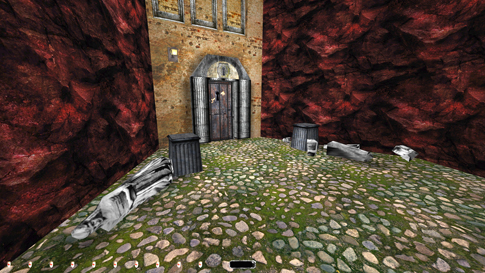
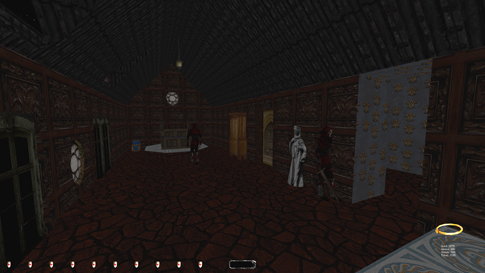
control box on I emerge in an old ruined
building, with one patrolling crayman (left image
above). Fortunately the light isn’t too bright and I’m in no danger of being
spotted yet. The critter is basically walking in circles around an old fallen
table. I mantle onto the small “island” and look around. A rope arrow flung
into one of those rafters would be nice. I ascend the line and retrieve the
arrow. Up here the light is stronger, so I may want to dodge the crayman’s patrols a little. Inching along the east wall I
make my way to the secure part of the floor, out of sight. The next opening
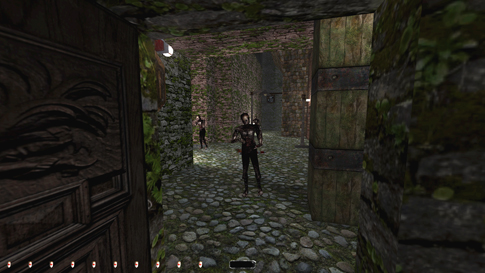
guides me to a locked metal door. Picky picky...open sesame! Ohoi!! The main streets are crawling with zombies (right
image above)! No fear, there are heaps of ways around them. The easiest is
through the first doorway to the right and into the fireplace here. In the
back halls I keep going straight until the end, then turn left and open a wooden
door. Watching for zombies I sneak across a rusty metal grate and around the
southern corner. Aha...burricks, good old belching burricks. Five of those and one green spider are my next
worries. I’m not going to describe my encounters; most probably you’ll find
them different anyway. Check with the maps provided if you’re uncertain of
the terrain, they show the patrol areas as well. I proceed down the southeast
path past a grassy knoll and a house foundation. Across the bridge beyond the
spider’s area and north onto
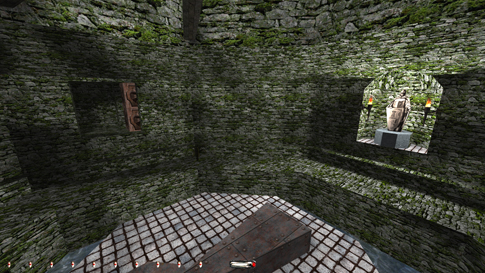
Two apparitions protect
the gates; one stationary on a high ledge, the other patrolling at ground
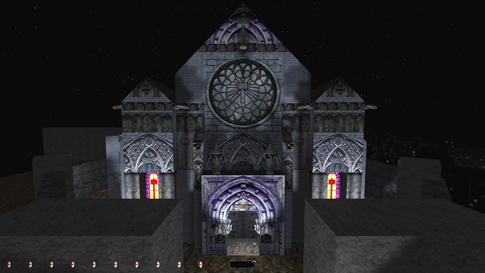
level. I sneak past them through the gate and up the stairs. Ah, this seems
like a heartwarming place (left image above)! A plaque says the doors are
sealed. Hmm...perhaps there’s a different way inside. Somehow I have the
feeling it won’t be that easy. I’ll check out the eastern side of the
cathedral. Scattered among the bones I find 2
fire arrows at least. I follow the yard all the way to the back.
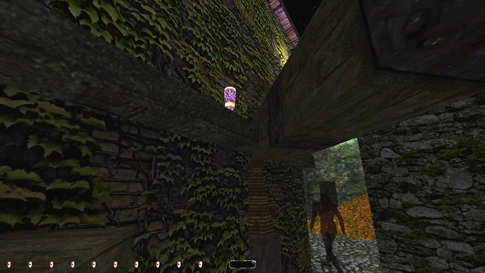
Some climbable ledges take me to a small window. Peeking inside I can see THE
EYE (right image above)!! It talks?! Very much so! New instructions. Gotta find the Keeper’s compound and learn how to fetch
some talismans that protects the front entrance. Thought I saw some statues
there waiting for something. Ah well, guess I’ll leave then, back to the
apparitions. Now could be a good time
to check whether any burricks are stuck to the
light post. If none are, I’d quicksave, then return
to the patrolling spirit for some pick-ups. Once there I sneak to the far end
of the alley along the west wall. Creep-crouching hides me good enough. Down
by the collapsed building are 2 more fire arrows in one of the windows and a
diamond (100) resting beside a wrecked lantern. I find another uncut diamond
(200) on the ground in the tipped structure back by the burrick
post. Out the south opening from here and to the left a chest is situated
behind a pillar among some stone rubble. Picking it yields a golden ring
(300). Once again I’ll have to deal with the five burricks
and the spider in the bridge area. A good place to hide is in the southeast
corner on the edge of the canal. None of the AIs patrol in this part. From
here I wish to shoot a rope arrow into the top edge of the window overhanging
the wooden bridge to the west. When that’s done and the coast is clear, I
climb the line and enter the small compartment (left image below). Some
unfortunate events must have happened here, bones and ancient graves are
scattered all over. The important object however is the necklace (500)
belonging to one of the deceased. I retrieve the rope and drop down.
The next area of interest
is the spider’s den beyond the bridge. I can easily creep in behind his back.
The eye talked about a grotto and illumination of a statue. That metal
keyhole structure resembles a pedestal, doesn’t it? I leap over onto the
middle island. There’s a vial of holy water
in a pickable chest here and a healing potion
lying beside it. I step onto the keyhole-shaped structure. My presence
won’t alert the green critter even if he enters the grotto, although my light
indicator shows yellow. Save. I take aim for the statue and fire. Both
torches lit up and a secret door opens to my left (right image above). Nice!
Ooh...the spider got very angry. That’s no good. Perhaps I can time the shot
so that he won’t hear anything. Reload. When the spider travels west across
the bridge I’ll go for it. Zap! I’ll check him out this time. Nope, he’s out
looking for me again. Darn it! ... Peter Smith at Eidos’
Forums claims to have made this shot without alerting anyone. Sneak has a
report on a successful perfect thief run in the old archives, and he directs
to other people having done it as well. TheBlackman
used the method of waiting for the spider to commit suicide by drowning, but
I personally think that’s a bust. Rule #5 which states that Garrett cannot
cause suicides of AI seems pretty clear to me, no matter if all you do is
wait. Anyway, I have never been able to make this shot without alerting the
spider to at least 2nd level. If it’s possible (and people say it is), it has
got to rely on perfect timing or sheer coincidence. The shot in itself is not
a bust since you follow the new objective. You are supposed to follow the
Eye’s instructions and this includes illuminating the torches. The door cannot
be re-shut and is thus not a Supreme bust. I guess Supreme rules demand
dousing the torches afterwards to minimize traces of Garrett’s presence. So
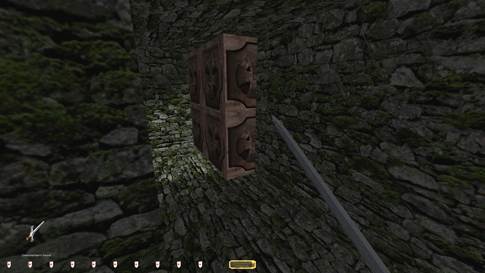
the use of 2 water arrows is allowed. Behind the secret door I eventually
reach an entrance closed by both a gate and a metal door (left image below).
Two pressure plates on either side open them, but they must be held down. The
trick is to open the gate, jam it with one of the stone rubble pieces, then
step onto the other plate and run through the door before it closes. A lever
directly to the right will open the entire entrance from the other side. I
pick up the rubble piece and place it back; home free! This next hallway is
stacked with more pressure plates, this time triggering arrow traps. A line
straight through the middle is the safest way to proceed. Down the stairs and
around the corner. Another plate will trigger a trap just in front of the pickable door up ahead. Hurl a rope arrow into the
ceiling and jump past the wall...easy. The left door leads to the library.
Documents on the table tell about elemental talismans hidden away in case of
a catastrophe. I pick up the portal key and the red metal key
from the table. The latter unlocks the door opposite the library. A book in
this study chamber tells of the exact locations of the talismans. The
talisman of earth is kept by the Hand Brotherhood. The Hammerites
have got their hands on the talisman of water. The fire talisman is hidden
somewhere in the lost city. And finally, the caverns deep below the city
conceal the talisman of air. New objectives too! Screw the cathedral for now.
The portal key is already in my possession so that box is checked. Leave and
relock the door. Place the red key back on the library table and leave the
entire compound, remembering to push the lever by the entrance.
The rest of the mission is
pretty straightforward; lots of pick-ups and sneaking. I work my way back to
the grassy knoll just west of the spider bridge. From here I take the alley
further west past some open doors. Make a full turn at the left corner and
approach the pit. I shoot a rope arrow into the beam above and climb down.
Follow this tunnel to the first circular area. In the left lantern niche lies
a golden plate (550) worth 50. It’s quite hard to see and one has to
hop to reach it. Once it’s in my possession I head back up the rope. From the top of the pit I mantle onto the high wall
directly north. Jump across the street to the opposite rooftop. Mantle into
the left window and grab the 3 fire arrows in the corner. Some nice
info on the Torc as well. Drop down and pick the
lock on the northwest door in this area. It reveals a tiny room with a single
breath potion. Back to the grassy knoll. On top of it is a
burrow that leads to an underground lair. Another patrolling green spider
protects it. The lair consists of two compartments, each with loot. Directly
to the left lies a jar (600). There is plenty of room to work around
the spider. The other part has a goblet (615) and
a healing potion. Exit this grotto through
the north opening. Ignore the path to the left (it leads to a barred doorway)
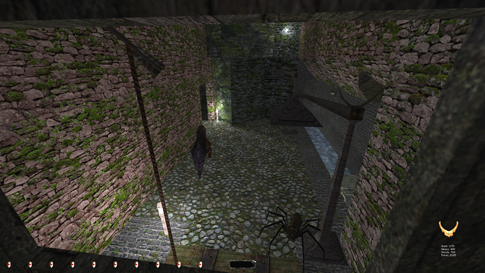
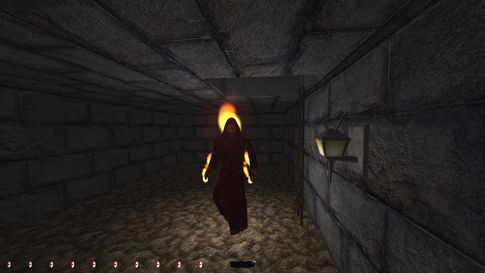
and climb the ladder up ahead. Another underground cave system; could have
been a food cellar in earlier times. I end up in a bigger square room with a
patrolling flame spirit (right image above). There’s
a rope arrow in the opposite corner. Quickly up the ladder
before he catches me. I take the open doorway west and follow the hall north.
The opening to the right takes me right onto
I monitor the streets from
here. Wow...zombie highway! Well, I need to get across that bridge and around
the corner. If you’re having trouble, just wait. The opportunity will come. I
slide down the slope and mantle onto the small wall above the drawbridge
mechanism. From here I can mantle even further up onto the bridge wall
itself. There’s a secret door on the opposite side that leads to an enclosed
section of the ruin city (left image above). See the image to the left below.
I pick the door, follow the path and end up at an abandoned residence. The
door is locked and unpickable. Aha! The doormat
hides a silver key...clever. Patrolling haunts inside; two of them.
The left room contains a jar (965) and 2
moss arrows in a chest. This house is pretty terrifying, with
haunts walking around making those awful noises. I follow their patrols
upstairs. Two pickable chests in the bedroom. One
contains the Serpentyle Torc (1315, right image above), the other a holy water vial. That’s all! I
make my way back down and out of the residence. Lock the door and put the key
back under the mat, then head back to the drawbridge. I need to drop down to
the other side from the top. If I jump into the lamppost there, it might slow
my fall enough to avoid getting hurt. Hah! Great jump! Through the southwest
doorway is another pickable metal entry. It
conceals remnants of an old dwelling, long since abandoned. There’s also a diamond
(1415) here for me. Back out and continue south. As mentioned, 2
apparitions and 5 zombies have relatively long routes all through this area,
but fortunately shadows are plentiful. Just past a narrow passage I encounter
a bunch of wooden beams connecting some buildings. Situated on one of the
rafters running along the stone wall is another valuable jar (1465,
left image below). I walk around the angled wall further south and make a
hard right. There’s a window here that I mantle up to, just north of the
half-tipped tower. I walk through this room into another hallway and emerge
on the top floor of the adjacent house. Ignore the ladder and walk left onto
the stone beam. Here lies a golden plate (1515). Mantle onto the wall
and look around. This is a difficult task, but I want to leap across the
street and mantle into the window with the vase (right image below). The door
to this building is pickable, but takes far too
long considering the ground level activity. The vase (1615) is worth
100 gold. Just inside lie 10 broadhead
arrows, and on the far wooden rafter 2 water arrows. I go
down to the bottom floor and pick the door from the inside. Outside I make a
right and yet another right onto
--- Starting Area &
Underground --- I enter the doorway to the
right and pass this room to the opposite corner. Directly
outside and to the right is a fallen rafter. On the ledge by its top is a
well-hidden moss arrow. I cross the road to the next building.
The hole in the floor leads to the underground caves; I drop down. Walk
straight and ignore the turn for now. I stumble across a golden goblet
(1740) among some scattered utensils in the room up ahead (left image below).
I walk on and follow the gray caves to a huge grotto. Oops...more burricks; I better tread softly. Behind
the closest stalactite-stalagmite column I find a yellow key, a rope
arrow and a noisemaker arrow. Strewn around the grotto in
the various corners are a purse (1840), a goblet (1855), a vase
(1955) and a golden goblet (1980). I leave through the north exit.
The next part contains heavy burrick patrols, but
several dark side-caves make for perfect hideouts. I eventually reach a
circular water-filled sewer compartment. Close to one of the grates here is
another goblet (1995). I then travel all the way back to the turn I ignored
at the beginning. This is in the middle of a crayman’s
patrol area, but usually he doesn’t start walking until one enters his pool
grotto. He’s pretty easy to avoid anyway. Just north
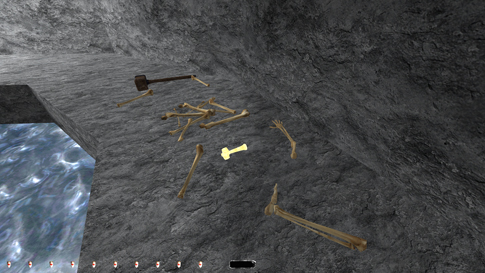
is a small storage room containing some barrels and 2 water arrows. I
follow this tunnel and wait for the beast to leave his lair. Quickly run
around the pool and grab the hammer (2070) among the skeletal remains
(right image below). Other items of interest in
here: a water arrow and a moss arrow on land, and 2 more
water arrows on the pool bottom. That’s it down here, back up
to surface level.
I climb to the top of the
rafters using a rope arrow. A golden goblet (2085) rests on a
windowsill, while a diamond (2185) lies in the opposite corner. The
north exit leads to another room with more rafter loot, this time a regular goblet
(2210). I return to the other room and take the remaining exit. Climb the
sloped board and turn left at the top. Underneath the fallen steam pipe is a jar
(2260) worth 50 gold. On the edge of this wooden
floor sits another healing potion. I drop down on the western
side. This pickable door
leads to the weapons dealer. Downstairs I find 12 more broadhead arrows; upstairs 2 flash bombs
and 2 mines, the latter in a pickable
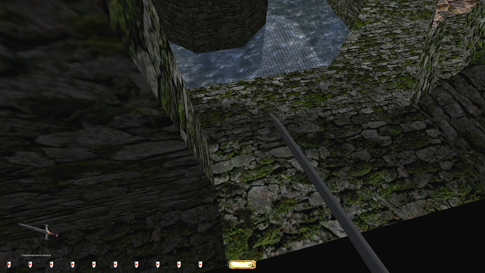
chest. Back out and shut the door. Around the west corner and behind
this big stone block is a well-hidden piece of loot. I bend down and peek
under this big structure; a golden plate (2310) is just within my
reach (left image below). I then take the same stroll as in the start of the
mission, up the sloped pavement to
In the wagon shed to the
right I can reach the top floor by flinging a rope arrow into one of the
wooden beams. In the tower across the road are another vase (2410) and a noisemaker arrow. Drop back down by
retrieving the arrow in mid-air. The path west takes me to a different part
of the city, yet unexamined. Directly right beside
some barrels is a healing potion. The western house is protected by a pickable door and a live mine. I can sneak past the bomb
on the left side. The room otherwise contains 3 flash bombs and 3
noisemaker arrows on the floor, and 3 mines and 3 rope arrows in
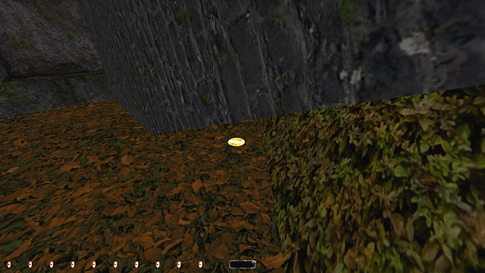
each of the unlocked chests. I then leave. In the far northwestern
corner of the map lies a tiara (2535). It is situated between two
grassy hills hidden among the leaves. Directly east
from here is the alchemist’s. Inside are a breath potion in a chest
and 3 fire arrows in a niche in the left wall. Leave. I then
make my way back to the sewer entrance by the burrick.
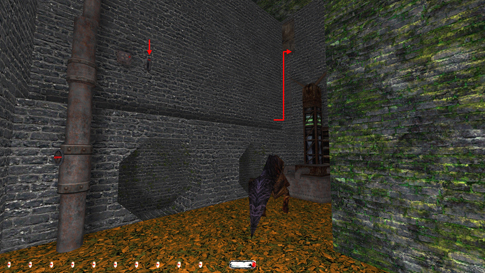
Seems like I’m going in circles, literally. Well,
I’ll take a slightly different approach this time. Instead of plunging into
the waterway, I jump onto the ledge above the two openings. A lever here
operates a hidden maintenance room to the east (right image above). I climb
the ladder and enter. Inside: 2 fire arrows, 2 water arrows and
a breath potion. Climb down the ladder and close the door. I
enter the sewer system like earlier and follow the same underwater tunnels.
Along the way among some human remains I find the last piece of loot, a purse
(2635). Suspended in the water column in the
same long-stretched tunnel is also a moss arrow!? Back in the crayman cave I mantle onto the middle rock as before. Hop over to the side and grab the yellow key here. Rope
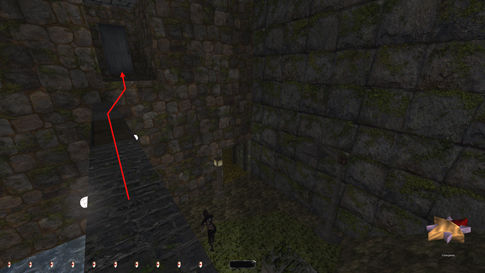
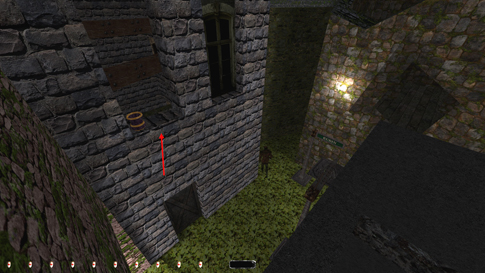
arrow up top and return to UPDATE: In NewDark, it is now possible to successfully Ghost this
mission, but it does require a heavy engine exploit. With newmantle
turned on, you can use a lean-block-jump technique in the left corner of the secret
panel (left image below). Done correctly, it will cause you to penetrate to
the inside of the panel, where you can see (but not move) beyond it. If you
then move to the right side and use the same technique there, you should pass
through the panel fully, and be able to freely move on the other side (right
image below). This circumvents ever having to use the fire arrow (and thus
alert the spider) in the first place. I do show this technique performed
after the segmented run of this mission here.
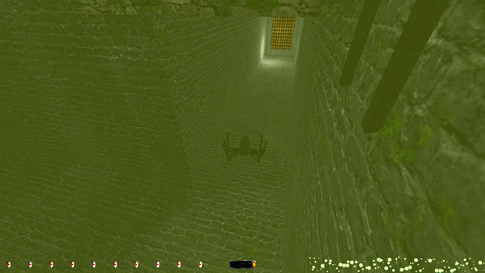
There are no other changes
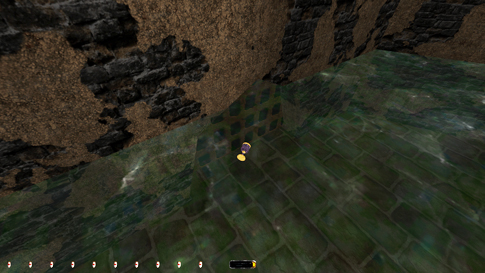
to this mission as far as ghosting issues are concerned. However, I have
encountered the spider outside the keeper grotto drowned in the canal below
the stone bridge in NewDark (image below), and
others have done so in OldDark. Although it’s not
allowed to construct a situation where the spider dies, or even to wait
around for it to happen, should the spider be dead upon arriving at the
grotto, nobody would call it a bust. I wasn’t ghosting when I encountered it
dead, and I haven’t been able to replicate the scenario. I’m simply including
the information to let my readers know that it is possible to Ghost this mission in OldDark,
if the aforementioned situation happens to occur.
Time: 1:12:09 Loot: 2635 out of 2635 Pickpockets: 0 out of 0 Locks Picked: 14 Damage Dealt: 0 Damage
Taken: 0 Consumables: 1 Fire Arrow
& 2 Water Arrows Ghost: Failed! Perfect Thief: Failed! Supreme Thief: Failed! Perfect Supreme Thief:
Failed! Norwegian
Thief: Failed! Notes: -
One fire arrow was used to open the secret
passage to the Keeper’s Compound. Follows directly from the objective so not
a bust. -
The green spider protecting the grotto was alerted to 2nd level when
lighting up the torches. Inevitable it seems, but still a Ghost bust. -
Used two water arrows to put out the lights by the statue after
illumination, done to covers tracks. No bust. |