|
PREVIOUS MISSION THIEF GOLD NEXT MISSION Mission 6: The Sword
[This
walkthrough has recently been updated for TFix,
running NewDark 1.25. Although the original text
for OldDark has been preserved, situations affected
by these patches have been inserted in green. All screenshots have been
updated, and many new ones have been added. Keep in mind that there is a
difference between playing the game in NewDark with
or without TFix. TFix
updates the core mission files, as well as applies .dml
files that tweak the environment in numerous ways. These changes aren’t
supposed to have a significant impact on gameplay, but when ghosting, slight
changes could occur. If wanting as close to the “vanilla” experience as
possible, install just NewDark, without any further
patches. I have ghosted the game 1) in OldDark, 2)
in plain NewDark, and 3) in NewDark
with TFix. This walkthrough will discuss
differences between all varieties.] Over
the years, The Sword has become my favorite Thief Gold mission. Its surreal
design, eerie architecture, creepy ambiance, and mysterious layout, that
confuses me even to this day, never cease to simultaneously amaze and
bewilder me. Frustrating at one end, and magnificently captivating at the
other, The Sword sets the mood for The Dark Project’s main storyline. A trip
into Constantine’s deformed mansion might as well be a journey through his
twisted psyche. I love it also for the bold choice
the authors took when stretching mission making to its most extreme, at a
time when the stealth genre still was in fetal development. The mission can
be Supreme Ghosted, although a few loot pieces need to be skipped to avoid
triggering traps. If you haven’t played this one yet, get ready to be warped! Overall score: 9.9/10 J
Been contacted by a gal named Viktoria
(or Victoria?). Someone she knows wants me to steal a collector’s sword. The
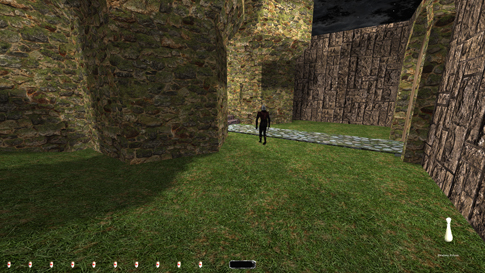
owner is called Click my way through the purchase screen, nothing there worth buying anyway. 3 rope arrows, that should be enough. I drop down from the outside wall by the southwest corner of the residence. Already I spot a balcony further to the north that might well be accessible. But I’ll get the rest of the outsides done first. I stroll along the manor to the east and stop in the shadows just west of the front doors. Two guards have a short chat before starting their patrols. No, nothing will happen...to me! One of them goes inside while the other walks his route here. Steady in my spot, I grab his purse (100) [1] as he passes, worth one hundred goods. Our first challenge will be to grab a potion through the window on the east side if the main entrance. A guard patrols inside the small lookout, plus both of the guards involved in the conversation earlier could spot me. But I have a plan. After pilfering the purse, I follow the guard towards the doorway. I have to stay as far to the right as possible to minimize the chances of the guy in the lookout seeing me. With some luck no one inside will come by at this time. The guard outside turns somewhat to his right and starts walking away from the house. I now swiftly crawl over and hide underneath the window. I do not walk onto the staircase, as this will raise me too far up to stay concealed. I have to time the guard-beyond-the-window’s loop-patrol, stand up and lean the instant he turns. I won’t be able to lean through the window entirely, but far enough to highlight the chest on the floor (I can’t see the chest light up, but I can open it). Frobbing it twice opens and closes it, plus it adds a well-worth healing potion to my inventory. I duck and sneak south around the left corner into the shadows here. Good job! I wait for the outside guard to come by once again and follow him back west (left image below).
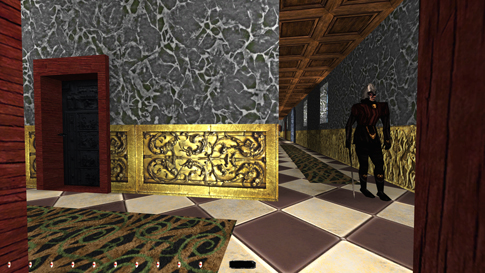
Nice! I can now focus on getting inside safely. On the west side of the mansion I arrive at the referred terrace. Both sides have woody support rafters ideal for an accurately put rope arrow. I fling an arrow into the wood and ascend the line. From the top I can easily hop onto the balcony and retrieve my projectile. The double doors are unlocked and bidding me welcome. I enter into one of the upstairs bedrooms. Directly to my left next to one of the bunk beds are three stacks of silver coins (136). The metal door is locked and unpickable...will have to maneuver around it. I take the south doorway into the SW tower. A ladder descends to the lower floor. I exit the room below to the north and rest for a minute. In the two lockers farthest away I find a mine and a flash bomb. The door here is unlocked so I take a peek. Four guards patrol in this area of the mansion. Three of them wear the same kind of blue key, which will open the locked door upstairs plus two double-doors accessing the 3rd floor. Grabbing one of those keys will make it easier to move around, but it is possible to finish the mission clean and with full loot without it. Filching one of the keys necessitates dropping it back due to Supreme rule #7. However, I feel supremers should avoid this, as it leaves a small hint of your presence. I will present a route through the mission that prevents having to pick any of the blue keys. [UPDATE 2/12/12: The information presented here regarding the blue keys is incorrect. I do need a blue key, preferably from the guard in the garden. I have noted this in an updated ‘Garden Area, Part II’ section further below.] I check the territory from the doorway, my light indicator all black. Remember, most doors have a line of darkness in the middle and provide a perfect spot for scouting. A guard walks toward me in the hall going east-west (right image above). He turns at the corner and heads back, fortunately not noticing the open door. For Norwegian Thief I need to grab his key [2] and I can just reach it leaning forward. I sneak over onto the carpet and follow him along the rug. When he steps onto the marbled floor, I crawl a little left headed for the fire up ahead. Hidden among the flames is a fire arrow. I quickly head back to the doorway before the guard turns at the end of the hall. Another guard appears from a door further north. He walks a short distance this way only to enter the next door to his left. Waiting for the first guard to turn once again I enter the metal door directly across. Seems empty this room, but there is something worth taking. At the foot of the eastern pillar I spot a secret compartment. The lock is pickable so I bring out my tools. Inside I locate a golden plate (186) and another healing potion (left image above). I close it and return to the door.
Entering the hall, I could run into the guard I saw before, but luck is on my side. I rush north, enter the opening to my left and hide clasping the wall to the right. The guard in question will soon emerge from the door in the hall and pass by. He opens the door across, and when he does I pilfer his belt holding one more purse (236) [3]. I follow his route through the door and enter this dining area. Yet another swordsman will enter the opening straight ahead, but he is nowhere to be seen at the moment. Wait…there he is, strolling happily in the opposite direction. A golden candlestick (286) stands on the dining table. Hmm...a door in the ceiling? Starting to get a feel of how weird this place could be. The first guard enters the kitchen, but I leave the way I came. Turn right and walk down to the end. Around the corner I eavesdrop at the door to the right for the guard inside. When he leaves, I slip in and grab the jar (336) from one of the benches. Further I grab the 4 deer legs in the southeast corner. The man is on his way back, so I return to the hall. Inside again when he disappears and through the door to the east. Guards around me will alert if I make too much noise, so I crawl quietly to the end of the hall and around the corner. The next door brings me to the bar, but there’s a guard further east who could spot me. I wait for him to pass and then slip inside. Straight to the right is a dark patch where I wait for the next guard to come (right image above). He turns where the carpet ends and heads back. That’s when I lean over and grab his key [4]. All alone I search the counter for goodies. Aha! A hidden panel concealing three golden goblets (411). Also on the back wall are two bottles of fine wine (511). Crawl back to the dark spot and wait for the guard. Leave through the north door and stand in the doorway. Looking east and leaning left makes me able to watch the guard appearing from the south. I follow him onto the carpet and grab his key [5]. Quickly now I enter the door to the left. In here I find a single vase (611) worth one hundred gold. Back out and head north into the right opening. Halfway up the stairs and hide in the shadows. I peer down to the hall and watch him pass through this room. He appears again out in the hall walking left. I run down and follow him again. This situation might be tricky, but I want to continue following him around the corner and into the next sitting room. The guard patrolling the main corridor could be close by, and if he is, I’ll just have to return and try again next time around. Good for me he’s far enough down the hall. Inside the carpet-floored room are two goblets (641). I wait in here a bit longer for the swordsman to slip by the room across the hall. Out again and return to the staircase. This time I walk all the way up to the 2nd floor. Now it really starts getting weird. I mean look at this place! I’m suddenly in some rhythmic ceremonial jungle-hallway...only it’s on the 2nd floor of a seemingly ordinary house. There’s a locked door across the hall. I pick it open. A bathroom...no an indoor garden...no...arrh whatever. Nothing worth taking as of yet so I continue through to the next-door bedroom. Traps are located quite frequently on this floor, and they will hurt you. I’ve concluded earlier that spitball traps are not considered a bust. However, some traps only fire once, on the first encounter, and the owner could check them later to see if triggered. Two silver nuggets (741) lie on a ledge directly to the right, but they set off the face-trap on the wall when highlighted (left image below). These seem like so-called “magic” traps and I’m in doubt whether they violate any Supreme rules. After all, they won’t be highlighted again later since I’ll steal them and therefore it’s impossible to check if their potential triggering effect has been activated. … Ok, have checked with the forum at Eidos and it seems like the ghosting rules have been revamped. Peter Smith pointed out that Supreme rule #9 has been rewritten to specify traps caused directly by Garrett as a bust, even if he crosses an invisible trip wire. Geez, I hadn’t even noticed! Whether any traces are left as evidence is completely irrelevant. Guards checking trap mechanisms for ammunition has also been discussed and rejected. Only traps already active when starting the mission are accepted, like some of the spitfire traps in ‘Bonehoard’. I see no other outcome than to skip this loot. Regular ghosters can grab them though, as traps in general are totally disregarded from the rules.
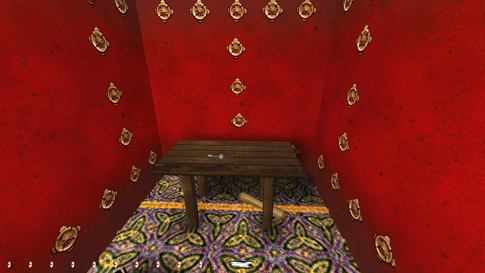
I move on through the south door. A desk with a key (right image above). Will need it to access the basement later, so I bring it along. [UPDATE 2/12/12: Recent information made me realize this key can relock the safe in the pillar from downstairs. Supremers therefore have to make the extra trip back down at this point. Thanks to ykcaks!] A papyrus on the floor tells about guards spying in the greenhouse. Leave the way I came and back out into the hall. Ghosters would want to bring the boulder from the garden/bathroom. On the wall to the north of the door is a small sensor that activates the spitfire-trap at the end of the hall. Crouching past it will avoid any triggering. Walk past the three doors further on north and stop when approaching the ramp to the right. The room at the top has more spitfires, and they trigger by crossing the line at the bottom of the ramp. As mentioned, the new rules specify crossing an invisible trigger as a bust, so this loot must also be skipped for Supreme. The traps can alert a guard patrolling southeast in the garden on the 1st floor. I’ve heard some talk about this guard being close to the sword, but that’s not right. If you listen carefully to his footsteps he’s clearly walking on grass, and none of the guards on the 3rd floor does that. Since alerting to the spitfire hitting the walls, it mostly depends on where he’s patrolling at the moment of impact. There’s a pressure plate keeping the traps from firing right at the top of the ramp. That’s why the boulder comes in handy. I run upstairs and step onto the plate. It sinks down and the firing ceases. I can hear the guard now, but he’s not aware of anything yet. Drop the boulder here and sneak over to the chest. Pick it and grab the diamond (841) inside. Back to the boulder, remove it from the pressure plate and sprint down the ramp. The traps will settle once again. I save my game and head up once more, just to hear if the guard caught me going down. He didn’t, so I reload.
All
right, let’s get a move on! If still carrying the boulder, place it back into
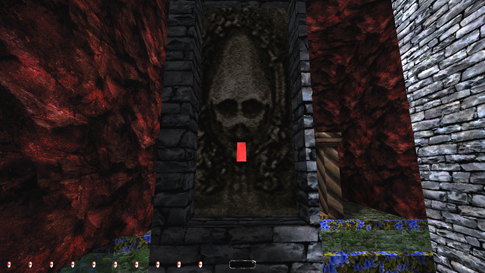
the tub/flowerbed. I then head south into the next single door to the left.
Another door in this small room opens to a large face picture (left image
above). Hmm. Two goblets (871) rest on a small table, and an
unimportant papyrus tells about some woman from Shalebridge
locked up in Cragscleft. Back out and close the
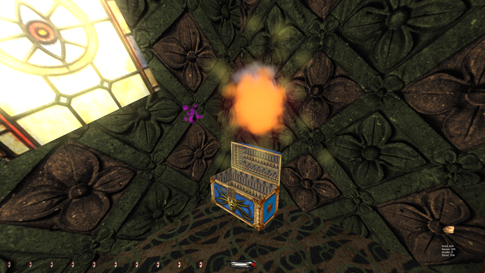
door. The next doorway down the hall leads to a study room with a fireplace.
More trap-protected loot that must be skipped for Supreme. The blue chest to
the right holds a golden nugget (971), but it springs a fireball
hurling from a face on the eastern wall (right image above). On a ledge
behind the fireplace I find another golden nugget (1071). I continue
down the hall around the corner. Need to crawl across the tile now as there
are guards on the floor directly below. The two doors on my right hand side
are both protected by traps, but the left doorway
about halfway down the hall has some goodies. The two pickable
chests contain a deer leg and a healing potion. Another
sensor is located on the far wall down the hall. Just creep around the corner
and I’m safe. Now I’m in the western hall with an opening in the floor to the
front leading to the ground level. I can see a guard patrolling downstairs
from up here. I need to access the room to the east from this side. Running
at an angle I can enter without having to jump. There’s one piece of loot
under the two-faced outcropping directly ahead. It’s a golden nugget (1171)
worth 100. Back to the doorway. I want to reach the ledge on the north side.
To do this it would be easiest to head back to the southern side, then make a
running jump and mantle onto the right edge. I watch out for another pressure
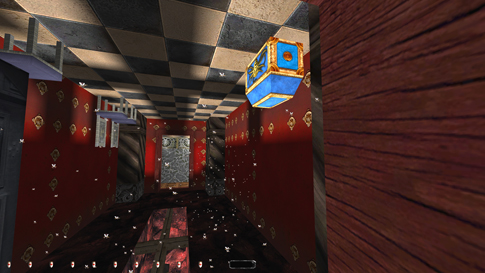
plate in the floor to the left triggering a trap in the north wall. The door
ahead leads to a room upside-down. Two masses of swarming bugs protect a
chest in the ceiling (left image below). Opening the chest lets a piece of
loot fall to the floor. I can run in and to the right without getting stung
by the flying insects. I then pick up the diamond (1271). I walk
between the two swarms and open the door on the opposite wall. I head left and open the door here. A book tells about Tatyana’s magical flowers. There’s a water
arrow also in a dark corner beside the bed. The tub in the next room
holds yet another water arrow. Back out to the hall. I wait here
for a patrolling guard to pass northeast. I follow him.
In the next dining room I pick up a jar (1321) and two deer legs. Hey, what’s this?! Something odd in the ceiling over here...aha, a hidden door. Quickly I shoot a rope arrow into the upper ledge and climb it, I then retrieve my arrow and close the entry. 4 pressure plates and an explosive barrel protect the two chests fastened to the ceiling. However I can reach them both from this side. A diamond (1421) from the left chest and a ring (1521) from the right. There’s also a mine on the floor. I can listen to the guard’s footsteps from up here. When the sound changes from wood to marble I open the door and drop down. I follow the swordsman out the eastern door. He enters the second doorway, but I crawl further and into the small-carpeted hall on the east side. Safe! In here is a single piece of loot, but it’s quite well hidden. To reach it I need to strafe-run up the steep sloped wall to the left. The silver nugget (1571) is located on top of the outcropping (right image above). I leave through the only other doorway here. Waiting in the shadows I follow the guard once again when he appears. Past two carpets and into the wooden hall. I then enter the second opening to my right. The final sensor is on the floor in the corner here. Once again crawling slowly will avoid its set-off. Up the ramp!
This
grassy cave’s only route eventually ends up on the 3rd floor. Creepy noises!
Entering a wooden room, I continue right into another inverted passage. I go
through the doorway directly northeast from here. Up ahead and somewhat to
the left I spot another cave system that I use. At the top there’s a hanging
vine leading to an upper level. That’s where I want to go. A guard to the
east will finally appear out a doorway and could walk in either direction
from there. I’ll have to wait for him to go further east. That’s when I sneak
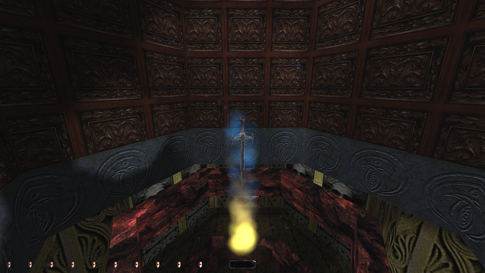
over toward the doorway and slip through. Wow!! Seems like the sword is on
display all right! I need to get up there and grab it. Initially I planned to
grab the piece approaching from the level above, but then I realized two of
the guards have a conversation before starting their patrols. Taking the
blade from here won’t even trigger the chat and let me with two guards less
to worry about. The sword is almost unobtainable with three guards moving
around up there. Hugging the large pedestal on the north side keeps me in
darkness. I turn around (face north) and peer up. Aha, an opening! Looking
more closely I notice a very tiny wooden frame directly underneath. Could I
hit that with a rope arrow? No, too high and lots of commotion upstairs. Try
again. Too low this time and I broke my arrow in the stone wall. Reload.
There!! I flung it into the frame perfectly! The clue to get down again
safely is to whiz another arrow right above the opening further to the left.
It’s important to get enough distance between the two ropes, otherwise I’ll
attach myself to the second rope when trying to mantle up. The screen capture
below and to the left is taken from the sword-railing and shows the idea of
this technique. When they’re successfully attached, I climb up. To stay dark,
I turn around while ascending the line. This will prevent any comments from
the guards behind the display further south. The patrolling guard inside the
pedestal room itself could see me more easily, but his route is too long to
be of any real threat. Upstairs an archer patrols all around the perimeter in
both directions. He even enters all three “windows” overlooking the precious
sword (however he won’t notice if it’s gone!). This opening is the only one
with shadows. Mantling up I turn 180° and inch out as
far as possible without dropping. From here I can lean over and grab the
sword (right image below). Hah!! Yeah let’s get out of this crazy place! The archer is carrying a healing potion [6] that
can be lifted from the opening. Whether the archer enters the opening
and catches me or not is impossible to control, and based on pure luck.
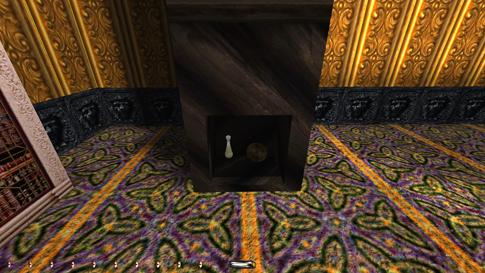
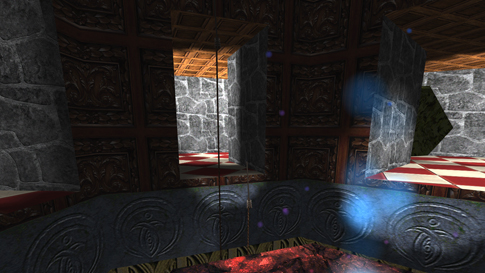
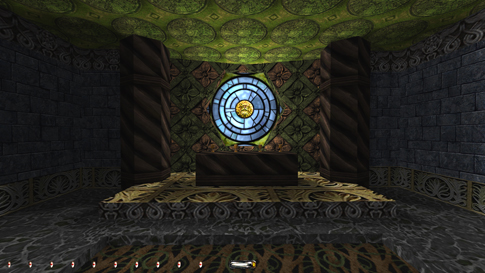
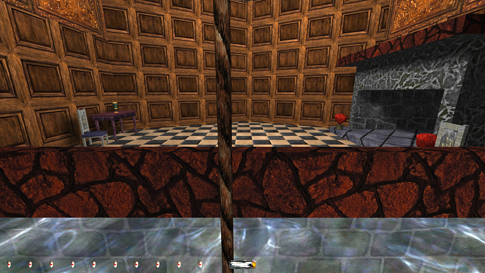
To get down I jump onto the second rope. This might cause some noise and alert the two stationary guards upstairs. If it does, I simply reload and try again. Safely onto the line I descend a bit and jump over to the other. Climb up to retrieve the second arrow, then down again. I now have to grab the last projectile and fall to the lower level. This won’t hurt me, but it might alert the patrolling man below. However, dropping down when he’s somewhere else keeps me clear. Hey, my old sword lies down here?! What on earth...? Oh well, must be some in-game script saying to drop your sword once finding a new one. I should bring it along to avoid any trace. Done! I make my way back to the top of the cave system. Go south through a window opening. There’s a hole in the floor to the north. I shoot a rope arrow into the wall and descend into the room below. Down here I find a golden candlestick (1621) sticking from the southern wall (left image below). Through a low slot to the north is a door in the floor. I open it and drop down. Enter the west hall and wait in the shadows. I hear a guard approaching. A fire arrow is located inside a small window to the right just here. Yet another fire arrow is halfway embedded high in the wall further south. The area to the west holds one moss arrow upon a display structure in the corner, and a mine and a flash bomb on two long shelves. I follow the guard east into a room with a pool. He has a key [7] that I take. The pool hides a water arrow. I exit north and wait in the shadows for a guard to appear from the left. I follow him west down a long hall. Immediately into the next area I slip south and come to a stand in a small patch of darkness. The guard turns around and journeys back. Jump over the river, up some stairs and follow the wooden hall to a set of double-doors. I unlock them with my key from upstairs. This must be some sort of temple (right image below). 4 golden goblets (1721) stand on display here. A fire arrow lies on the carpet behind. A door in here seems impossible to open. None of the keys in this missions unlocks it and it’s not pickable. Weird! Relock the door to the temple and head back across the river.
If
you’re plain old ghosting and not so keen on getting maximum loot, you can
easily skip this entire section. It includes a secret area added for Thief Gold,
which seems like more of a joke from the authors. I enjoy it very much and
advise anyone who doesn’t know it to tag along. It will give you 20 extra
loot plus lots of equipment, all within ghosting rules. Supremers
have no choice, as I’ll explain later; they will have to join in. Take a good
look at the ceremonial face on the north pillar. Camouflaged as its tongue is
a switch that operates a gate in the north end of the waterway (left image
below). I plunge in and swim into the newly accessed cave system. With a deep
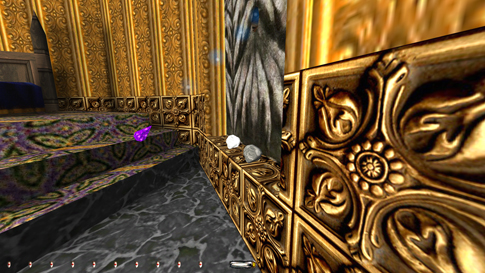
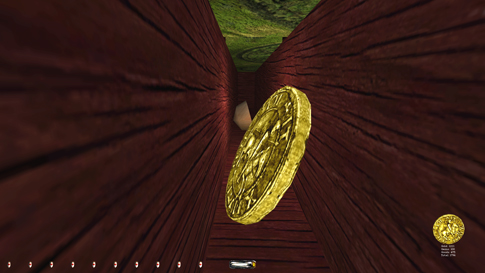
breath, I duck under. The first part is a long diving session. To avoid losing any health, it’s imperative that I strafe-run while under water. Back on surface, I wade around the corner ahead and down a waterfall. I’ve turned into Gulliver it looks! A tiny stonehenge hiding a breath potion, and a small river going south. A good place for cover is directly south of the stony structure. A swordsman carrying a healing potion [8] will come along shortly. When he passes, I quickly run through the narrow road into a small village, literally. To the east is a water dam. I mantle across and jump into a large lake. Further east I enter a pipe. I follow this one-way-route and emerge in what seems to be a huge sink. Mantle up on the left side (right image below). Wow!! Directly behind me are two shelves above each other. Two rope arrows will take me to the top. Inside a large cooking pot is a water arrow. The pot can be hard to mantle, but both sides of the handle seem able to clasp. Remember, you can drop from an indefinite height and still take no damage landing in water. Thus, I can safely fall back into the sink and resume to the ledge on the south side. A running jump will take me to the table. The same method will also take me further to the stool. Two well-placed rope arrows escort me to the top shelf on this wall. In the pin cushion at the other end are three rope arrows. I jump across the gap and enter the box of matches. Four fire arrows are mine to take inside it. Mantling back out is a little tricky, but doable. Then fly into the tub below where I find three more water arrows. I mantle out on the south side and discover another rope arrow stuck in the carpet, it probably fell from the shelf above.
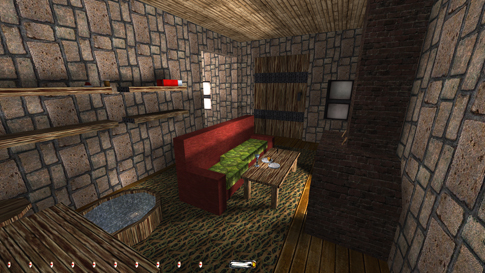
A
rope arrow can be used to ascend the short side of the sofa. However, there’s
a wary guard on the table that might utter a comment. I press the creep-,
crouch- and walk-key and drop down from one ledge to the next, finally
landing behind the cushions. I find two large coins (1741) worth ten
each (left image below), but how Garrett can fit them in his pack is beyond
me... Mantle back up. I keep on cc-ing towards the
table. The guard actually has a blind spot. If I can land on the very corner
of the table, although I’m in the red zone the stem of the glass will block
his sight. Neat eh? I continue to creep-crouch north
to the opposite corner, then straight west. About halfway down I stop and
turn left. Slowly approaching the cheese. Mr. Guard still whistles. I lean
over and pinch two moss arrows from it. Head back to the southeast
corner. Shoot another rope arrow into the sofa and tenderly fall onto
it. Safe on the ground! I move behind the couch westward looking for guards.
Two of them patrol the grounds between the bedroom and the living room.
Nevertheless, their routes are too long to pose any threat. Further
south I approach a study desk. Gotta do some
planning on how to get back down while still retrieving all my arrows. Shoot
a rope far down on the side of the horizontal board on the chair. Place it so
you can drop down onto it from the very top, meaning not too close to the
desk. I mantle up (no retrieval) and fire one into the back support
approximately at the height of the desk. Climb up, turn around and hop. The
projectile is too far away now, I’ll have to shoot another one from here.
Firing arrows straight into the target leaves it sticking farther out from
the surface and you with a greater chance of successful repossession. Leap
and grab hold of the closest line, then regain the first arrow, jump back and
retrieve the final rope. The reason Supreme requires entering Little-Big
world lies right here on the desk. My last unchecked objective is to find
implicative proof on
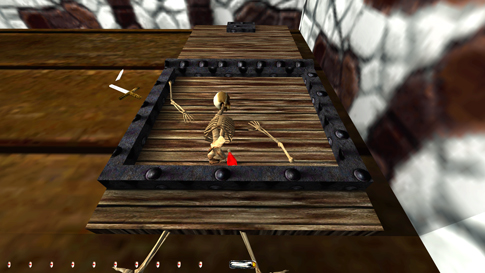
Due east from the desk is the bedroom. Directly to the right of the entrance I find a mousetrap, and a speed potion, and a skeleton (right image above). Two spiders are guarding the bed. They’re stationed in one corner each and protect three moss arrows overall. Not to alert the closest creature I rope up on the north side of the foot end. From the top I can plummet down with no pain and no alerts. Taking spiders’ butt-vision into consideration, both beasts peer straight south. All the equipment can be reached without much trouble. One arrow is NE, another SE and the last pretty much in the middle. Cc-ing over to each of them is easy enough. Rope arrow back over the north end and fall onto the chest lid. The box itself holds three noisemaker arrows and two additional rope arrows. I can leap down safely from the locking mechanism of the chest. The intended exit from Little-Big World is through a mouse hole, and via rope arrows back to the upper garden area. However, the exit door can’t be closed. It is no bust for Supreme, but I like to leave doors closed if there is a different way out. Accordingly, this calls for a revisit to the sink and a dive back through tiny-country. The gate opened by the secret switch can both be closed and relocked manually.
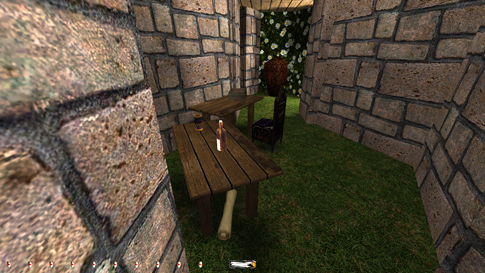
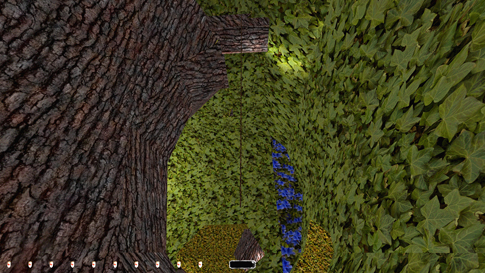
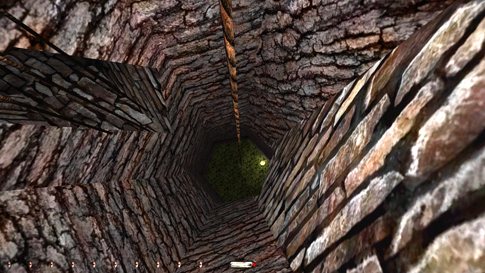
I’ll use the river to move around by now. Straight ahead lies a water arrow. Swim through the cave and reach a junction. On the ground here and at the end of the east canal are two more water arrows. I dive south and emerge at a stony structure. 2 water arrows float around the various pillars. Both east and west will take me to wells holding two water arrows, one each. Watching for guards I mantle up on the south side of the large old tree. Moving east I take the second opening to my right. A guard should be patrolling through this section in a counter clockwise pattern. On a small ledge in the SE corner is a jar (1791). Quickly into the south room before the swordsman appears. He won’t enter here. South of one of the flowerbeds stand two stacks of gold coins (1841). I’ve heard of hanging gardens, but hanging water...? There seems to be a room above. One precisely shot rope into the top rafter......zap! Can just reach the end of the cord. Rope-climbing through the water (left image above), is that even possible?? One more valuable jar (1891) up here. The rafters look too inviting. Using another rope arrow I climb and have a look. Hah, I told you! One moss arrow, a fire arrow and the mission’s last remaining water arrow. I slide back through the water. Wait beside the doorway and listen to the guard’s steps. He turns and heads east. I follow him and snag his purse (1991) [9]. Wait beside the next doorway until he goes north. Out and straight ahead. Inside this garden just left lies a moss arrow. Down a short flight of stairs is a locked metal door. The gray key will open it. Only one room in the basement (right image above). Two pieces of loot; a bottle of fine wine (2041) and a goblet (2056) on one of the tables. The papyrus functioning as incriminating evidence lies under the same table. A letter from Lionel Karthman about the building of the house. Important to leave the paper where it was, as we already have the information we need. Another book containing some magical info on the other table. Back up to the garden and relock the basement door. I wait in the staircase for the guard to stop by. Out the doorway, make a right and pick the wooden door to my left. Two vases (2256) inside. [UPDATE 2/12/12: This metal door also responds to any of the four blue keys found in the mission, so supremers have to use one of those to relock it. Thanks to ykcaks!] Around the corner north and west past the tree and all the left openings. I go north at the end and down the right slope. Across the bridge and wait in the dark doorway. A swordsman patrols around a huge tree stump and passes this entryway close enough for me to pilfer his purse (2356) [10]. Nice! All pickpockets! Continue straight and enter the opening here. I end up by another tree, the biggest so far. I take a few steps northwest and examine the ceiling more closely. There seems to be a hole leading to one of the branches. A well-placed rope arrow does the trick (left image below). Climb up and enter the tree.
Jumping off at the north side takes me towards the inside of the
tree. A small opening, apparently too tight, shows the inner part of the
trunk. I can lean through and peek down. A shining mushroom appears to be
everything of interest, but I can’t make out the entire area. Could I inch my
way through perhaps? I would definitely need a rope arrow first, attached to
the ceiling maybe. Yes, let’s do that. Fastened. I can see from up here that
the line doesn’t extend to the ground though, far from it in fact. Will need
one extra rope to descend the last bit. Can fasten it anywhere around the
trunk below the break in the texture pattern. Garrett can wiggle himself
through any hole as long as he can lean. This hole can be tough to permeate,
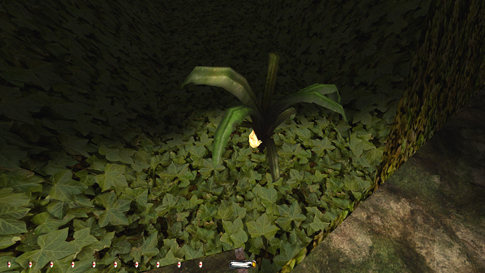
but by leaning forward and jumping repeatedly I can reach the rope. I leap to
the second rope and arrive at the bottom. HAH!!! There’s a moss arrow
down here (right image above)! Unbelievable! I came down here mostly to see
if it was possible. Whops...I suddenly fell into oblivion! Hmm...there’s a
mysterious hole in the ground. Seems to be a design error and thus unintentional.
It doesn’t hinder me in any way though. Now the big question. Can I get back
out? Impossible to jump through in normal fashion at least. Might be
achievable by some rope arrows from the ceiling or the wall above the crack.
Will shoot some into the various areas from the ground. Back up the rope and
try some different maneuvers (left image below). Hop, wiggle, turn,
squeeze...no. This looks hopeless. I need to lean inside, but that can only
be done from solid ground. Not surprising at all, since the hole in reality
is too tight. Well, at least I found the arrow and got to practice some
roping techniques. Reload then. With TFix, the tree described above has been modified for easy entry and exit. No longer exists the hole in the ground either. Personally, I wish it hadn’t been “fixed”, as the challenge of getting in there has completely disappeared. Jump
off at the south side and retrieve my arrow. I squeeze my way past the huge
tree log and take the next hall left. Follow this road to a small incline on
the right hand side. Up here and through an odd looking, spiral-shaped
passage. Enter the grassy cave ahead and walk east into space. Now how is
this possible? I hope this house doesn’t reflect
Reclaim
my arrow once again. At the east side of this area
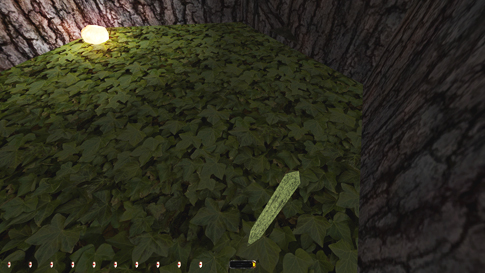
is a cave with another moss arrow. Leave via the eastern
opening. Another large tree area. On a plant straight south is the last piece
of loot, a golden nugget (2656, right image above). I follow this exit
back to the garden. On this wooden overhang lies the
last moss arrow. As the guard leaves, follow him and jump into
the river. Trail the waterway south back to the displayed tree and mantle
out. I choose the opening leading to the entrance area. Enter the first
doorway left and head up the stairs. 2nd floor again. I need to replace my gray
key through one of the doors ahead. A useful door-trick is to lock it, but
keep it from closing by blocking its path. Put the key back and close the
door fully. Successfully locked! Head to the west side of the mansion and
rope arrow through the hole to the hall below. Enter the door in the
southwest, up the ladder and out onto the balcony. That’s it! [UPDATE 3/7/12: I went back to relock the first floor safe and the garden closet due to the updated information on the keys described in the text above. The keys were replaced to their original location for Supreme. The stat time has also been updated.]
Time: 2:03:58 Loot: 2656 out of 2656 (Supreme: 2356) Pickpockets: 10 out of 10 Locks Picked: 6 Damage Dealt: 0 Damage Taken: 0 Consumables: None Ghost: Success! Perfect Thief: Success! Supreme Thief: Success! Perfect Supreme Thief: Failed! Norwegian Thief: Failed!
Notes: - Two nuggets in a second floor bedroom had to be skipped for Supreme. Both trigger a spitfire-trap when highlighted. Violates rule #9. - A diamond had to be skipped for the same reason as above. The chest holding it is protected by three spitfire-traps. - A nugget worth 100 was yet again victim to Supreme rule #9. Had to be skipped. -
The moss arrow inside the
northern huge tree in the forest area cannot be obtained. It can be taken,
but leaving the inside of the tree is impossible. A small Norwegian bust. Fixed with TFix; it’s no longer a problem to obtain the moss arrow
and leave safely. |